Adding a drawer slide to the back of an oil painting lets you move a piece of art back and forth without having to take it off the wall. Why would I (or you) ever need something like this?
I genuinely have no idea how you might want to put this technique to use, but for myself it was one of those "necessity is the mother of all invention" situations.
I needed it, so I invented it. Although I really don't think I invented it, I'm sure bazillions of other people have done the same thing.
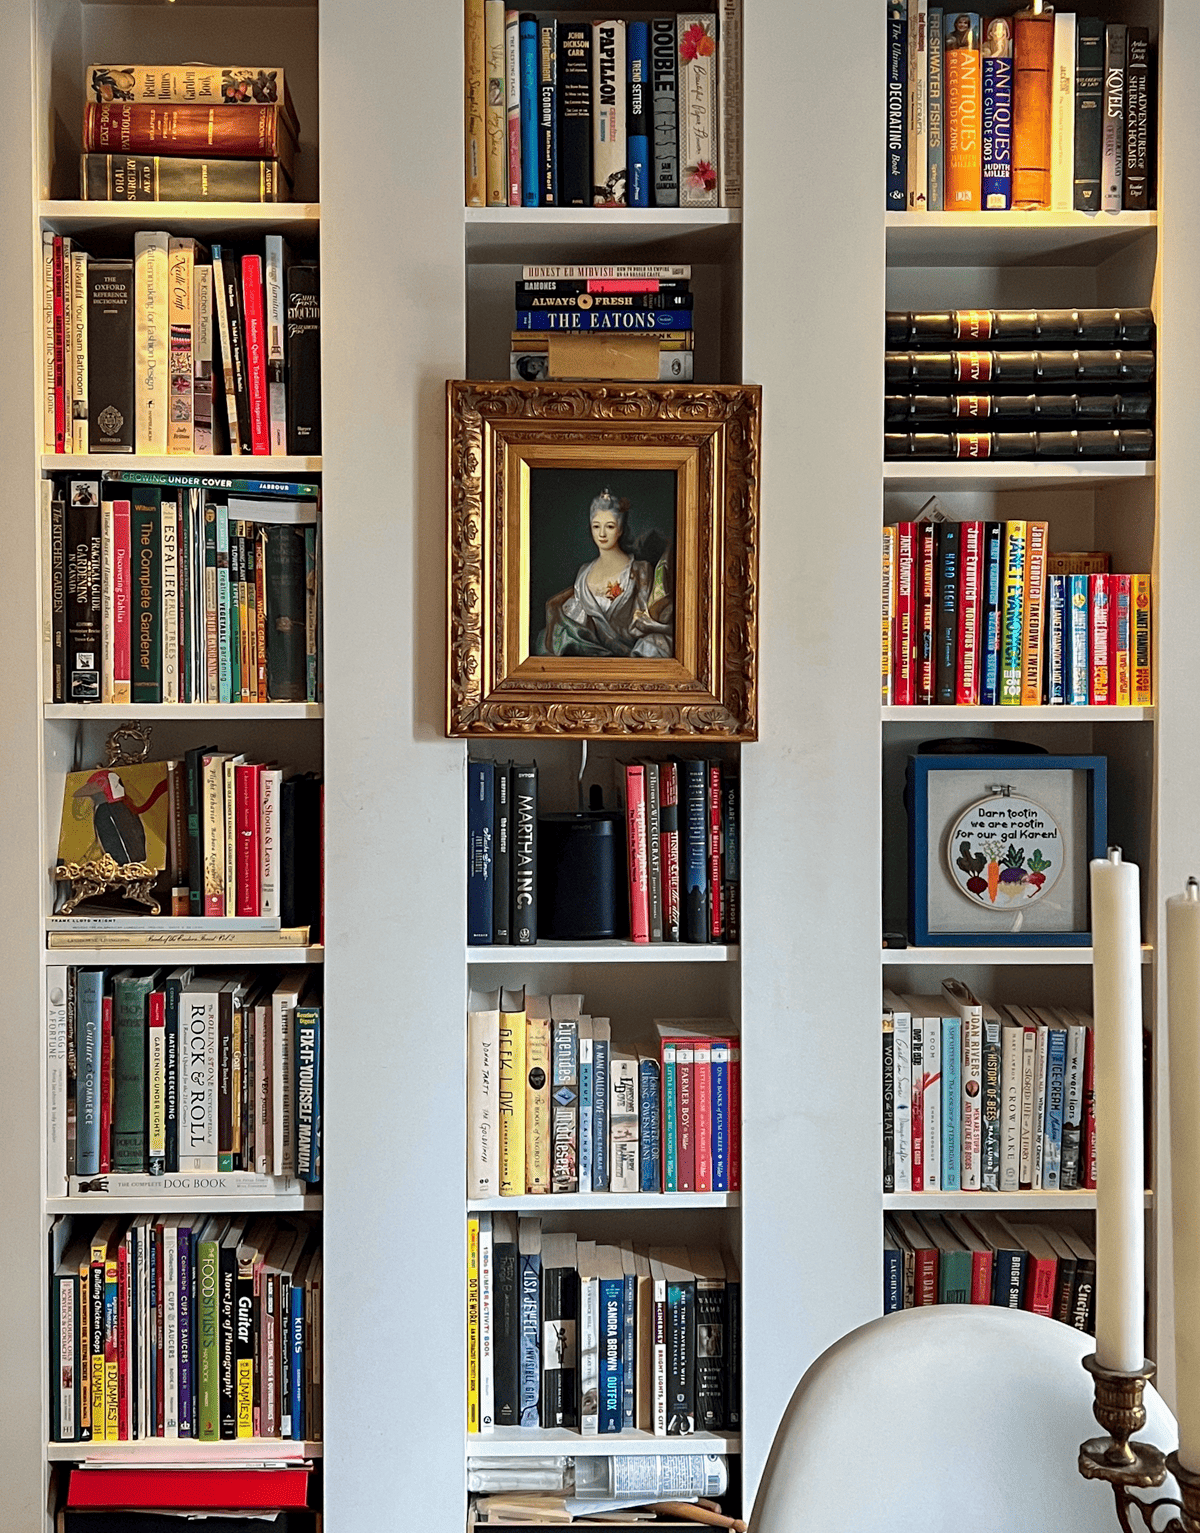
Not interested in how to make art slide back and forth on a wall? No problem. There are 3 other interesting things in the photo above you might want to learn about.


O.K. Here's a look at how it works the sliding frame works:
Before this I had to take the painting off the bookcase and hold it with one hand while I opened the bookcase door and got whatever I needed out with my other hand.
Either that, or I had to pull the extension cord out of hiding and rearrange a few things so I could place the painting right on the ground. I never did this because it took too long.

So I juggled the painting while pulling out what I needed.
It wasn't a perfect system.
The risk of dropping either the oil painting or whatever it was I was trying to wiggle out of the very compact storage space was high.
I don't like high risk unless the reward is money or laughing so hard that you can't even hear the laugh - it's just belly contractions, closed eyes and an open mouth.
So I thought I'd just do a quick trial run. Nothing perfect, just something fast and furious to see if this would actually work.
It did.
Materials
- Drill
- 1, two way drawer slide
- screws
- Scrap wood
Instructions
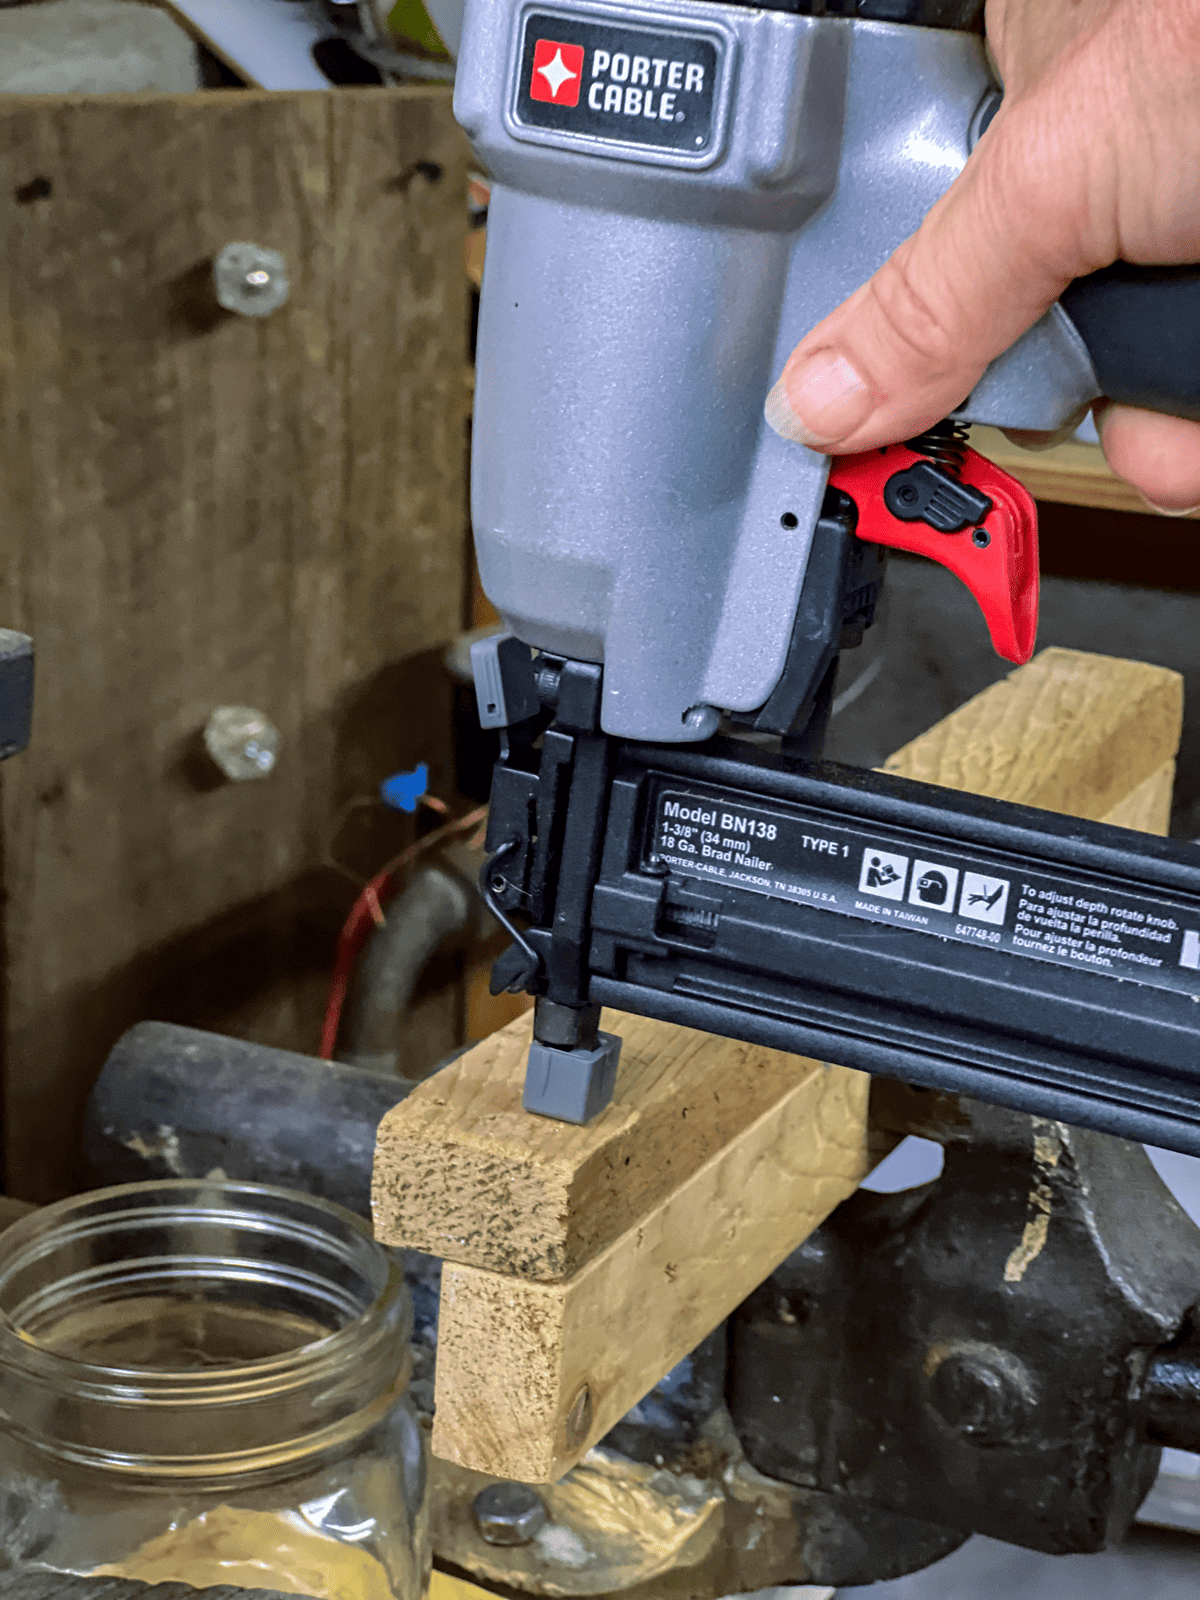
- Screw one part of the drawer slide onto the back of your frame.
- Screw the other part of the drawer slide to your wall.
In *my* case the frame wasn't hanging on a flush wall, so I needed to build out the bookcase a little bit with a scrap of wood. If your frame hangs on a flat wall you won't need to do that extra step.


- My bookcase shelves are slightly recessed from the doors. Because of that I needed to add a piece of wood to make a flush surface to screw the drawer slide to.
2. I realized that I was going to need to beef it up a bit to make everything more stable. So I added a top portion to rest on the shelf. This was more stable.

3. I glued and nailed the two pieces together.
4. Then nailed the piece to my bookshelf from the front and top. (REMEMBER: You only have to do this extra step if you aren't working on a flat wall)
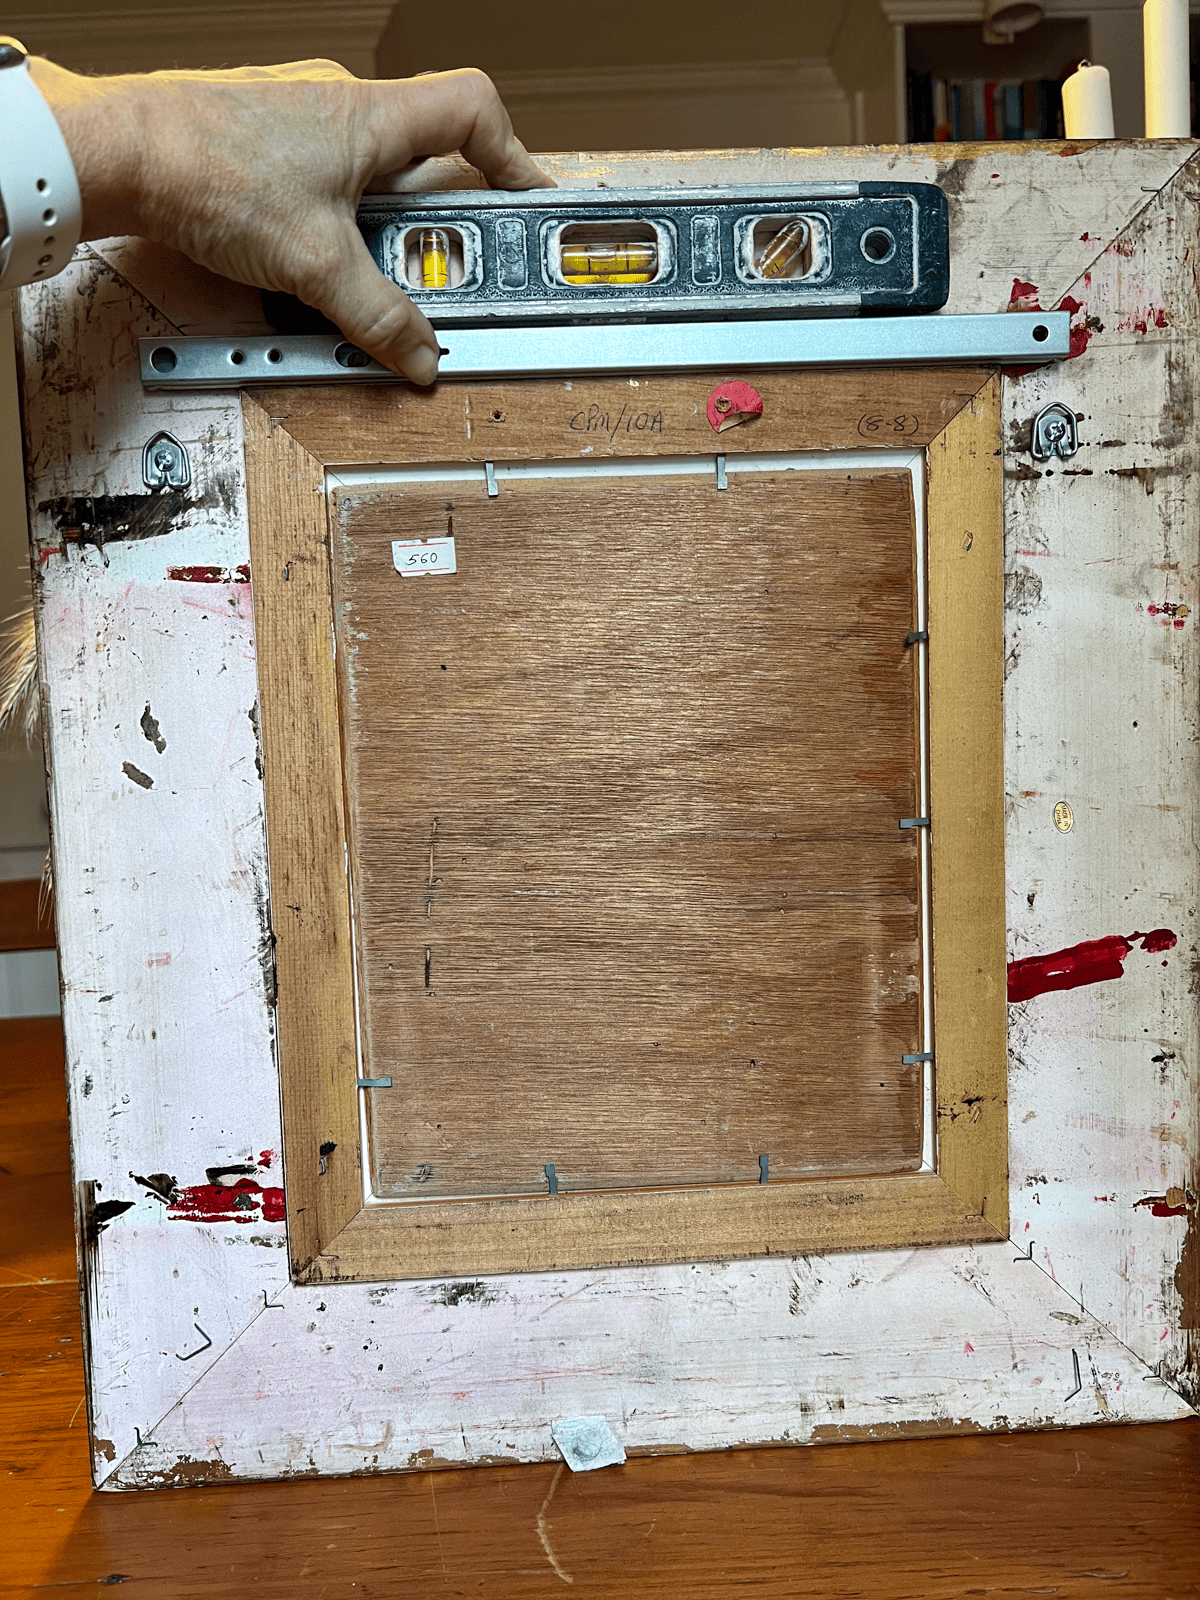

5. Lay the thicker half of the drawer slide on the wood frame making sure it's level otherwise your art will be askew.
6. Screw the slide onto the frame with short screws. To access the portion you have to screw in, just slide the mechanism to the right to reveal the screw holes.
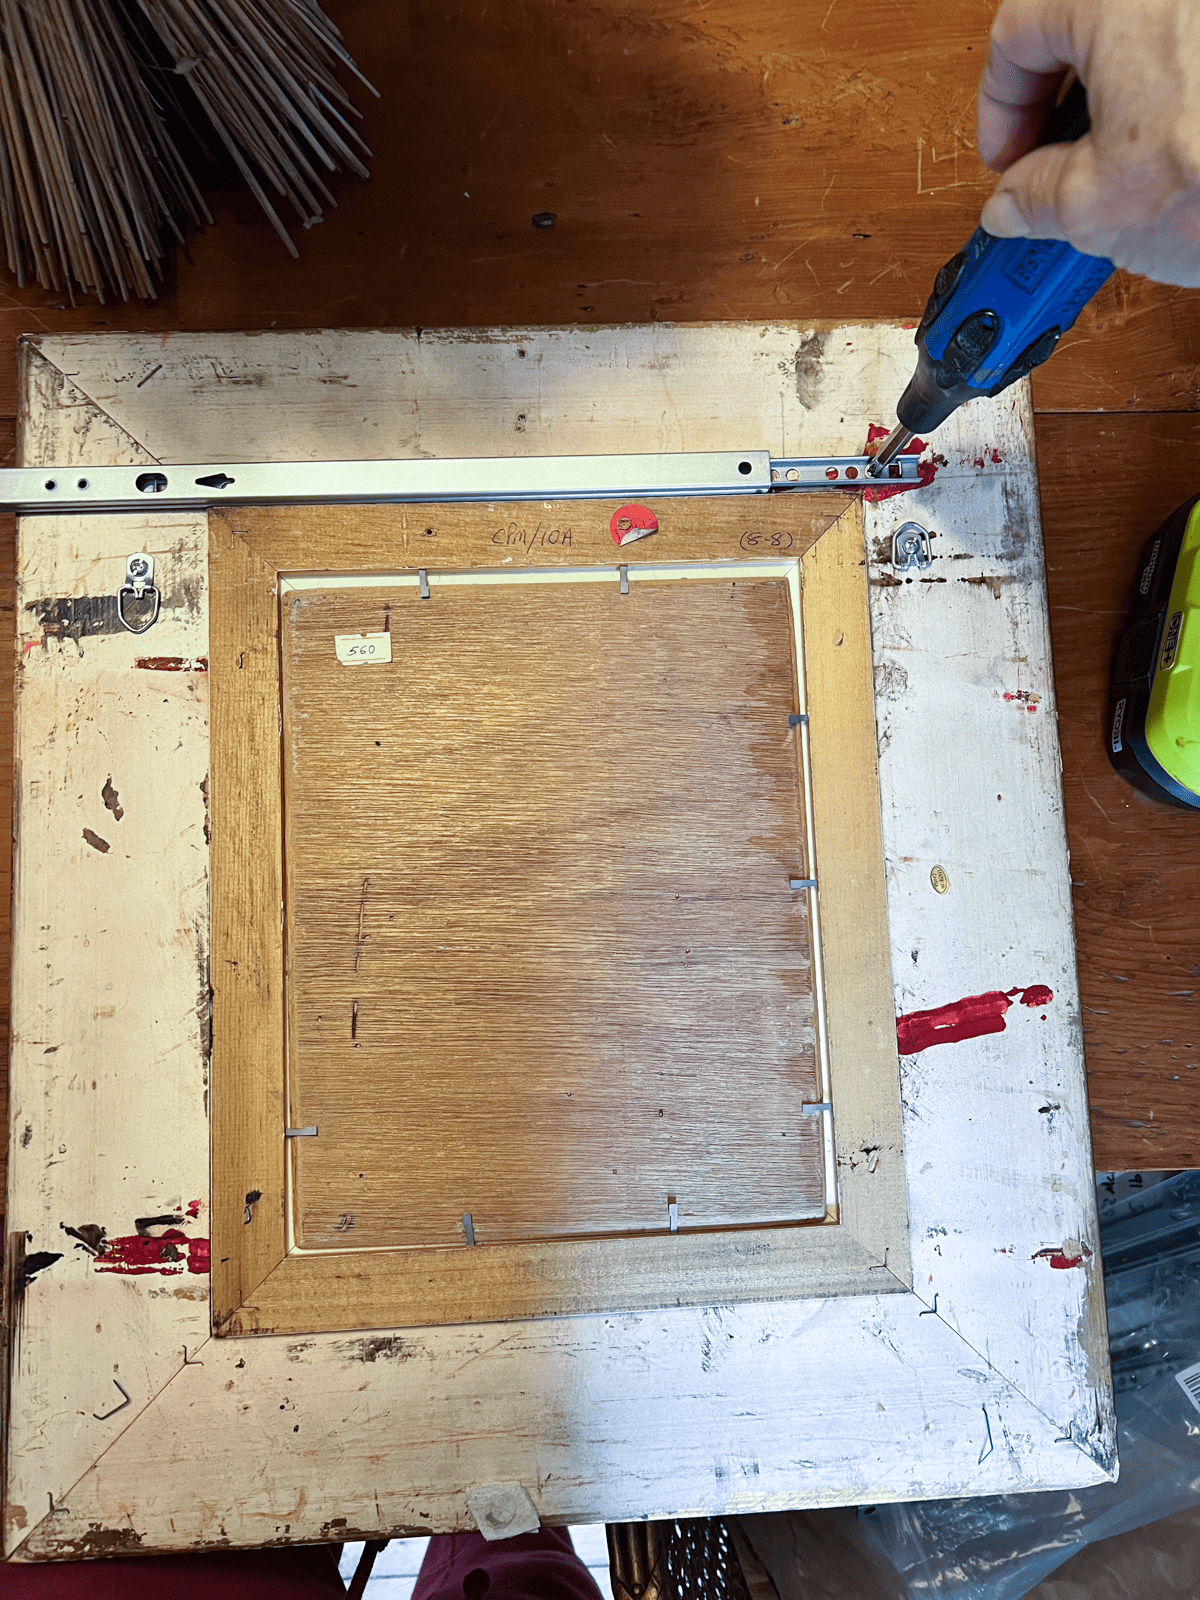

7. Do the same, sliding the mechanism to the left to screw in the right side.
8. Now screw the remaining arm for the slider to the wall (or in my case the fake wood wall I created). Make sure it's level.


9. About this time I realized I also needed to add a piece of wood to the bookcase near the bottom of the frame. It keeps the frame perpendicular. Otherwise it would tip inward at the bottom of the frame.
10. Finally add some felt pads to the back of the frame to help it slide along the doors as you move it back and forth.
Because the drawer slider is a TWO WAY drawer slide, it has a stopper on both ends which prevents you from sliding the frame right off of the wall.
It has brakes.
HERE'S THE PROBLEM
And I do this all the time. I try something quickly - just to see if it works. Then it works and I never redo it properly.
What's properly?
Using shelving material that matches the bookcases to make my little wood jig. If the wood portion was made out of the same sort of material or at least colour as the bookcases it wouldn't be as noticeable when I slide the frame back and forth.
This is not enough motivation for me to redo it. I even went out and bought the materials I would need to make it properly.
But I'll never do it because it works and if it ain't broke don't fix it is a saying for a reason.
Also, you only see that raw wood when I'm actually moving the frame, not when the painting is just sitting there, looking pretty, minding it's own business.

I've since done a better job of hiding the wire dropping down from the frame and resigned myself to the fact I'll never do it properly and that's O.K. It's fine.
I bought 12 of these drawer slides because they are definitely multi-use gadgets. Next up? DIY pull out drawers for my kitchen.
I will probably do them properly.


Great idea! (This sort of reminded me of "french cleats", another hanging system for pictures, speakers, etc.)
Hi Karen,
I would like to try the sliding painting, but the videos won't load. I keep getting an error message
Since we are empty nesters with two bedrooms upstairs to be used as we (I) please, I have taken one as a prayer room disguised as a guest room. Since most guests are not being invited to move in, they certainly don't need the closet!! The GH took off those awful, shuttered, folding doors and put up shelves for me and left just enough room for a small secretary desk.
This idea of sliding pictures may work very well!!!!! ( I've seriously wondered why noone has ever hung pictures on the ceiling...?? All that empty space!! )
Good solution! I think it's so funny though that you have all those cubbies hidden but you don't hide anything behind the painting :-D
Clever girl. :-)
But I really decided to comment because, despite allowing ALL the adverts on your site, and boy are there many and REALLY annoying, most of your photos don't load.
I'll get maybe a quarter or a third of them loading, and then just blank spaces over your photo descriptions. Meh. And sigh.
I’m so glad you are back, I missed you! However, (and I did hear you say you were sick) anyone who would even consider doing this slider thingy for a wall or bookshelf or even a commode cubby after watching your painful experience really is sick! was this project the only thing you had time for during your LOA? Still love you. Get well soon!
Just when I think you can't out-genius yourself... you out-genius yourself. What a great idea!
I get a thrill every time I slide it to the side! ~ karen
This would be good if you have a safe built into a wall.
Yes! ~ karen
I’ve said it before and I’ll say it again. Karen is a genius.
I'm not even close to a genius. But I *am* very curious. ~ karen!
Good to see you Back! Happy New Year! As for the problem that never gets redune only reply that it was planned that way!
OMG! This is genius! I’m constantly hiding my 10 yo son’s tech toys (oculus, old iPhones, and even the remotes) so he’ll stay off. Then I can never find them again..🤣 Hell never think to look behind a picture.. Brilliant.. I love drawer slides and know there are so many things to use them for. You should do a bit on all the ways to use a drawer slide… 😎
That is freakin' brilliant. Nuff said!
That is a brilliant idea and I had never seen that before. Good on you!
Brilliant!
Happy New Year! This is genius of course. And, love the new email styling.
if the raw wood bothers you, you could paint it so it isn't so noticeable.
This is VERY clever and it's amazing to me how you came up with it. There's no way I could have imagined this as I had no idea that two-way drawer slides even existed. Every time I see your bookcases I'm in awe. I've had the tutorial bookmarked since you did it. Thanks for sharing.
A very clever solution to your storage and decorating needs. Thanks for the brief video of the slide in use. Vids are worth a million words of explanation. Your rather unique hidden storage areas are just that. I recall the blog post when you created them. Congrats.
Hi. This is a great idea. Not sure how I would use it but that does nothing to diminish its greatness.
Oddly enough I just saw a similar use on Ana White's plans blog. She built a storage shelf thing on a side wall and slides it open to be a small pantry, spice holder on back side.
https://www.ana-white.com/woodworking-projects/slide-out-entry-pantry-cabinet-tiny-house