Installing a toilet seems like an intimidating DIY project but it's surprisingly easy to do yourself. Once you choose one you just need a few basic tools and a good step-by-step guide.
Most people don't even consider installing their own toilet. Not because it's such a complicated task, but because screwing up a toilet install? That has bigger consequences than other home DIY tasks.
If you hang a picture in the wrong place, you move it, fill the nail hole in the wall then forget about it. If you install your toilet the wrong way the result could involve you being chased by poops.
That isn't the sort of thing you ever forget.
Table of Contents
How to Install a Toilet
This is one of the easiest home improvement jobs you can tackle. It's way easier for instance than pouring self levelling concrete.
It also scores very high on the official bragging rights scale because it impresses most people; most people not knowing how simple it is to do.
It'll take 2-3 hours. About the same time as making a pumpkin pie. Maybe 4 if you run into a bit of trouble.
Materials
- Toilet (bowl and tank should come with bolts etc.)
- Wax Ring
- Wood shims
- Rags
- Pencil
- Masking Tape
- Caulking
Tools needed
- Adjustable wrench
- Vice grips
- Caulking gun
- Screwdrivers
- Tape Measure
Instructions
STEP 1. Turn off the water supply. If it's stuck, use WD40 and/or vice grips.
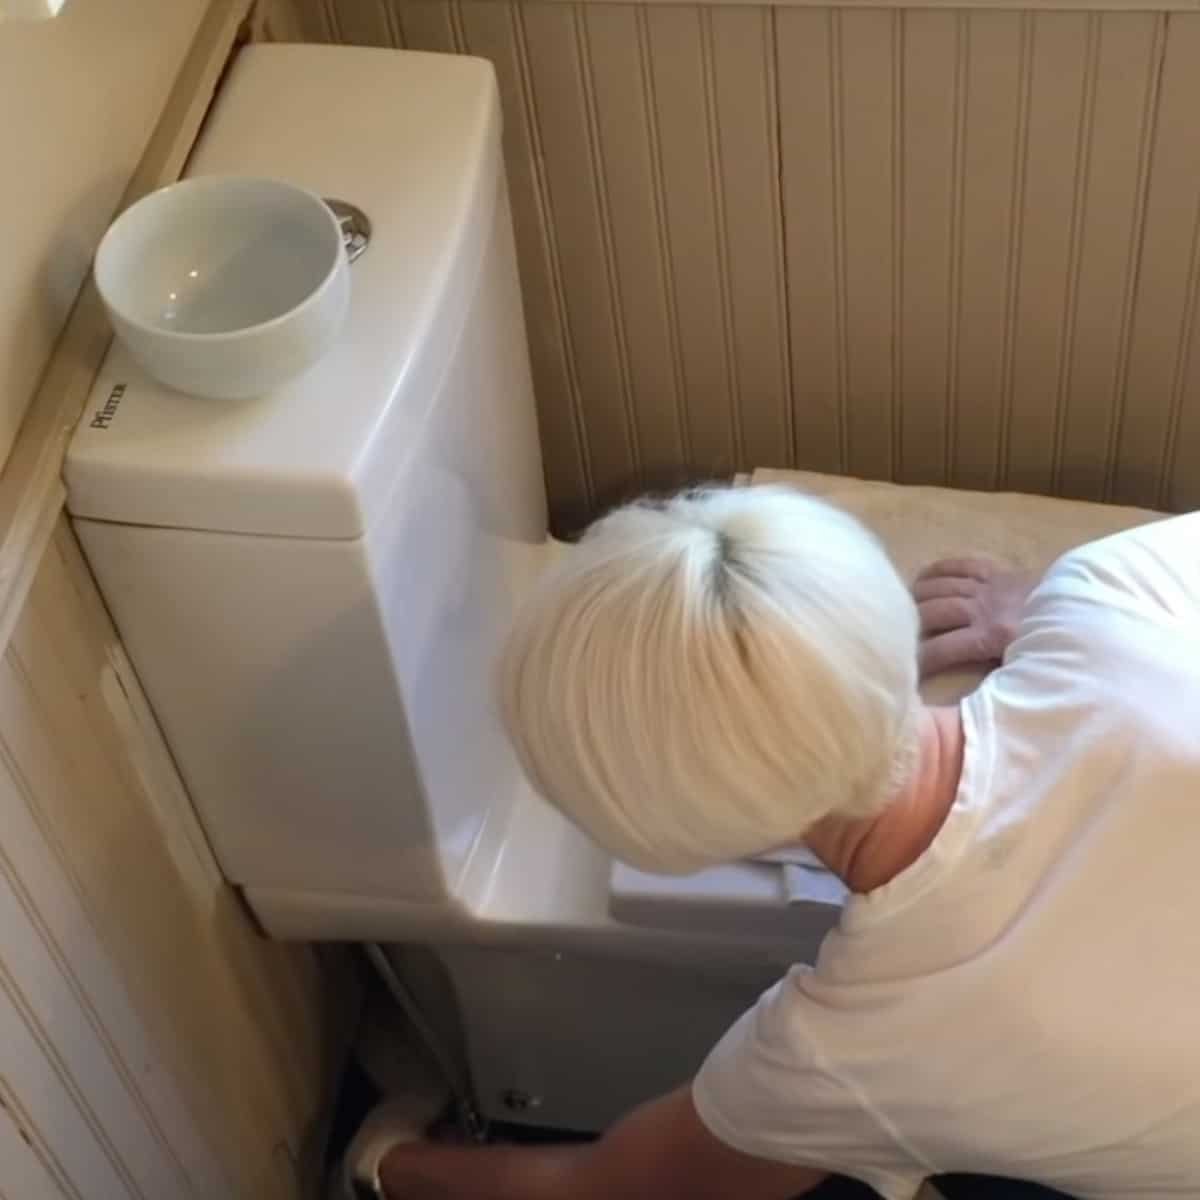
STEP 2. Flush the toilet.
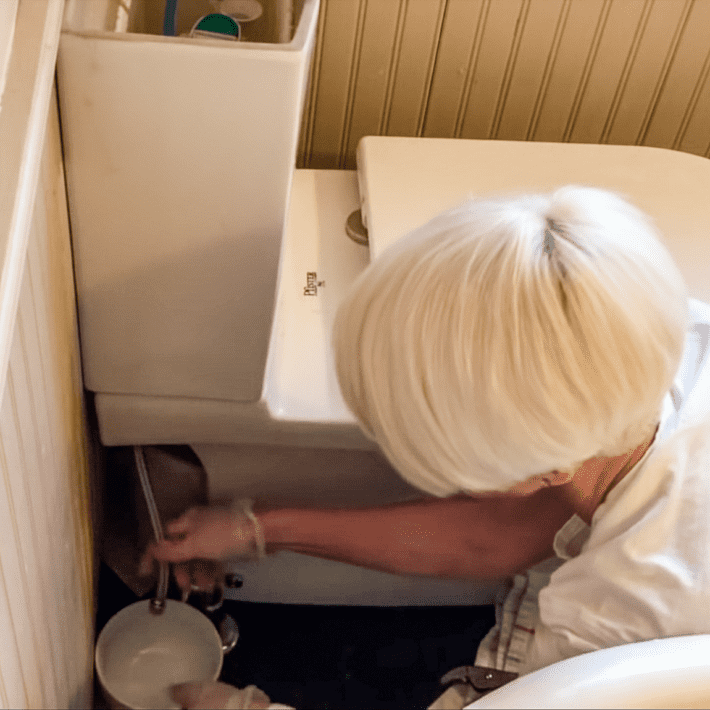
STEP 3. Soak up any remaining water from the tank & bowl with a towel and/or small bowl.
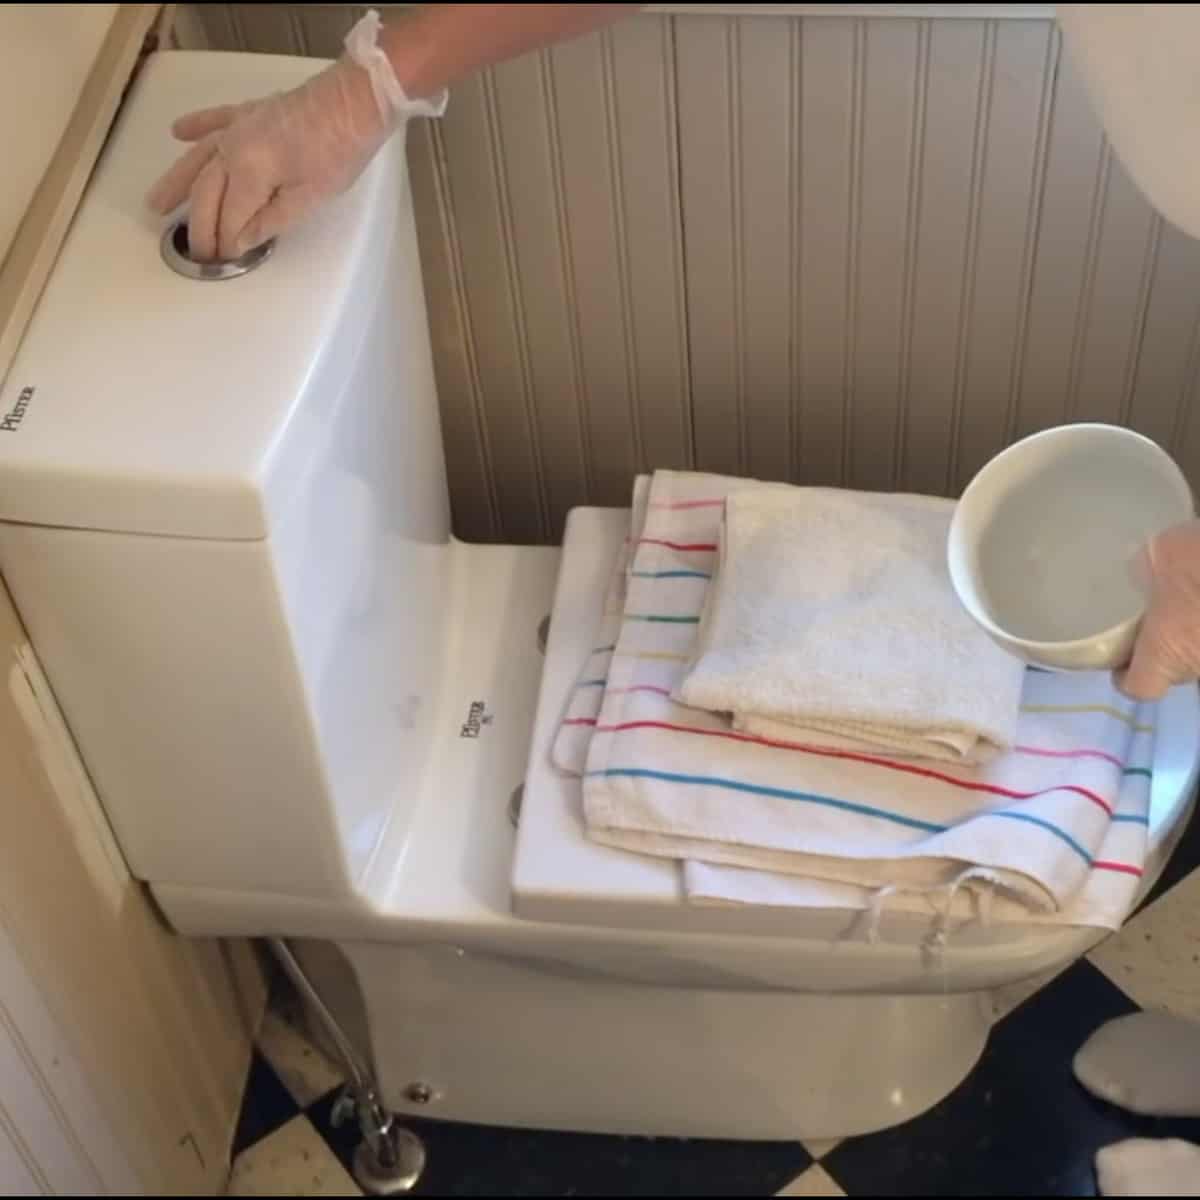
STEP 4. Undo the water supply line.
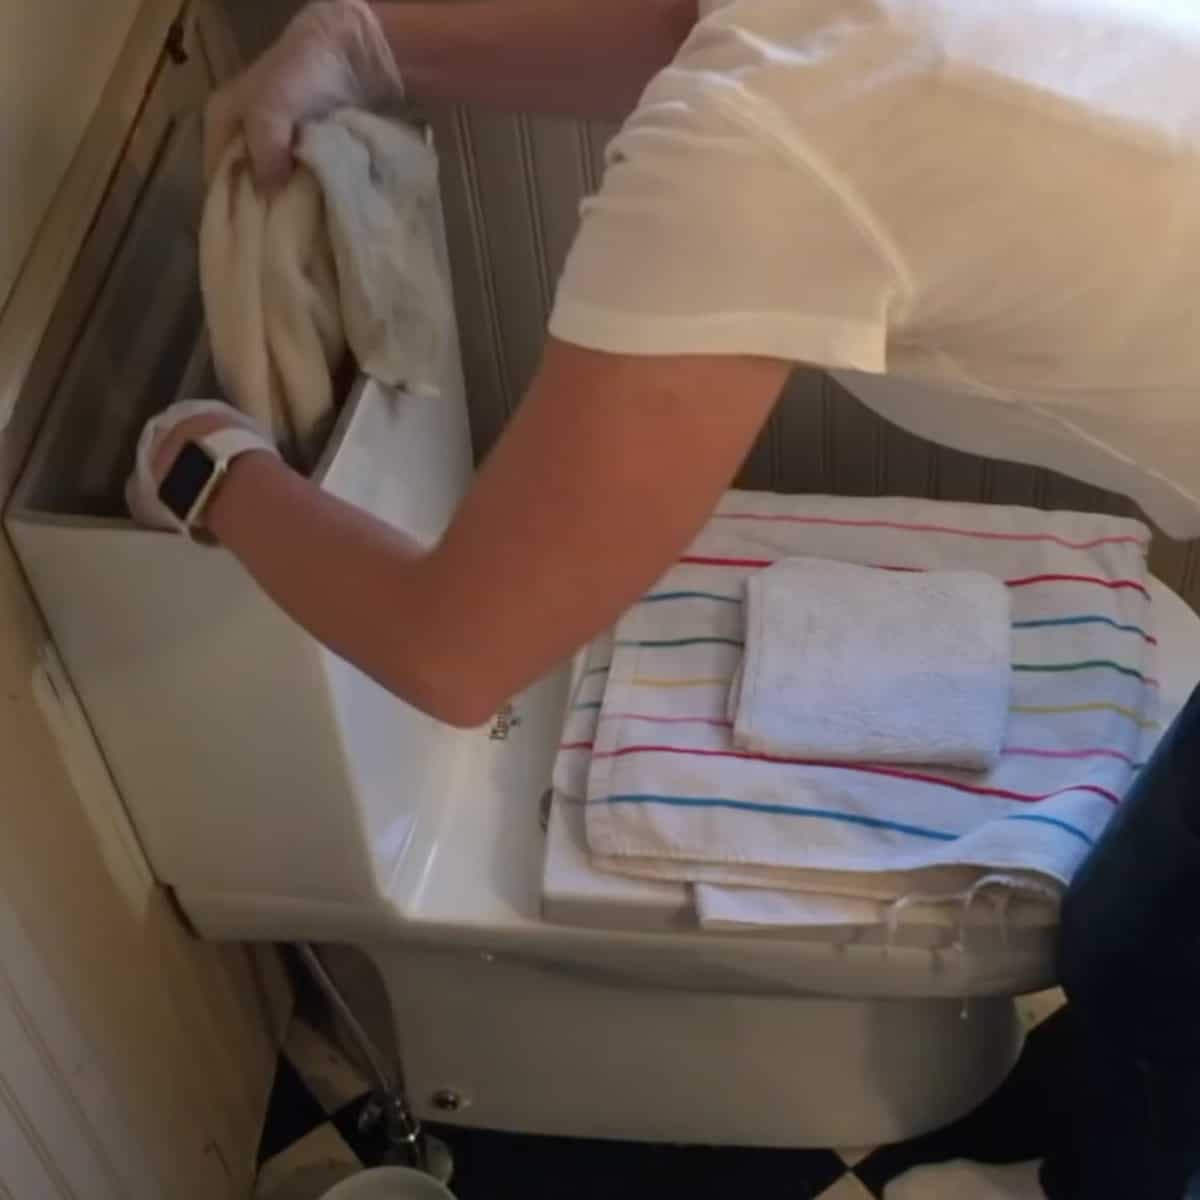
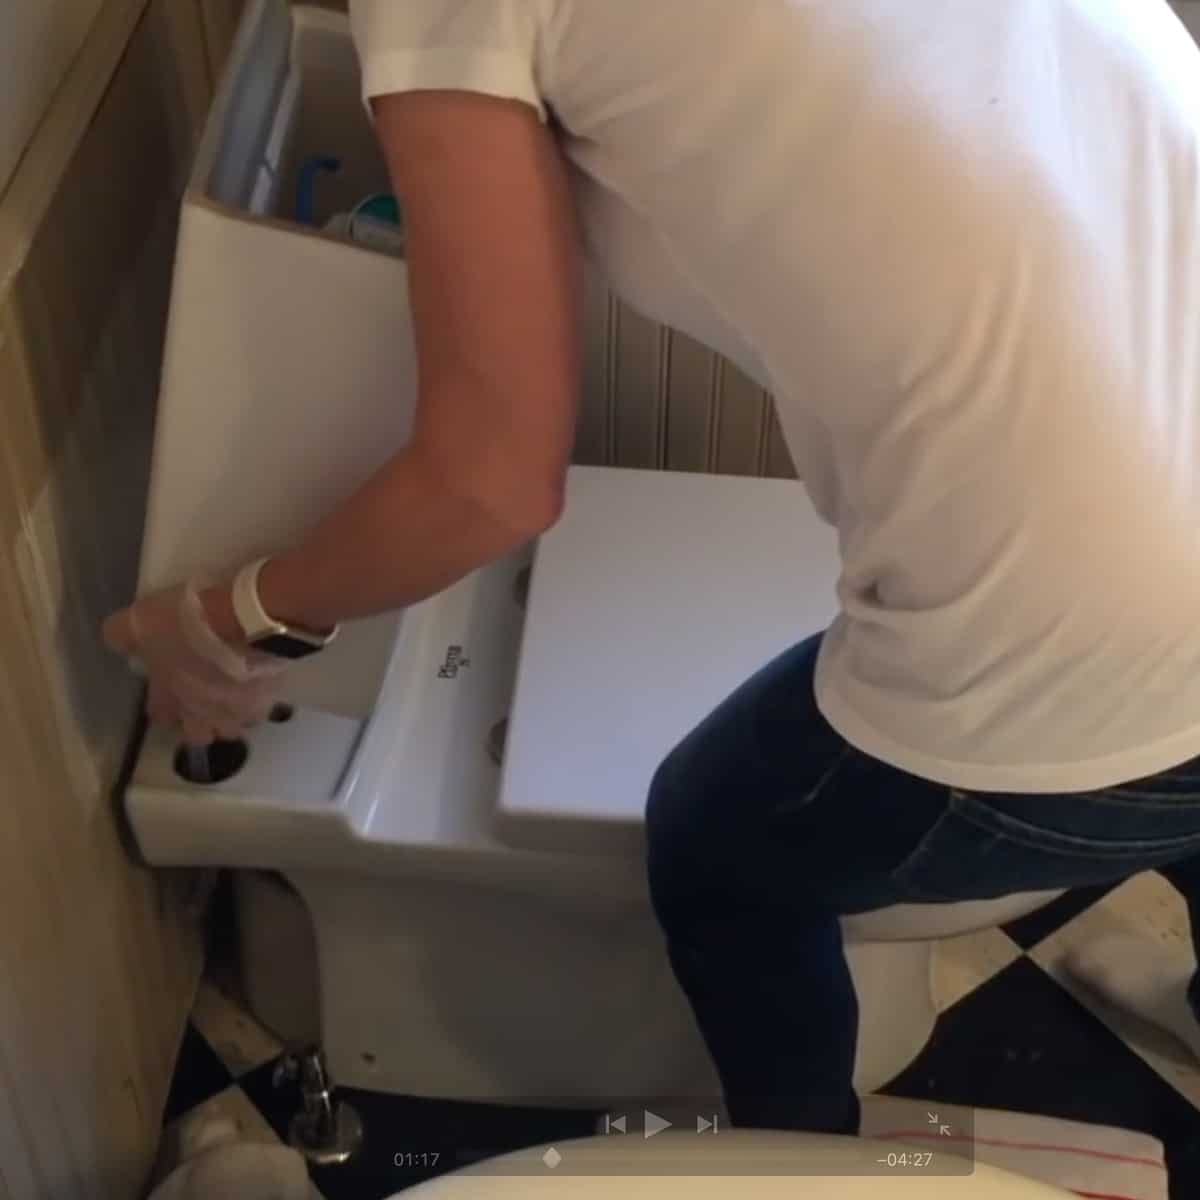
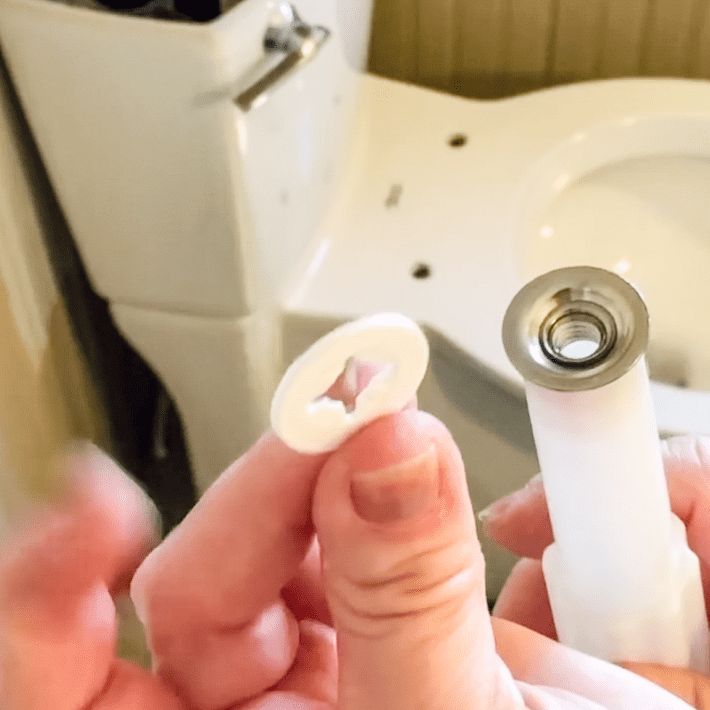
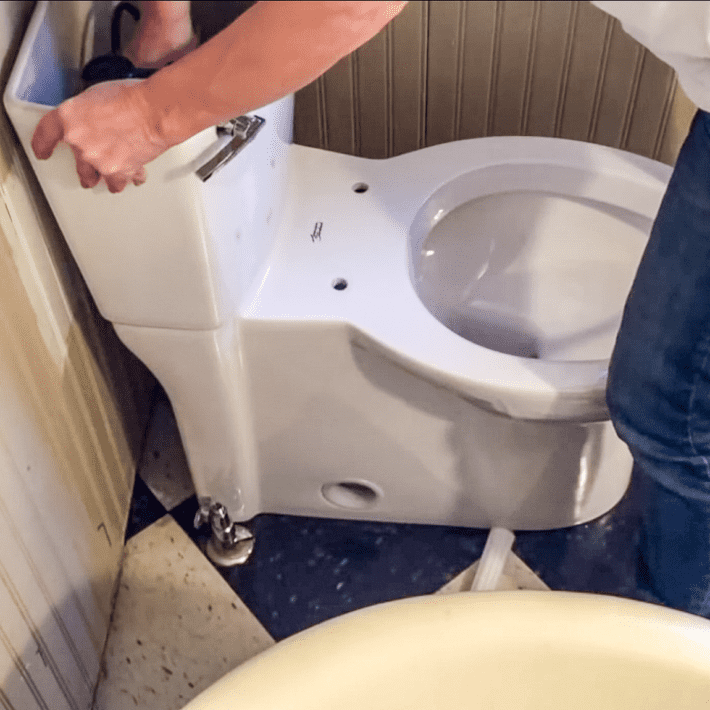
STEP 5. Remove the tank from the base by removing the bolts located inside and underneath the tank.
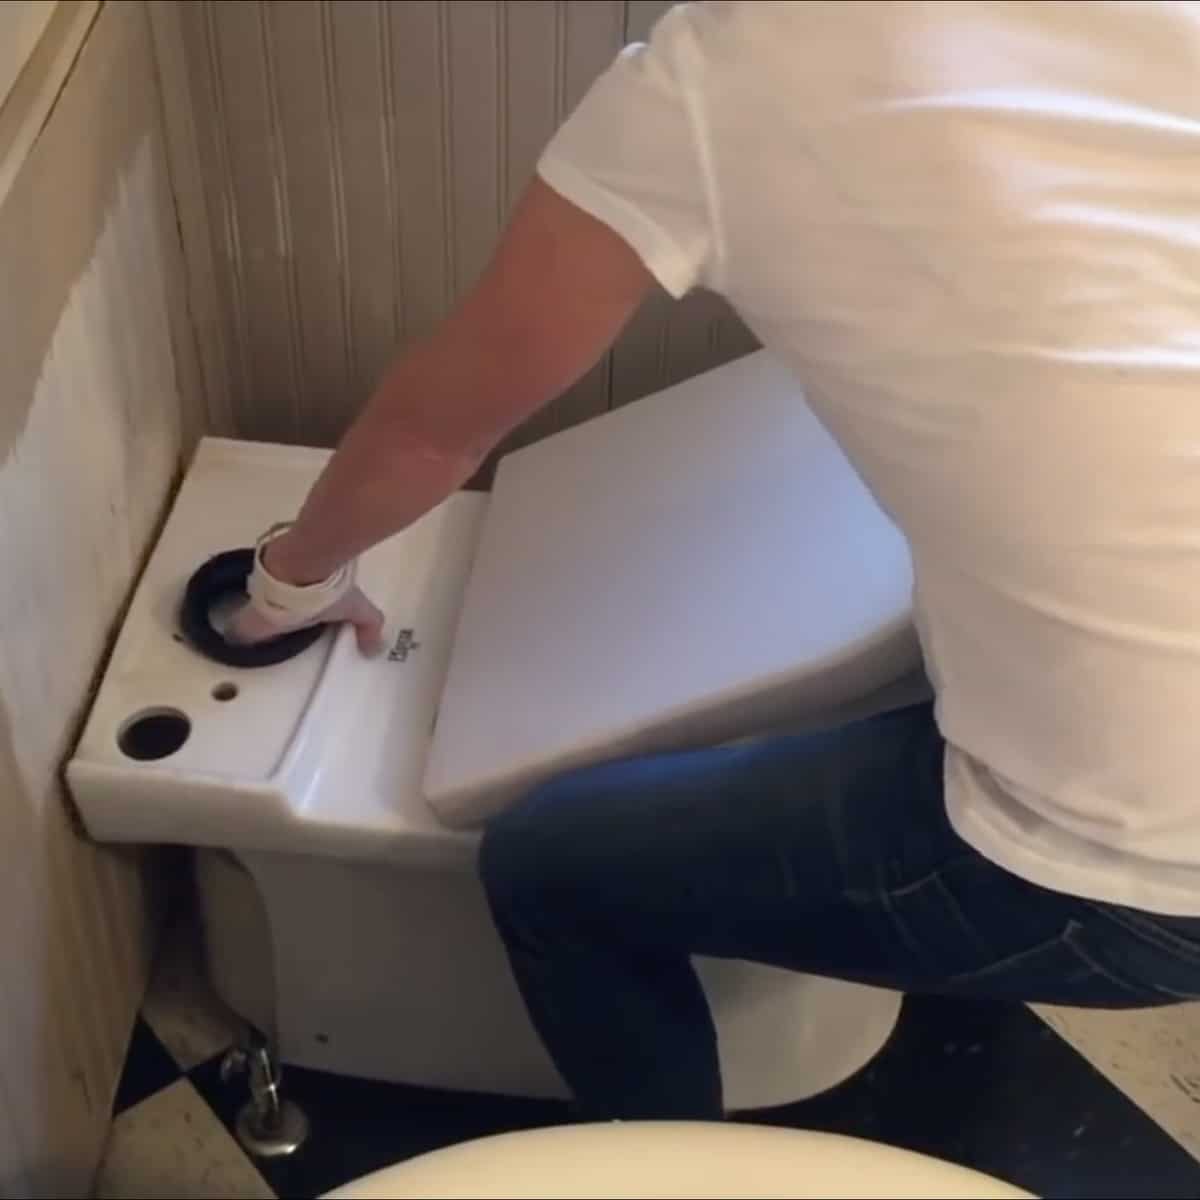
STEP 7. Remove the bolts holding the toilet to the floor and haul away your tank and toilet. You're now toiletless!
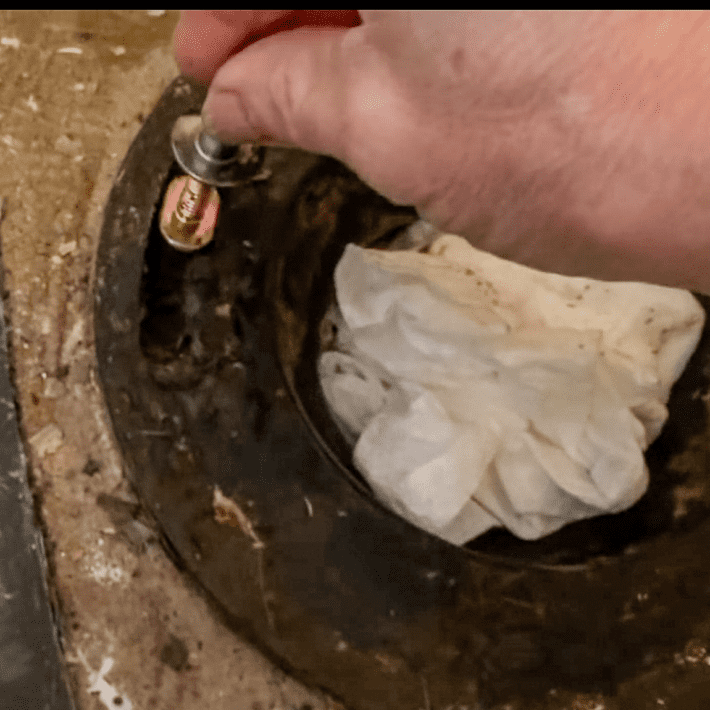
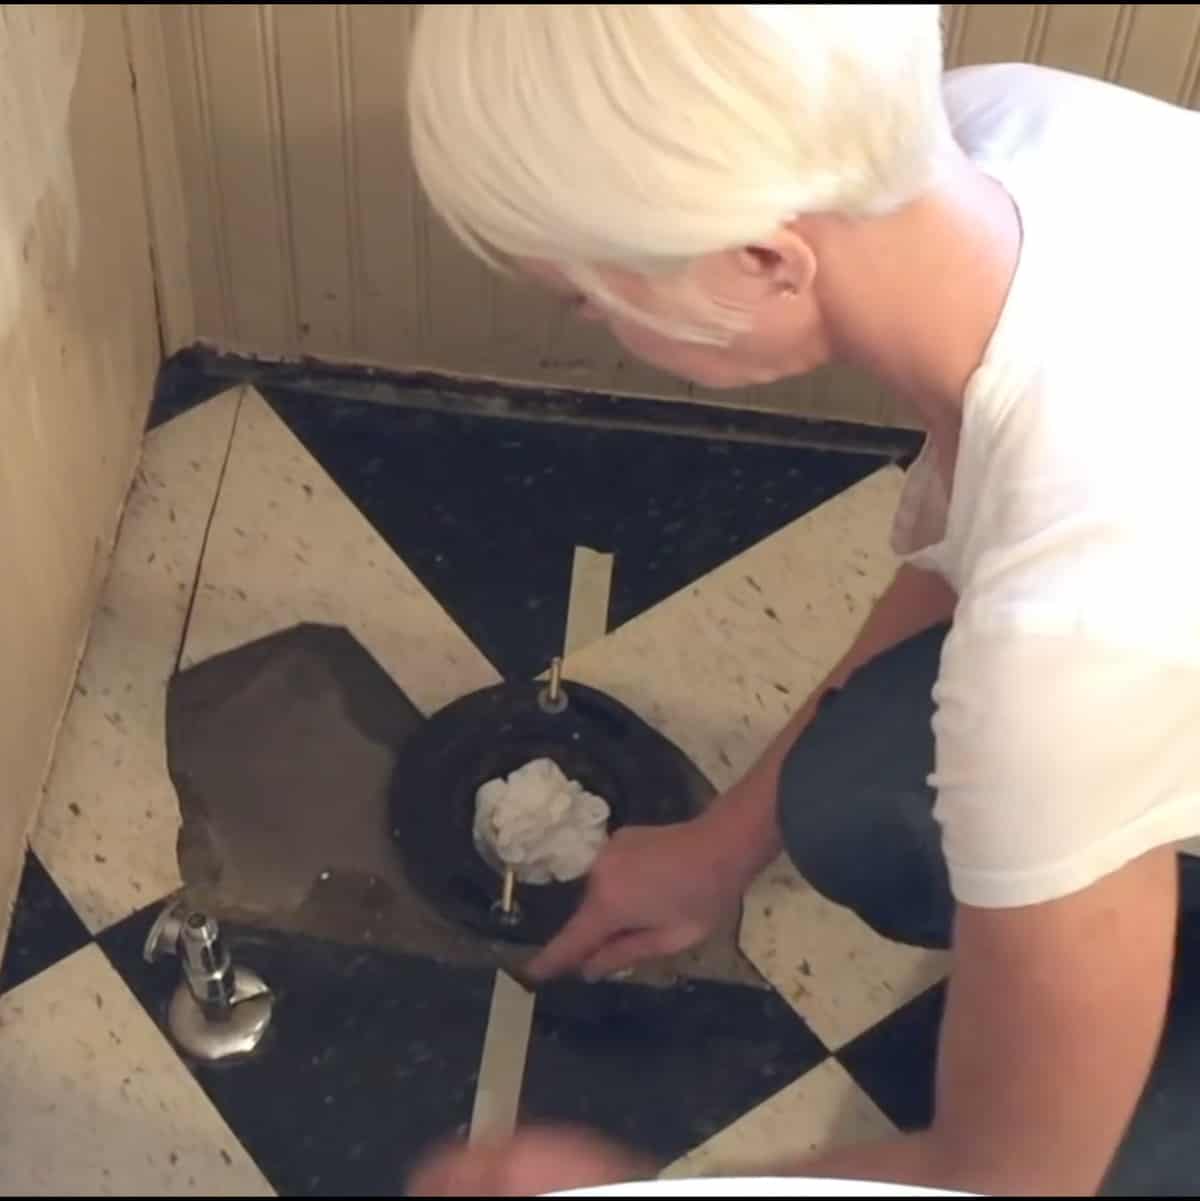
STEP 8. Plug the now open drain hole with toilet paper or a rag to stop sewer gasses from coming into the bathroom.

STEP 9. Scrape up any wax from the wax ring left on the flange and inspect it. If it's cracked or broken, remove the flange using a reciprocating saw, hammer and chisel and replace it with a new one.
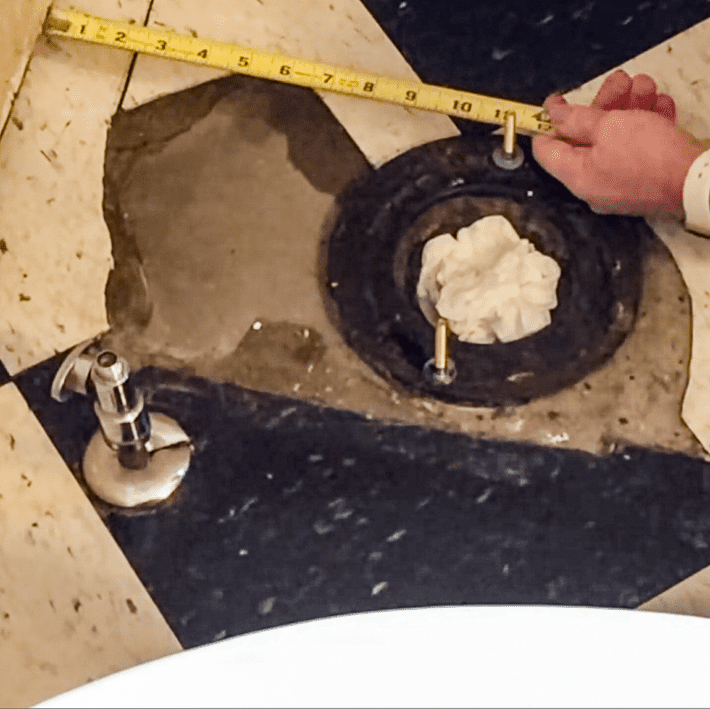
STEP 10. Install your new bolts to the toilet flange and finger tighten them. This secures the toilet to the floor. Make sure they're in the right place by measuring from the wall.
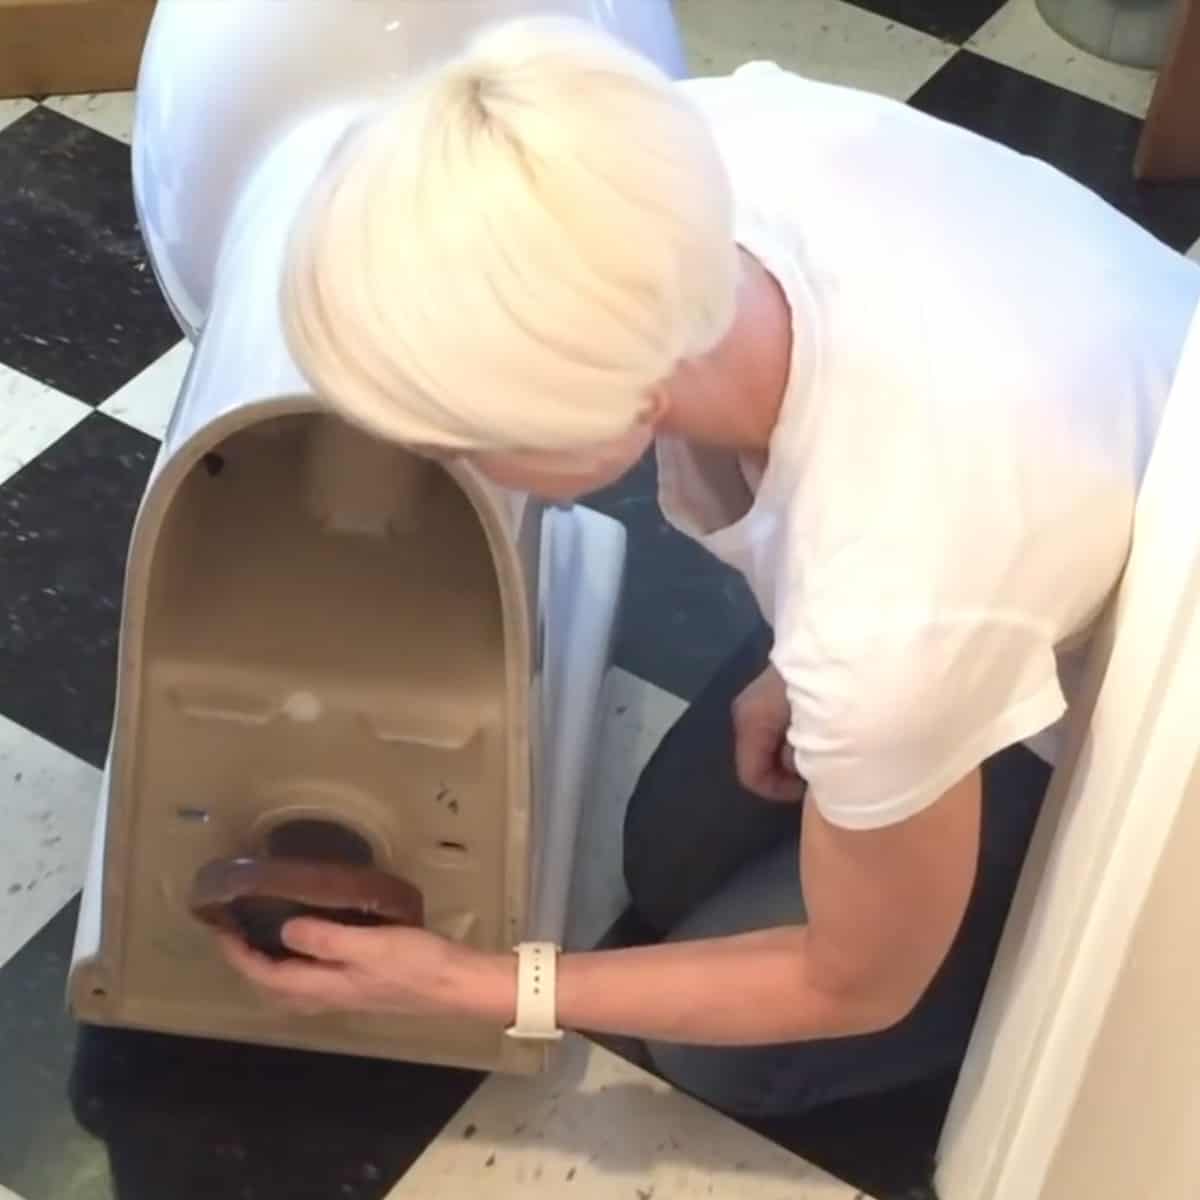
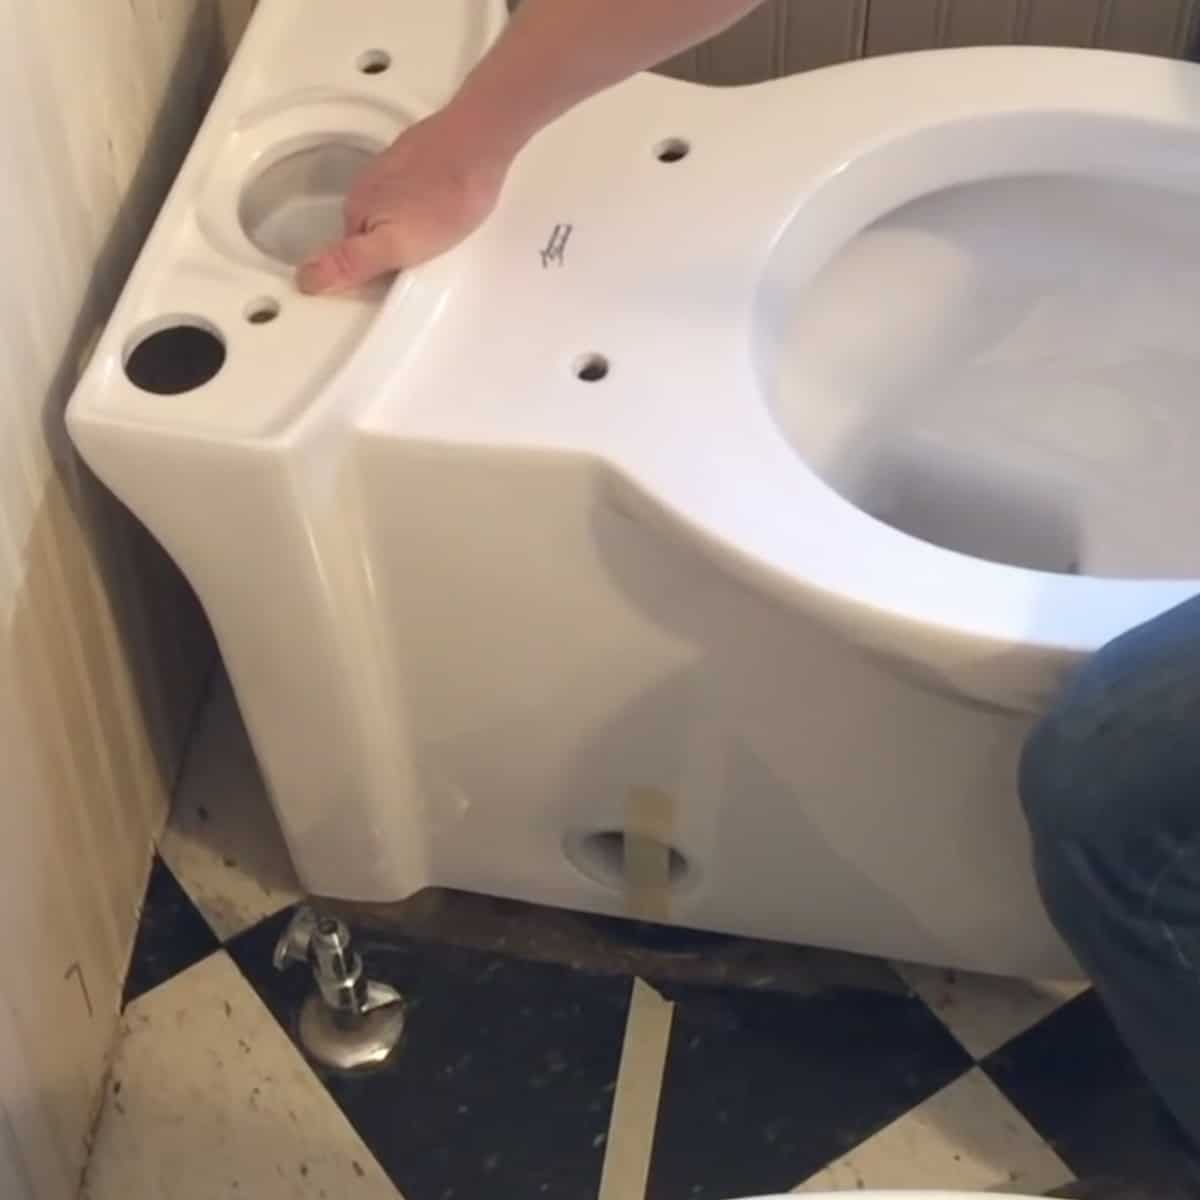
STEP 11. Apply a new wax seal to the new toilet.
STEP 12. For a skirted toilet you won't be able to see the bolts as you set the toilet down. Mark the centre of the bolts with masking tape on the floor.
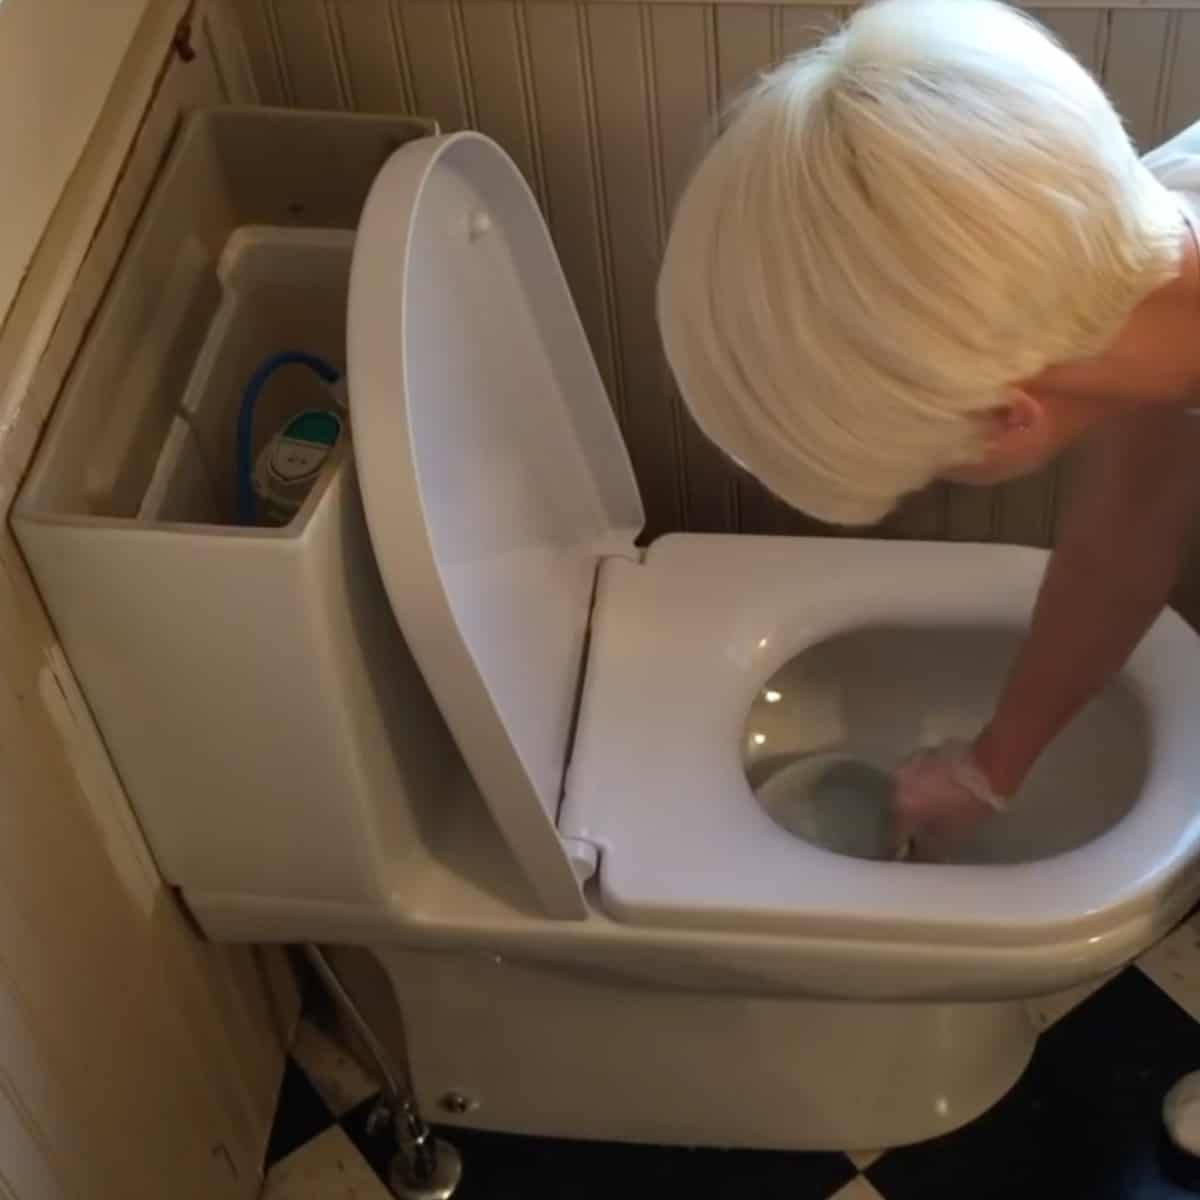
STEP 13. Lower the toilet to the floor then sit or crouch on it to help set the wax seal. Hand tighten the bolts to finish setting the toilet.
STEP 14. Attach the water supply line to the tank.
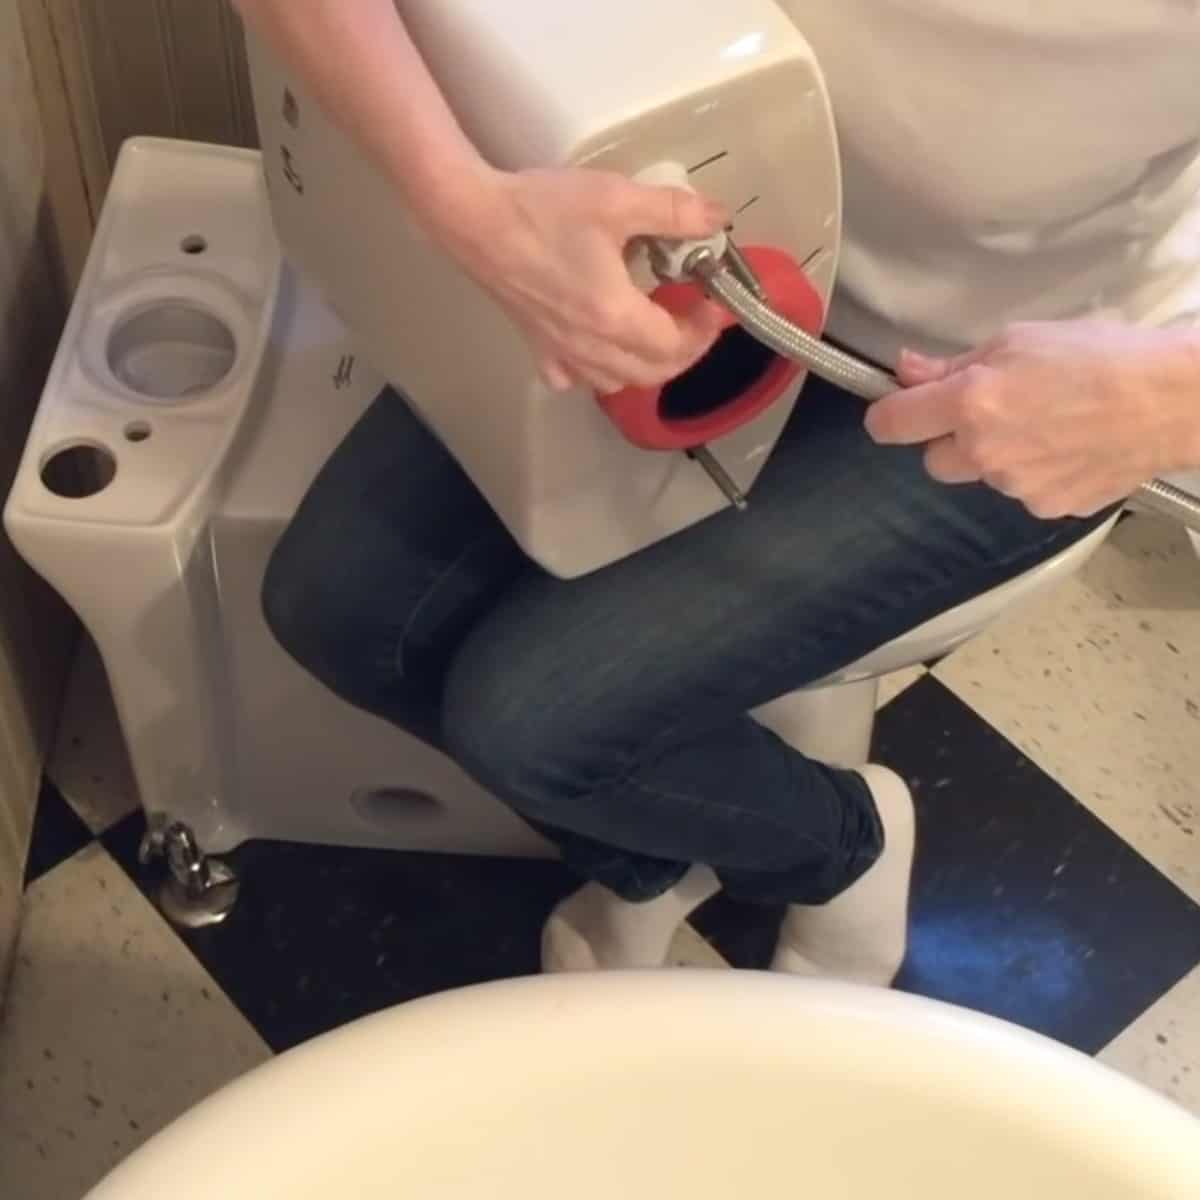
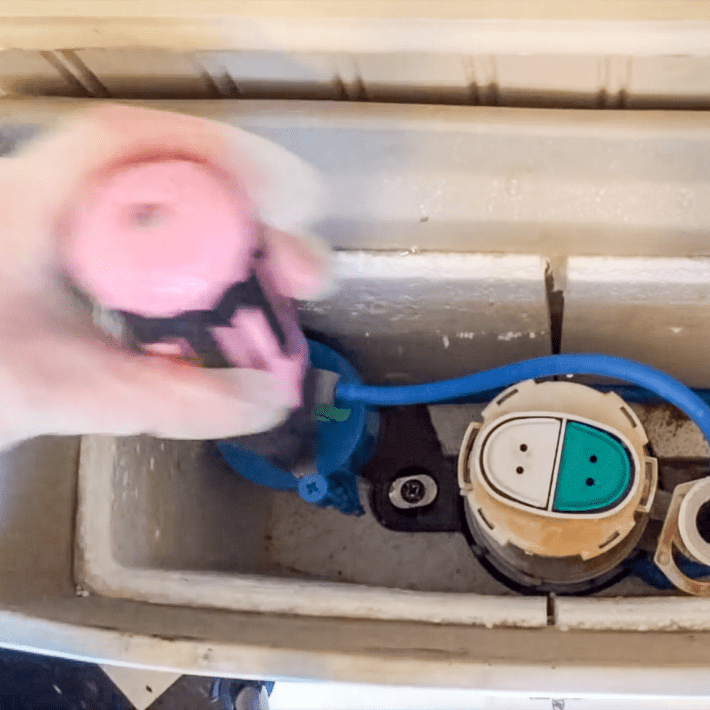
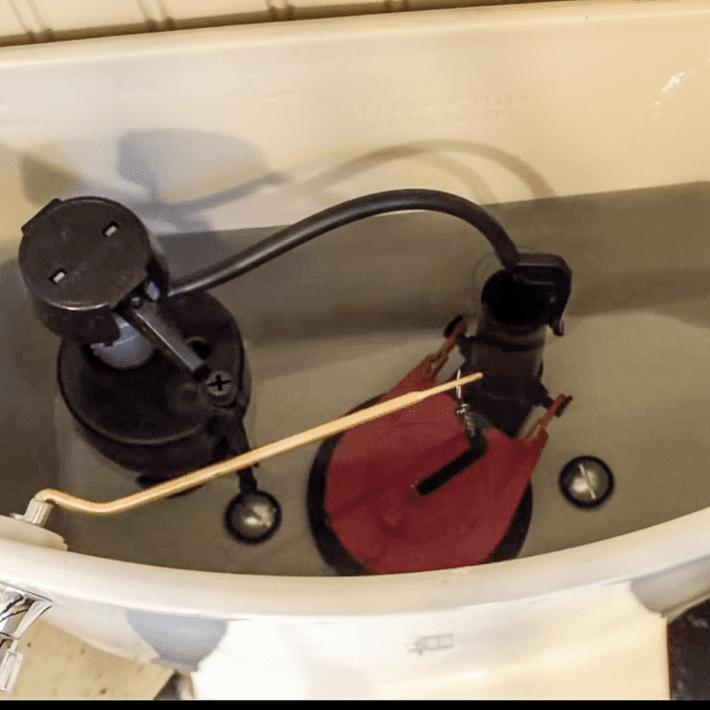
STEP 15. Secure the tank to the toilet bowl. My toilet came with a little tool for tightening the nuts. Hook the water supply line up to the water source.
STEP 16. Flush the toilet, check for leaks and adjust the float. If you have leaks from the water line tighten the connections. If the leak is from the tank tighten the tank bolts. If it still leaks, remove the tank and make sure the gasket is placed correctly.
STEP 17. Flush the toilet again and check for leaks underneath the toilet. If there is leakage your wax seal wasn't set properly. You'll need to remove the base, remove the wax seal and attach a new one.
Those are your steps. Here is the video of me removing my old toilet and installing my new one. It shows me actually doing all the steps above, so watch this video before you install your own toilet.
It'll help make things much easier to understand and make you feel more confident that you can do this.
Installing a toilet with roughed in plumbing
If you're working with a new build and are working with roughed in plumbing there are only 2 extra steps you'll possibly have to take.
- Installing a soil pipe.
- Adding on the closet flange.
All the other steps will be the same.
Toilet Buying Tips
1. Check the MaP (Maximum Performance) rating of your toilet. Anything over 800 is good. Over 1000 is GREAT. Avoid anything that has a MaP rating under that if you want a powerful flush and little chance of clogging.
2. Pay attention to the bowl shape. Round bowls are shorter and elongated ones are longer. If you are really cramped for space you'll save a couple of inches by getting a round bowl.
3. One piece toilets are usually heavier and harder to install yourself. If you're doing this on your own, a two piece toilet make not look as sleek, but it'll be easier for you to maneuver into place and drag up the stairs by yourself.
4. Bowl height? Yes, toilets come in different heights with the majority of toilets now being "comfort height". Which are only comfortable if you're relatively tall. If you're short you may find your legs dangling.
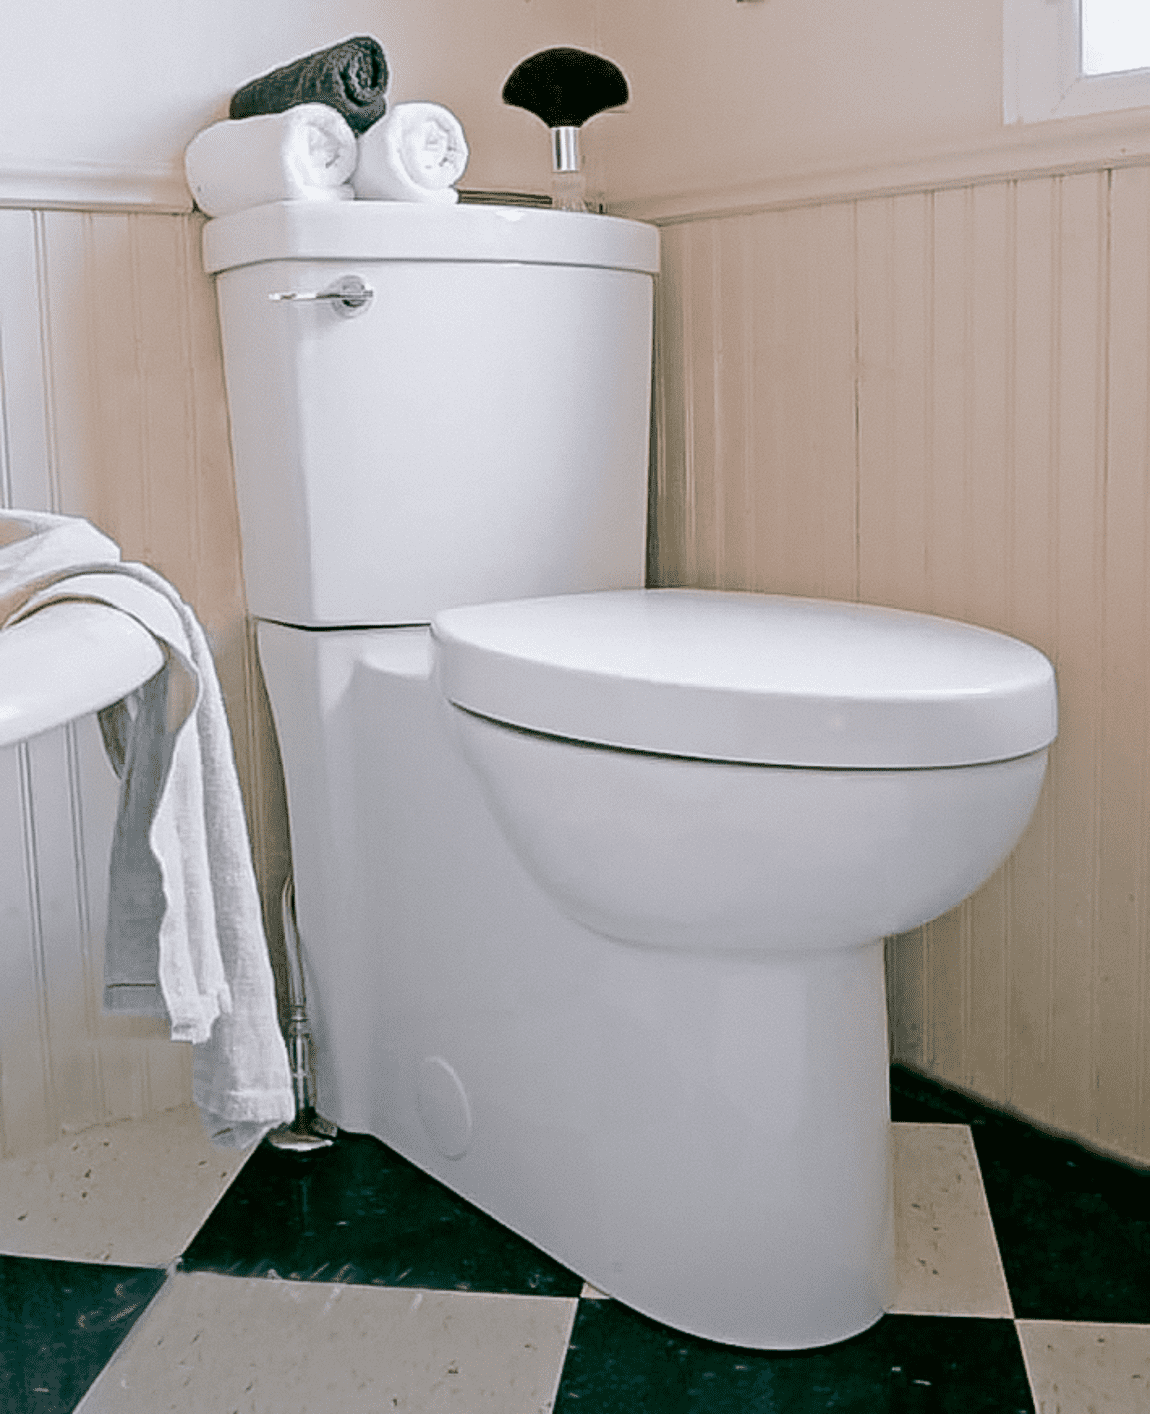
5. If you hate looking at the side of a toilet that looks like its colon is showing, get a skirted bowl. The "guts" of the toilet are concealed, so the toilet has nice smooth sides that are nicer to look at and easier to clean.
6. The toilet seat is where you'll actually set yourself down on so get a good one. Options are heated seats, bidet seats and slow close (slamless) seats.
The bowl that I went with has a MaP rating of over 1000 (the Cadet). I had NO idea there was such a big difference in toilets and how well they flush. Like I said, I just figured low flow toilets didn't work well. As it turns out, only certain low flow toilets don't work well.
This one works great.
As a general rule it's pretty darn easy. It just looks scary. But it takes time and of course is terrifying because you've never done it before and you're afraid it isn't going to work.
Nope. If you're just removing an old toilet and replacing it with a new one any homeowner can do it themselves.
Most building codes require that toilets be caulked to the floor after installation to help keep the toilet stable and to prevent odour and gases from leaking out of the sewer line.
If your bolts are tightened and everything is set properly but your toilet has a bit of a wobble to it, add shims. They'll stabilize it and prevent it from cracking.
That's really all there is to installing a toilet. Sure something's gonna go wrong. The water line is going to get knocked and spray water everywhere, or you're going to get part of the wax seal in your hair or you'll find out your water supply line is too short for your new toilet and you have to go buy a new one.
But all in all, installing a toilet is really one of the easiest jobs you can do in your home.
And definitely easier than using your neighbour's bathroom every time you have to go because you're too afraid to use your own crappy toilet.
→Follow me on Instagram where I often make a fool of myself←


Nice toilet! Good video, too. I have a tip that some people might want to try if for some reason a nifty new toilet isn't an option right away. We had two low flow toilets that never flushed worth a damn, and we hated them. We figured you just have to live with it. Over a few years we had replaced various pieces inside the tank, thinking maybe this little part or that one is the culprit. Nothing helped. Then one of the toilets took to "running" every now and then for no reason. And something (I think my husband used a plunger too hard) bumped the other one so hard that it started running nonstop.
The toilets weren't all that old, so I went down to the hardware store and looked around and decided that maybe replacing the whole valve assembly would be required to stop the running till we could get around to replacing both toilets. The things were around $15 dollars each (I'm in the U.S.) The only problems I had with the whole thing was the very close quarters on the water supply side in both bathrooms. It took me longer to get the old parts out than it did to install and adjust the new ones. But I got both done in one afternoon, and that included the trip to the hardware store.
The valves worked -- no more running. And no leaks. And here's the zinger: both toilets flush much better than they did when they were new! Gone are the days of needing to flush twice nearly every time. So maybe some of your readers might try the valve fix first, if the toilet is in fairly good shape. If it doesn't solve it, they can follow your fabulous instructions and they will have only wasted an extra $15.
You are amazing, and I bow to you in awe!
if you redo bathroom,keep the flooring. :D
Oh I'm keeping my floors. :) ~ karen!
I have several American Standard toilets and they are great. Low flow toilets were terrible when they first came out, they have been improved greatly in recent years. I've never seen a skirted style like you chose but, while stylish, it looks like a maintenance nightmare to me- it is a good thing you can do-it-yourself so easily. How did you tighten the bolt on the right side- I've never seen a toilet so close to the wall, with so little clearance and hardware which looks so hard to access. Forget what I said about a bidet attachment being easy to install on this style toilet- I can't see how the seat is installed which is necessary to have easy access to for a bidet attachment (as opposed to a bidet seat which are much more expensive usually). Also, the water supply line looks impossible to replace without removing the tank so I would go with the best stainless flexible line I could find to make that job as infrequent as humanly possible. You are fearless to go where most men aren't comfortable working.
:) There's *just* enough room for me to maneuver a screw on the right side of the toilet. And there's no maintenance issues with having a skirted toilet. The only difference is how it bolts to the floor. Skirted from the side, non-skirted on the floor. ~ karen!
Now that is a sexy looking toilet! We replaced our toilet when we gutted our laundry/powder room and it makes all the difference when you don't have to ask your friends to only flush a few pieces of loo paper down at a time otherwise it will get stuck. Thankfully those embarrassing days are over!
Karen
It must be 5 years ago now that I replaced all 3 toilets with American Standard low flow toilets. I chose them because I could fix the mechanism inside when necessary.
There was a rebate at the time from the Provincial government.
The 2nd thing I found was our water bill dropped by 50%.
The other thing to look at is if you are a senior the higher rise is the easier (looks nicer) than special seats that increase the height.
I also installed supply lines that have a feature that stops the flow of water if there is a leak.
My plumber friends tell me they remove them frequently when they stop the flow for no reason.
Mine are fine so far.
You talked me into the American Standard, but out of doing it myself. I used to reset one-piece toilets at the old house. The one-piece isn't any heavier than a skirted toilet. Now, I've had back surgery, neck surgery, and one rotator cuff repaired. I call the plumber now.
Go for that no slam toilet seat. Even without a man in the house, I still have to think about the cat. I switched out from the cheap one they had. It was worth the money.
I'd like to say that it's just that easy, but anytime you open something up to repair it, you don't know what's going to happen. If you are going to do it, do it on a day when you can get a plumber to your house without paying overtime.
Oops! the stubborn 3" plastic screw; the nut was seemingly cemented on but the hack saw did the trick! I was so happy!
I never would have tackled that job if I hadn't read so many of your posts encouraging us to tackle projects. Thank you so much for your determination and encouragement!
I just replaced my toilet seat; I was perfectly happy with the old plastic seat until I spent four days dog-sitting for my sister and used her nice firm wooden one.
I Googled how to replace it and found what promised to be "four easy steps"! The first three steps involved taking the old seat off, which took over an hour due to my lack of power tools, the tight squeeze between the toilet and vanity and stopping because of back pain from bending over and kneeling on the ceramic floor. Plus I almost split my head open on the vanity counter! I finally took a hack saw to the stubborn
Yay! We just bought two toilets to replace our vintage ones that came with the house. The old ones are from the 1960s. (blech)
Ooh, were they play pink? My bathroom tile is from the 70s. It's almond with brown flowers because you know, when you think of flowers - brown. Ugh.
Surprisingly, no! They were white, which is probably why the three or four previous owners kept them. It just grosses me out to think of all the people who have used them before us. :) And they're terribly wasteful--every flush depletes the ocean just a bit.
Don't forget the new, non-revolting wax ring, or people will cry!
This makes me feel so empowered. Not that I've replaced a toilet yet, but now I know that I can!!
Thank you.
You can. And now that you've seen the video, I bet one day ... you will. :) ~ karen!
Several years ago my daughter and I installed a new toilet in her upstairs bathroom. We had a laptop with a "This Old House" video to use as a guide. Went smooth as could be - until it started to drip. We tried everything to get it to stop, checked every bolt and gasket (well, how ever many there are) and finally put a bowl under the drip and went to bed.
We called a handyman the next morning who said after he arrived that he always carried a spare supply line with him. Which he used to replace the old one. His tip of the day was to never replace a toilet without replacing the old supply line; if the toilet is old enough to be replaced then most likely the supply line is too. Good to know!
Gobsmacked!!
You are every man's dream woman!!
I would not even attempt that and you make it look so easy!
It is easy. :) That's why I did a post on it to prove it's incredibly easy. ANYONE can do it. If they can lift the toilet that is. ~ karen!
You might want to add the wax ring installation to your text list of steps. It's pretty important!
I replaced my mom's toilets - now I should do my own because it's one of the low-flow #&*&$#^ that was all we could get back when we put it in.
Done. ~ karen
Good Job Karen. I can not even count how many toilets I have replaced by myself. I am a renter and it seems every place I rent, it has a crappy shitter and of course I replace them ASAP! I hate those wax rings. Also in every single one I always have to repaint as there is always that horrid unpainted rectangle from the old toilet that is not the same as the new one and no one thought of painting behind the tank!
No, Karen, you rock!
Good video. Should encourage a few people to do it themselves. Pity though that your Pfister didn't work. We have that model and it's the best toilet we've ever had.
You may have a Pfister but maybe you don't have this exact model. I don't know which it was. Other than the awful one, lol. The biggest concern of mine was the company didn't seem to think anything of the fact that it didn't work for me! ~ karen
It appeared to be identical inside and out but that hardly matters. Yours didn't work and you got no support. Bad Pfister!
We put in a toilet and sink upstairs in our house yesterday. I am so happy to have a toilet on the second floor! No more 3am trips down the stairs when it is very, very cold.
Oh! A toilet upstairs. That'd be a luxury to me. ;) ~ karen!
It is a luxury to me, too! I drank lots of water before bed last night :)
My husband and I did so much of the repair work in my mom's condo after water intrusion damage because of the mind boggling incompetence of the people we paid. We could not find competent work ANYWHERE. Yet these are the nitwits building houses? Ominous!
We saved the original toilets that we had to remove and reinstall because of new flooring when we did the first rehab. We put in new tank guts, braided steel lines, seals, bolts, washers, handles and seats on the first upgrade and paid our neighborhood handyman for the job, which he botched. We watched YT videos, then had to reseat and tighten the tank bolts and put in floor shims and tank braces to make everything rock solid, as well as readjust the flush valves. NOTE to add = NEVER overtighten tank bolts! So we were out $300 on that round.
Then after the water damage 18 months later, the shitforbrains "repair" workers cracked two tanks and one lid by standing on them to plaster and paint.
I decided feckit, I'm selling this nightmare. This required all low flow toilets for new city codes. I had a setback issue (NOTE to measure your setback to make sure the toilet will fit!) and that meant I needed a 10" setback, which gave me one option for the guest bath. Replacing baseboards made that much of a difference. The two upstairs I had more options, but I must have spent 10 hours reading reviews. NOTE to open the toilet box in the parking lot and check for any CRACKS, that the base is pretty level, and that all parts are present. Defect level can be high.
Doing the toilets ourselves prior to listing the property allowed us to put in quality $250 each toilets instead of the $75 garbage ones the retrofit company was going to use. We did all the required misc retrofit ourselves and did a superior job and saved $700.
That's along with having to repair substandard drywall, ruined windows and sliding doors and door frames and medicine cabinets etc, plus repaint everything twice, and cleaning up all the additional damage from the mess they left everywhere, like plaster dust in everything and paint splatter on every window and screen.
Oh noes! The video is private.
Sorry Mel! I had the video scheduled to go live ... tomorrow at midnight, lol. It's up now! ~ karen