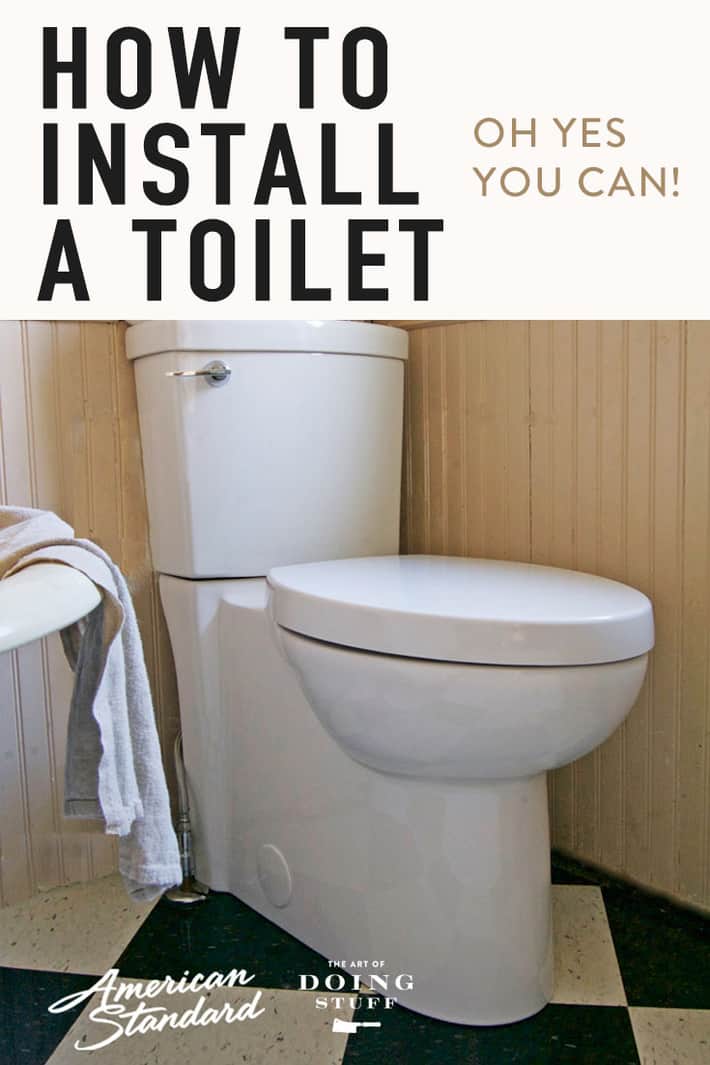
Installing a toilet seems like an intimidating DIY project but it's surprisingly easy to do yourself. Once you choose one you just need a few basic tools and a good step-by-step guide.
Most people don't even consider installing their own toilet. Not because it's such a complicated task, but because screwing up a toilet install? That has bigger consequences than other home DIY tasks.
If you hang a picture in the wrong place, you move it, fill the nail hole in the wall then forget about it. If you install your toilet the wrong way the result could involve you being chased by poops.
That isn't the sort of thing you ever forget.
Table of Contents
How to Install a Toilet
This is one of the easiest home improvement jobs you can tackle. It's way easier for instance than pouring self levelling concrete.
It also scores very high on the official bragging rights scale because it impresses most people; most people not knowing how simple it is to do.
It'll take 2-3 hours. About the same time as making a pumpkin pie. Maybe 4 if you run into a bit of trouble.
Materials
- Toilet (bowl and tank should come with bolts etc.)
- Wax Ring
- Wood shims
- Rags
- Pencil
- Masking Tape
- Caulking
Tools needed
- Adjustable wrench
- Vice grips
- Caulking gun
- Screwdrivers
- Tape Measure
Instructions
STEP 1. Turn off the water supply. If it's stuck, use WD40 and/or vice grips.
STEP 2. Flush the toilet.
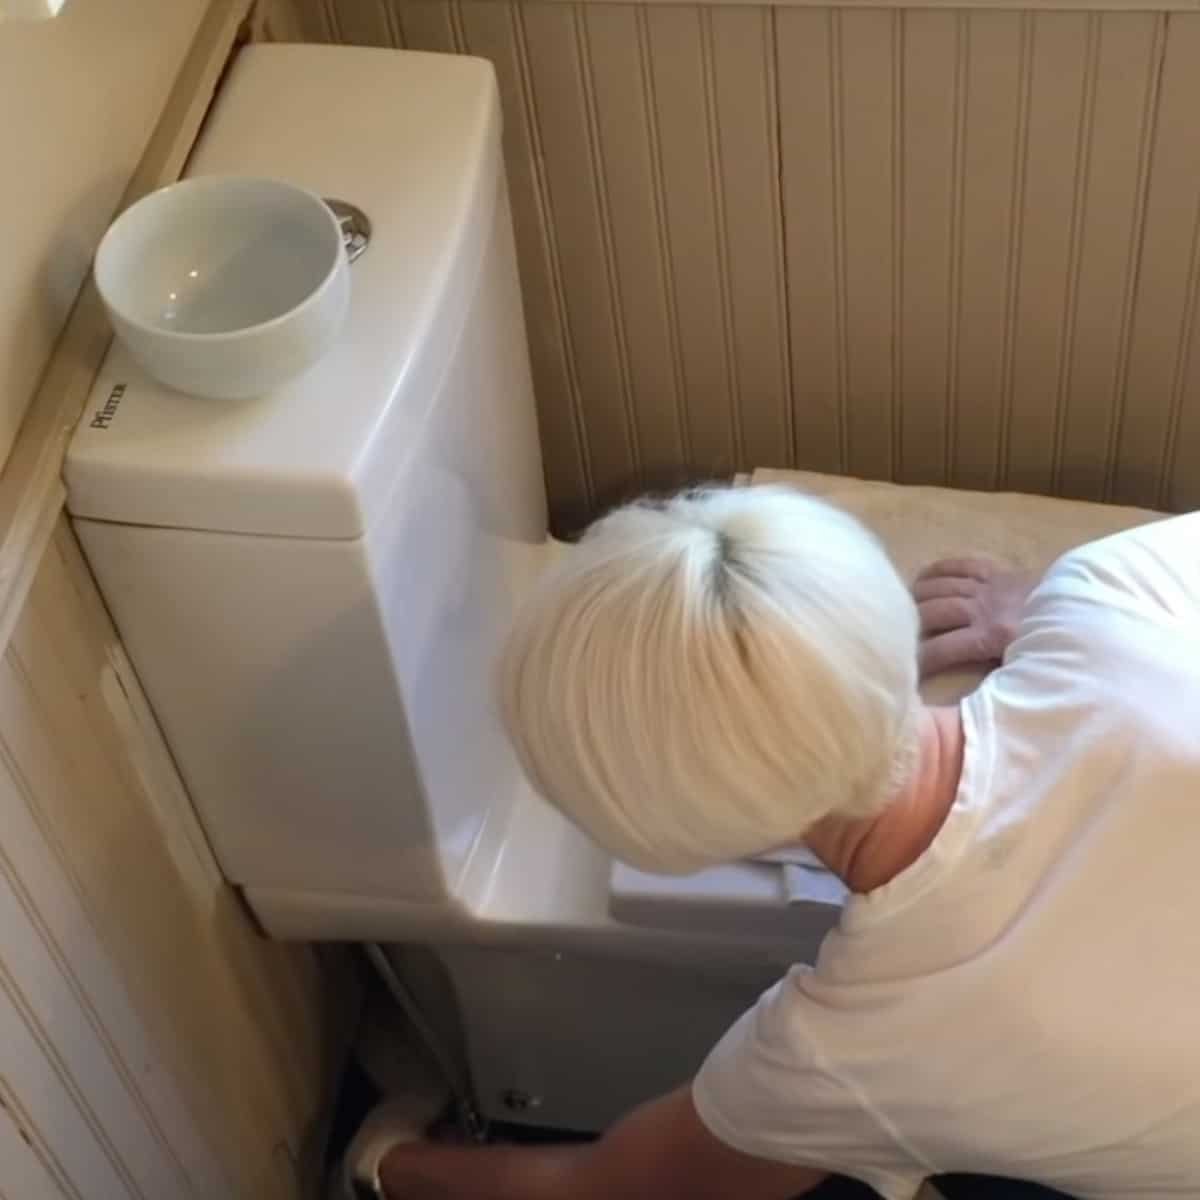
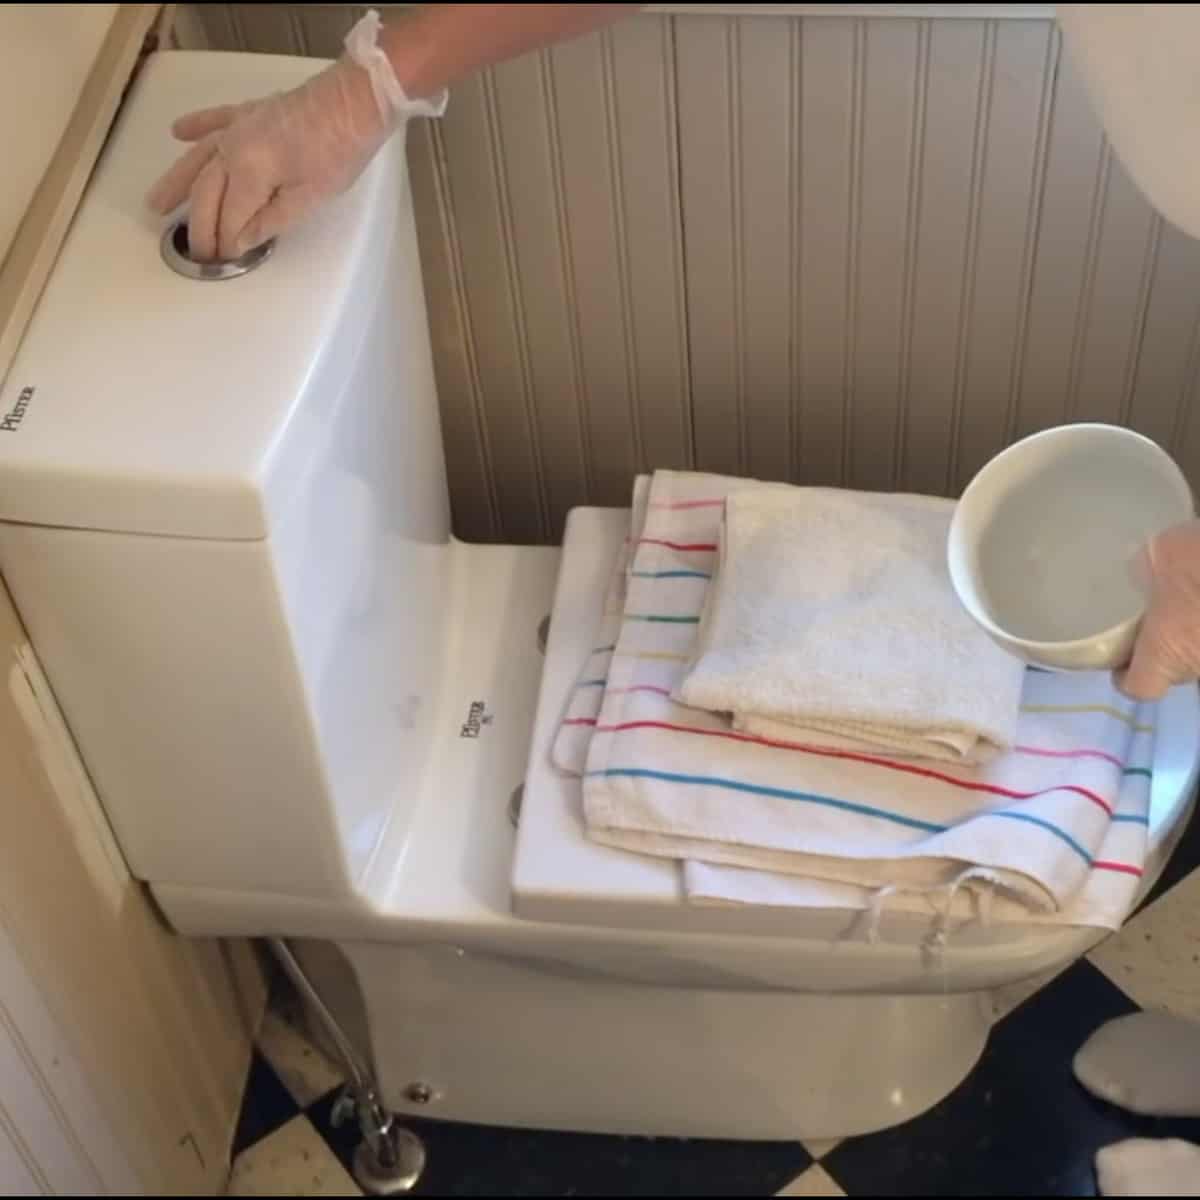
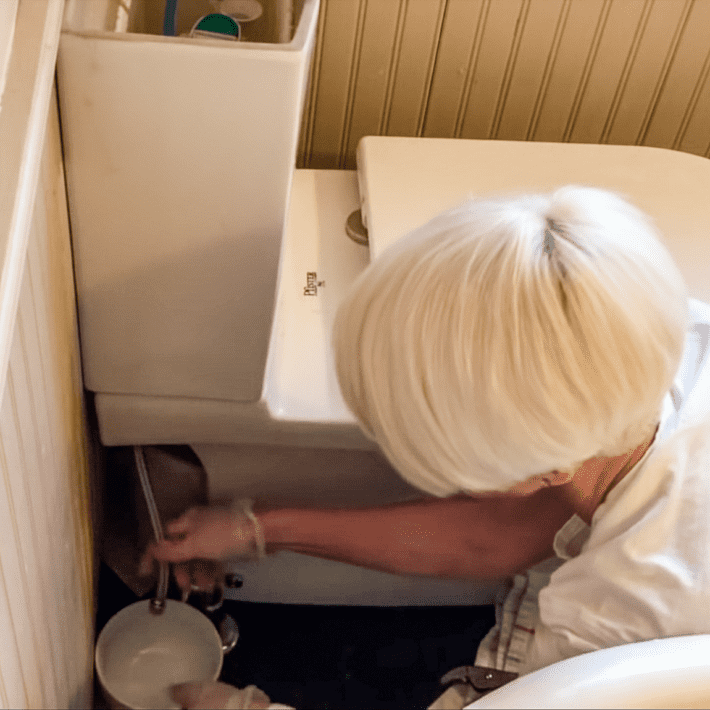
STEP 3. Soak up any remaining water from the tank & bowl with a towel and/or small bowl.
STEP 4. Undo the water supply line.
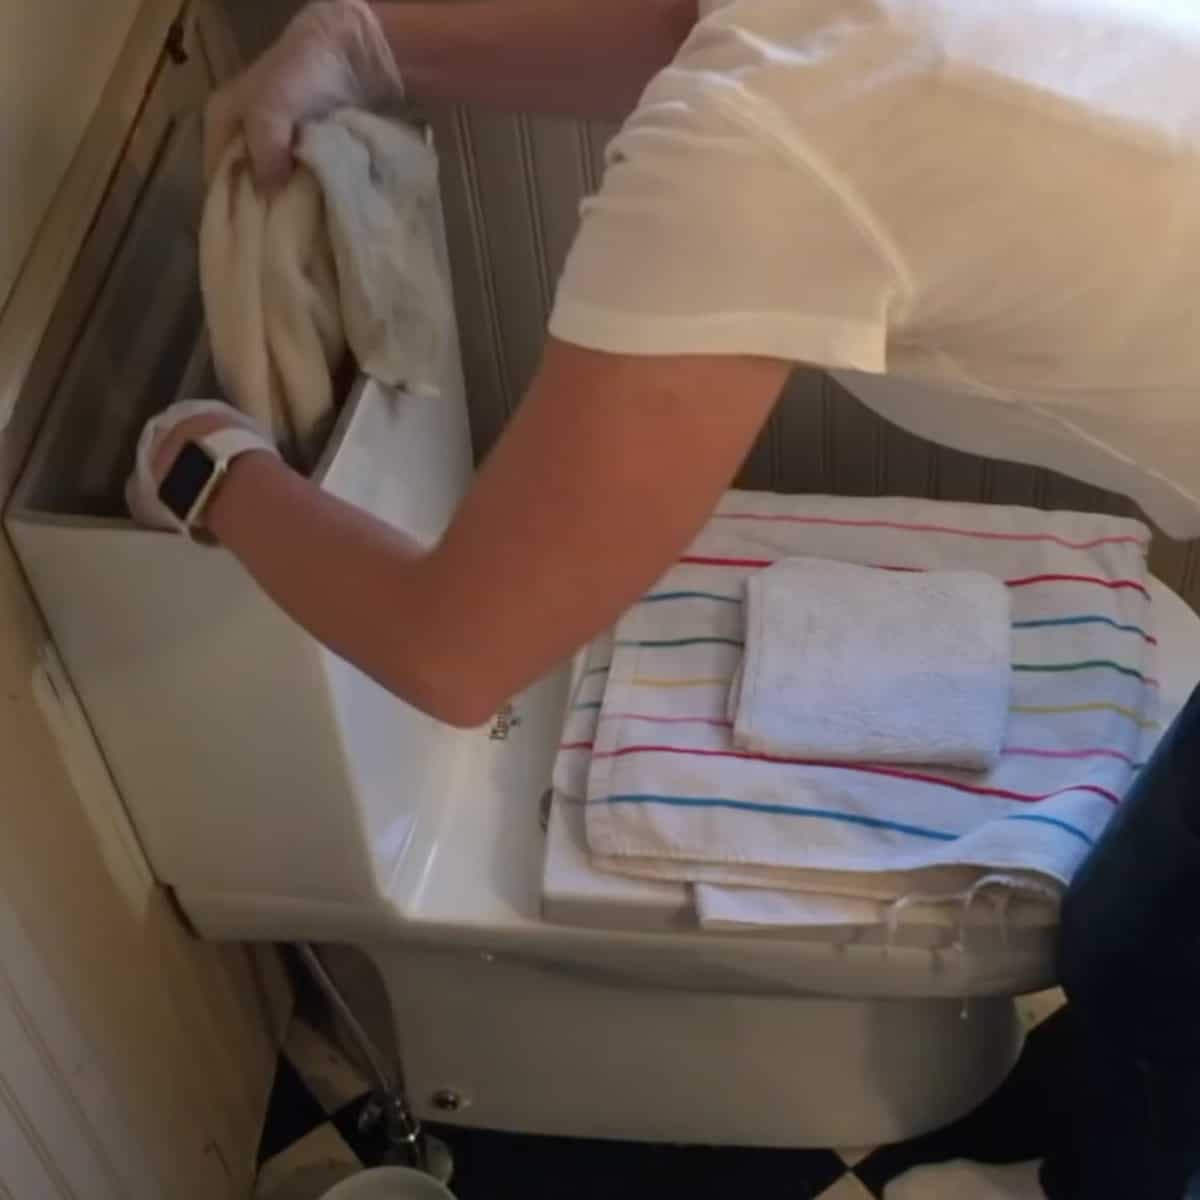
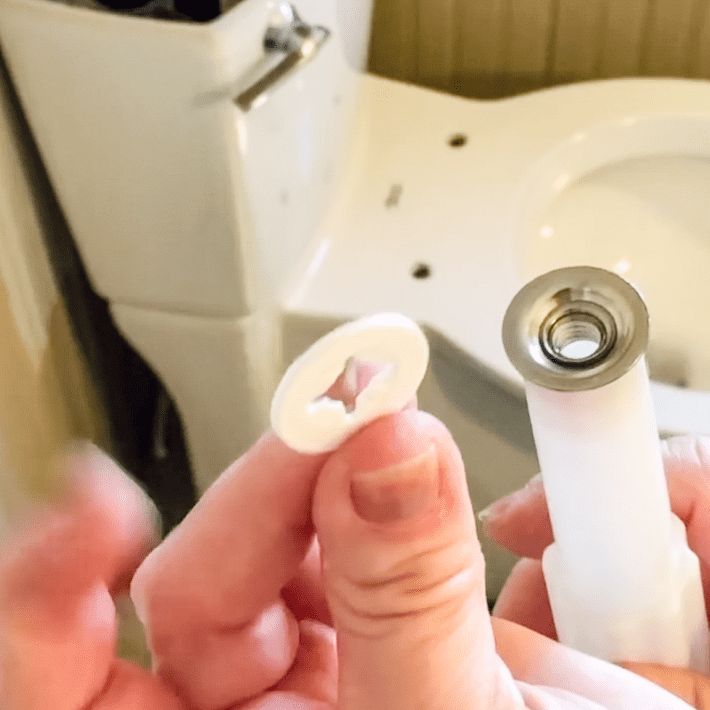
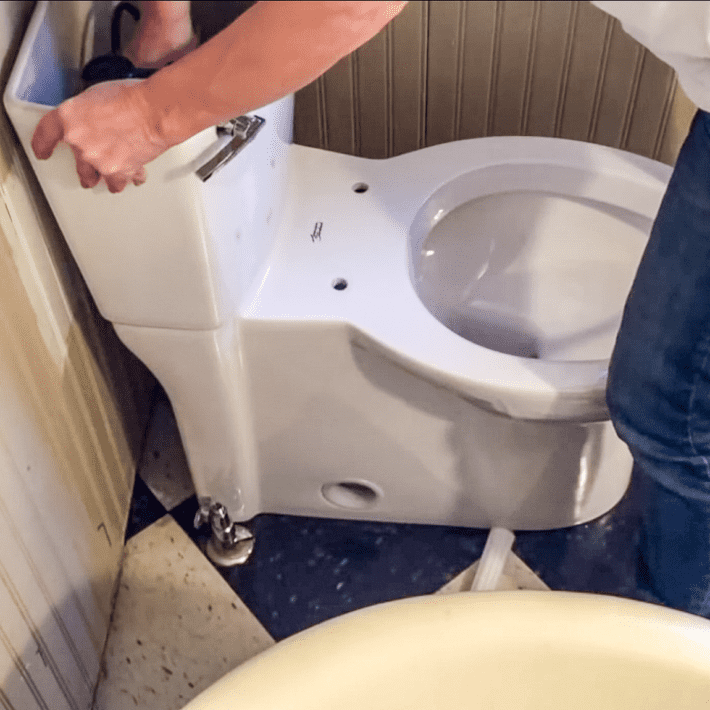
STEP 5. Remove the tank from the base by removing the bolts located inside and underneath the tank.
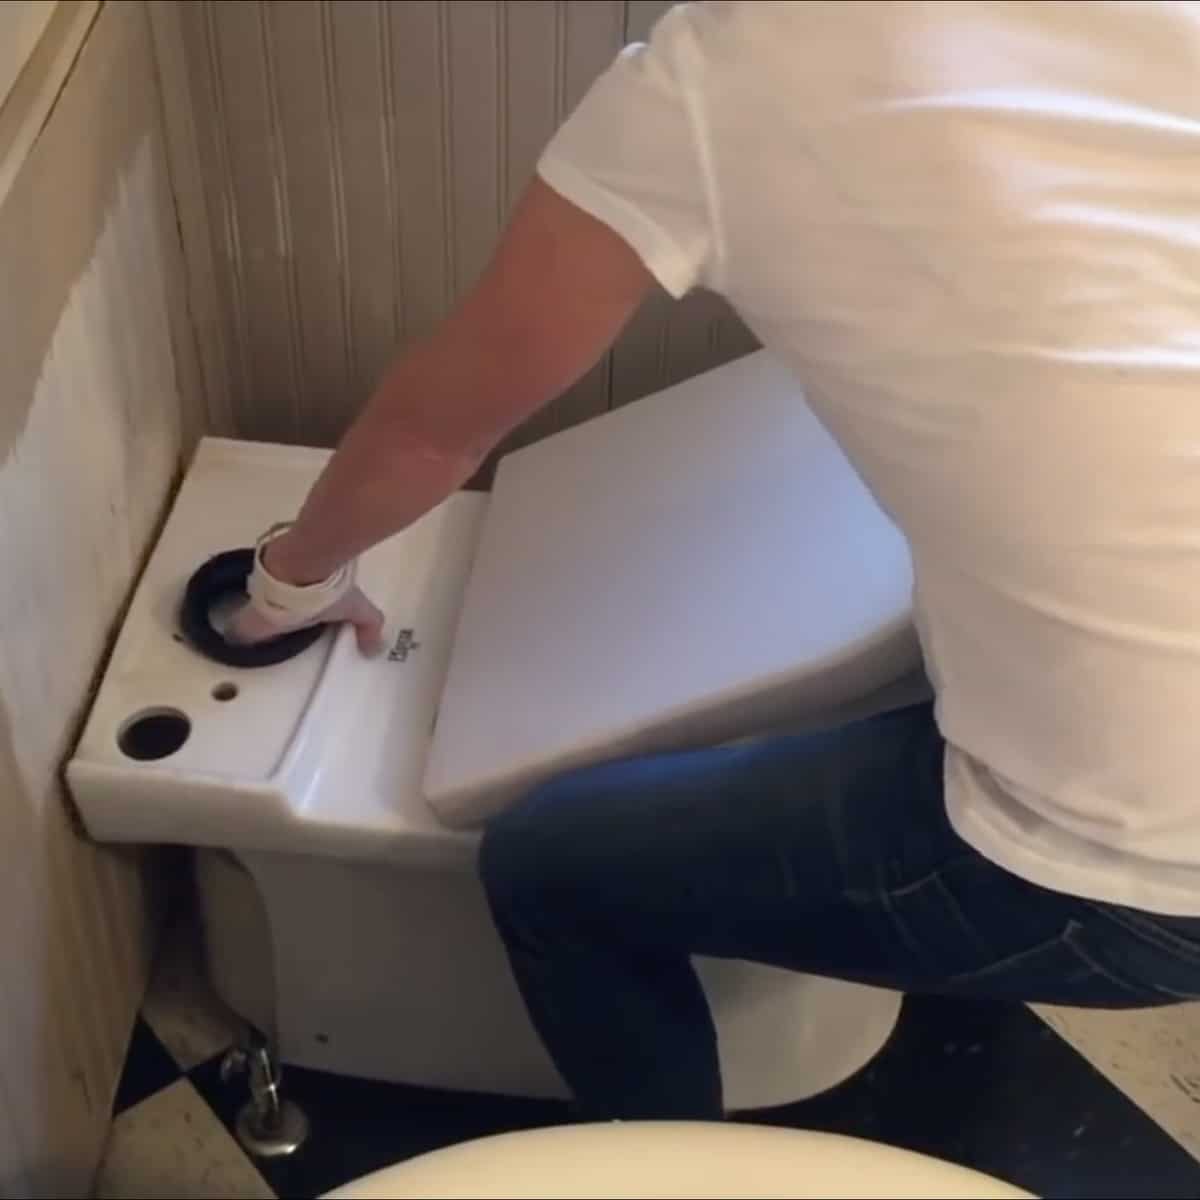
STEP 7. Remove the bolts holding the toilet to the floor and haul away your tank and toilet. You're now toiletless!
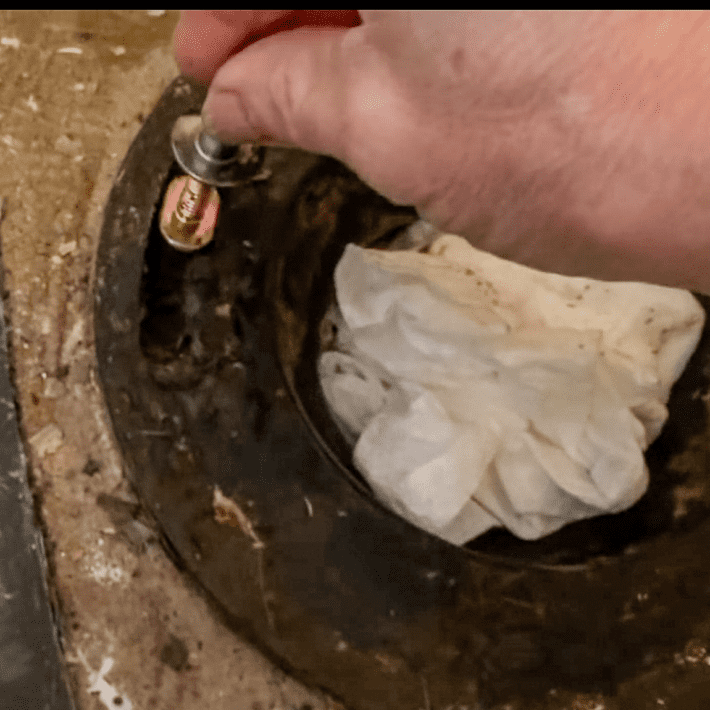
STEP 8. Plug the now open drain hole with toilet paper or a rag to stop sewer gasses from coming into the bathroom.

STEP 9. Scrape up any wax from the wax ring left on the flange and inspect it. If it's cracked or broken, remove the flange using a reciprocating saw, hammer and chisel and replace it with a new one.
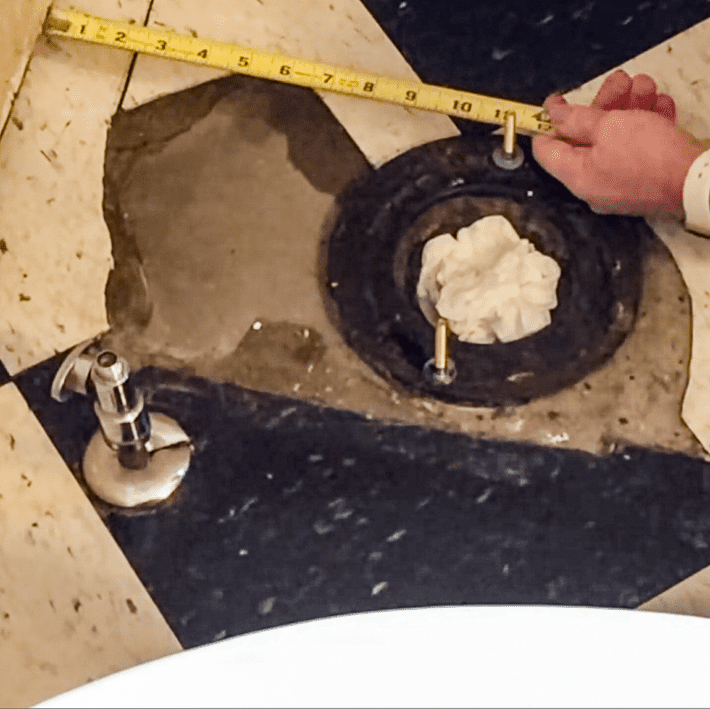
STEP 10. Install your new bolts to the toilet flange and finger tighten them. This secures the toilet to the floor. Make sure they're in the right place by measuring from the wall.
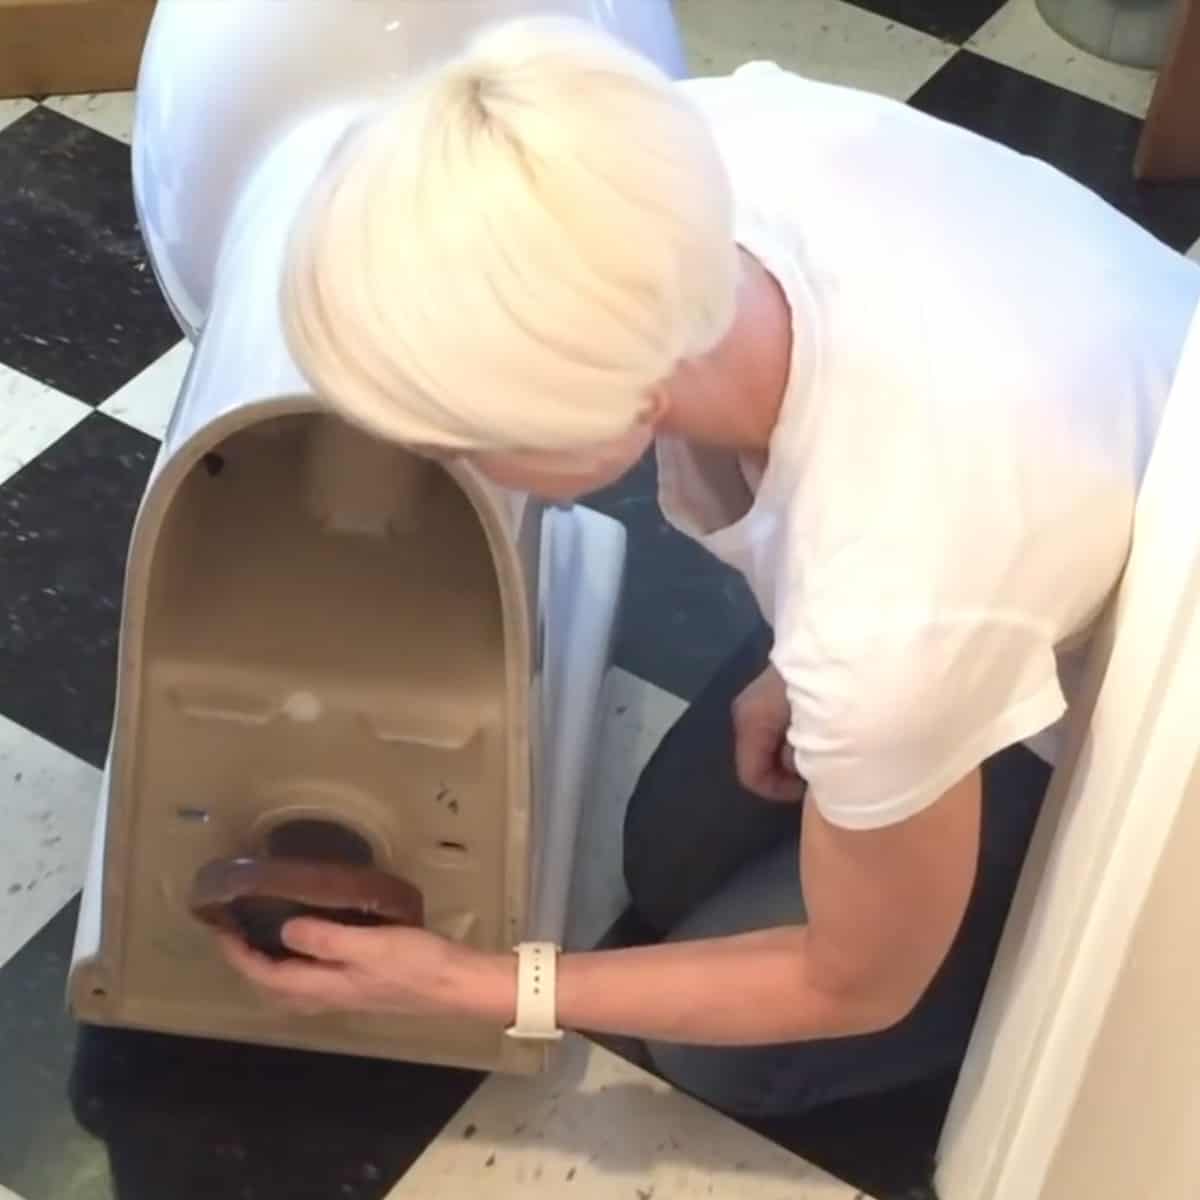
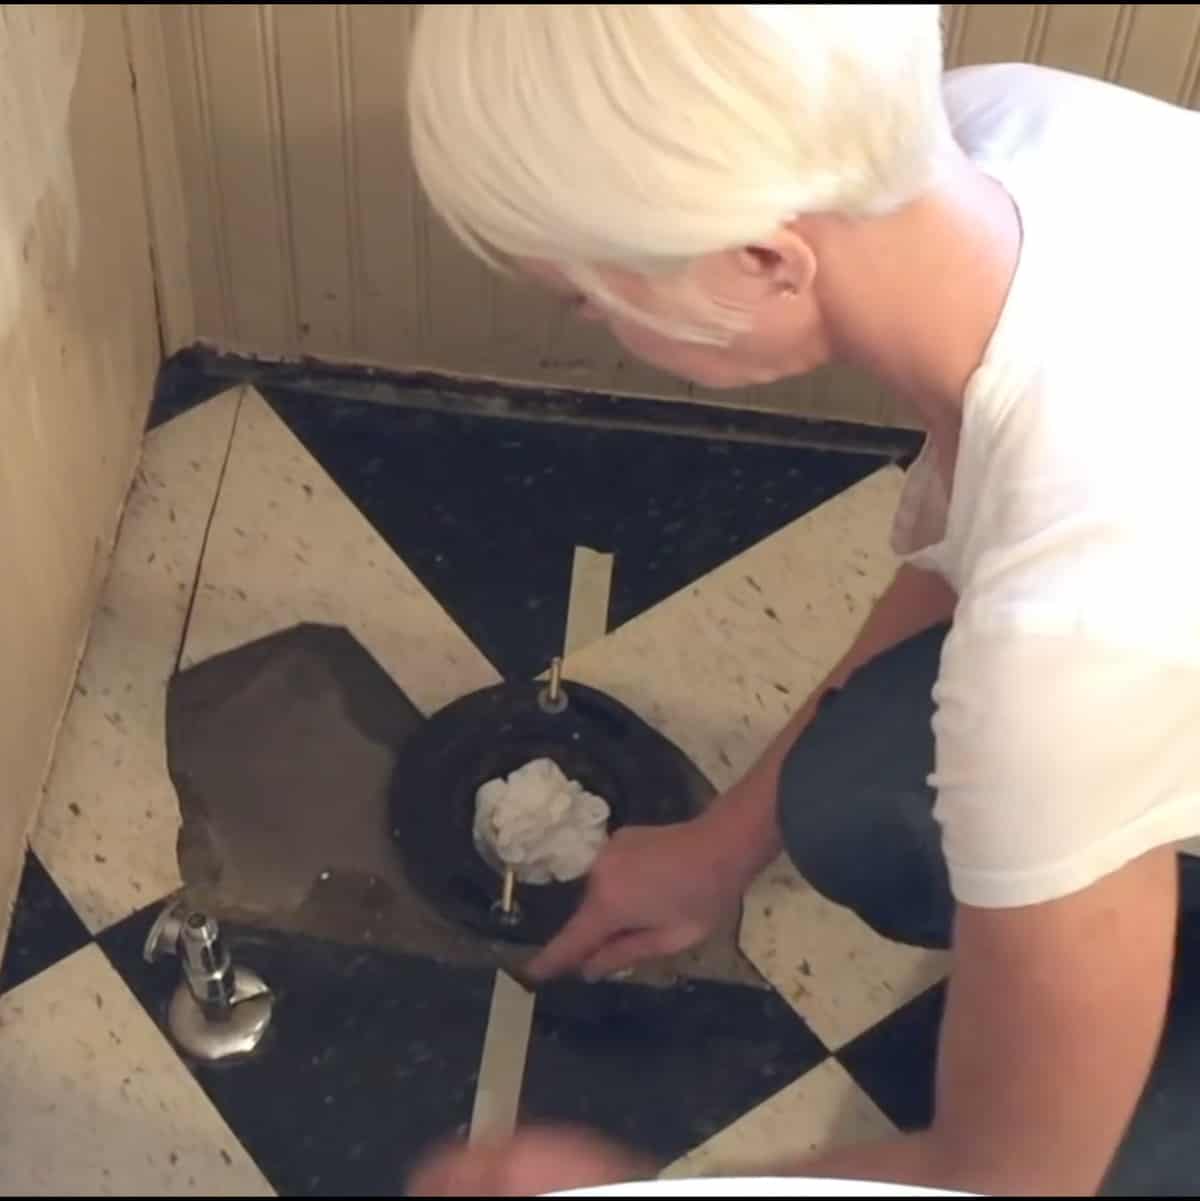
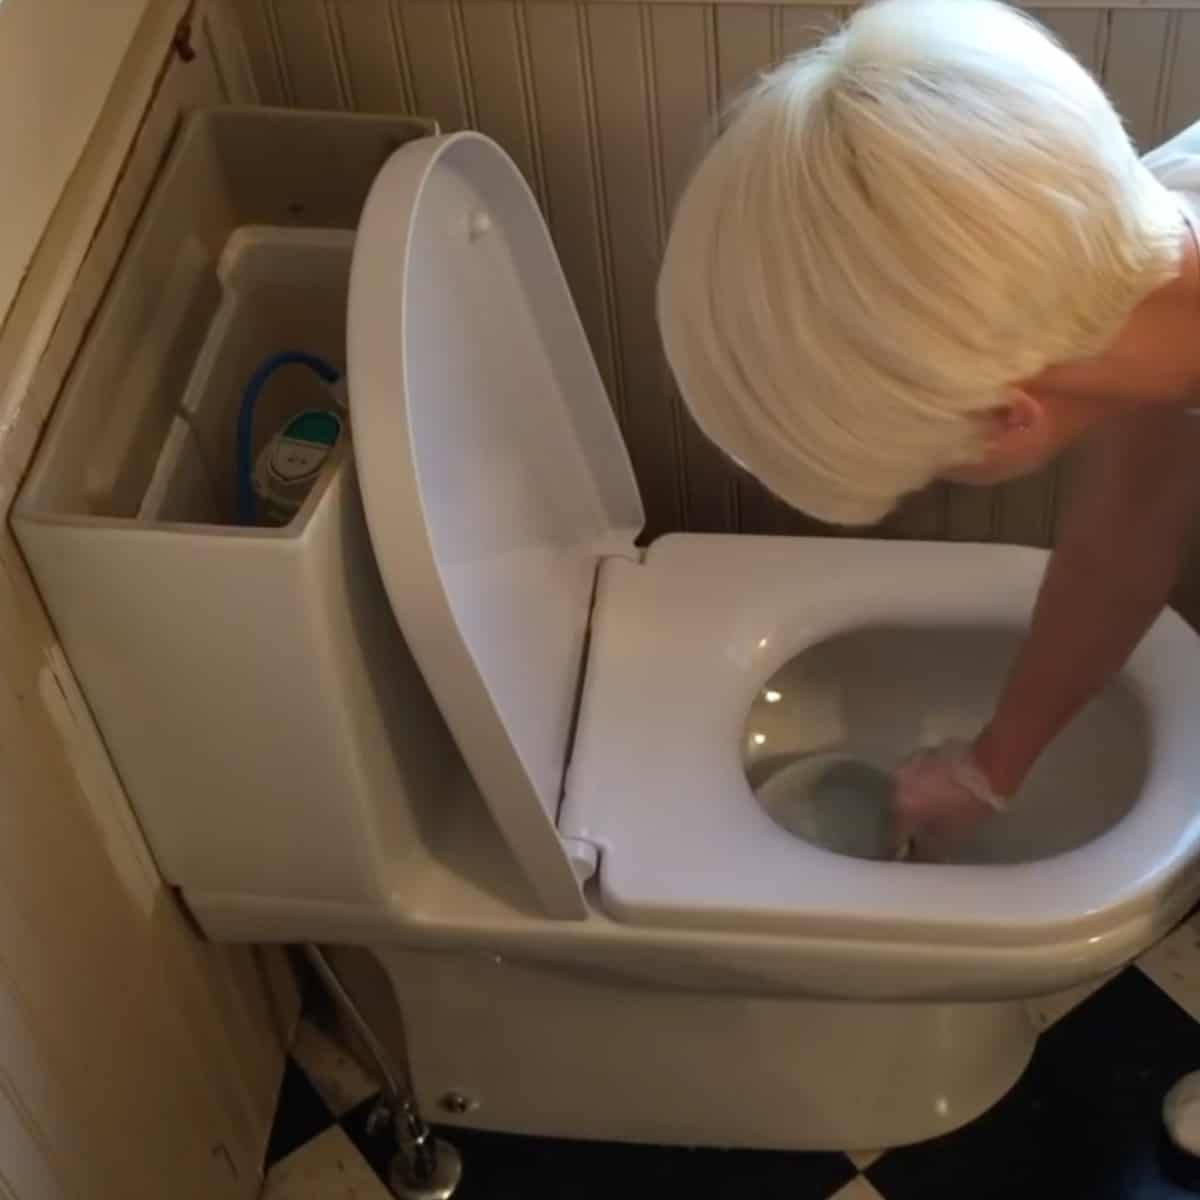
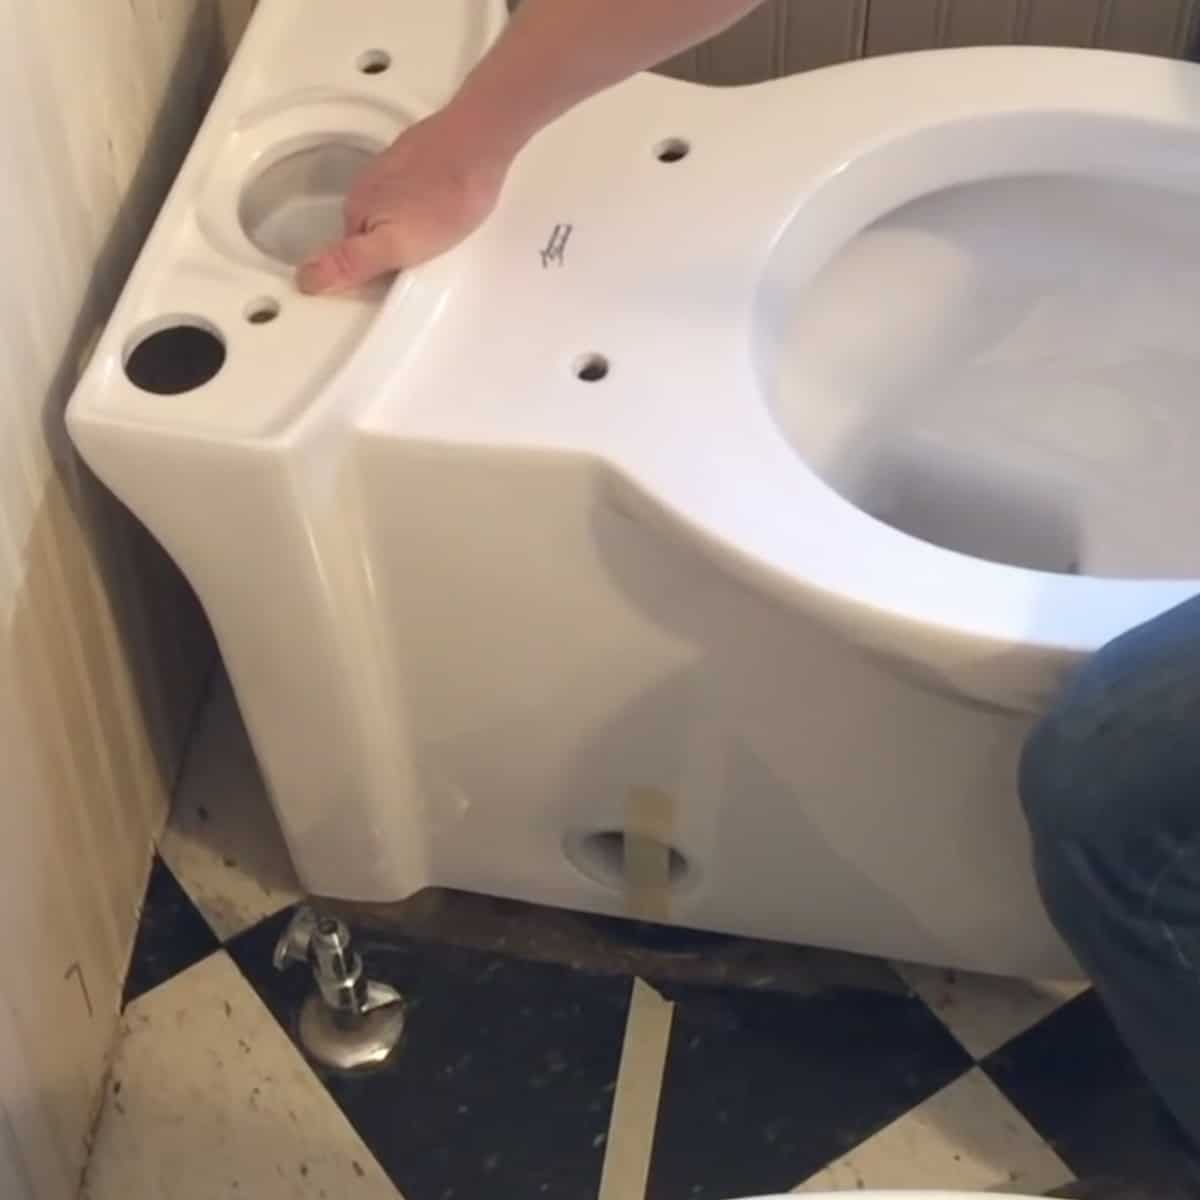
STEP 11. Apply a new wax seal to the new toilet.
STEP 12. For a skirted toilet you won't be able to see the bolts as you set the toilet down. Mark the centre of the bolts with masking tape on the floor.
STEP 13. Lower the toilet to the floor then sit or crouch on it to help set the wax seal. Hand tighten the bolts to finish setting the toilet.
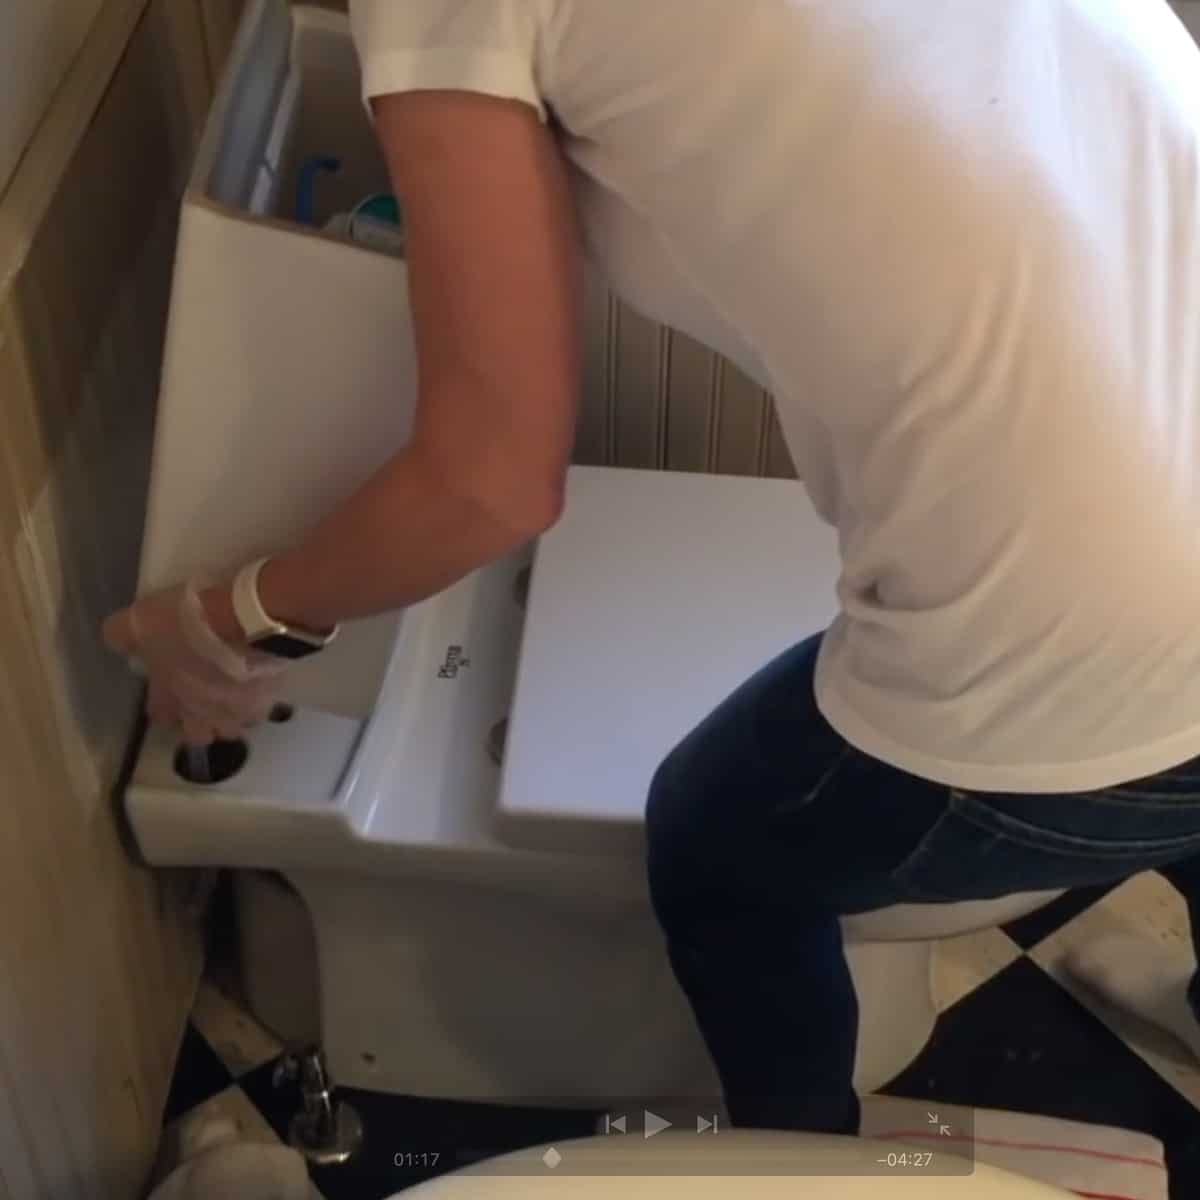
STEP 14. Attach the water supply line to the tank.
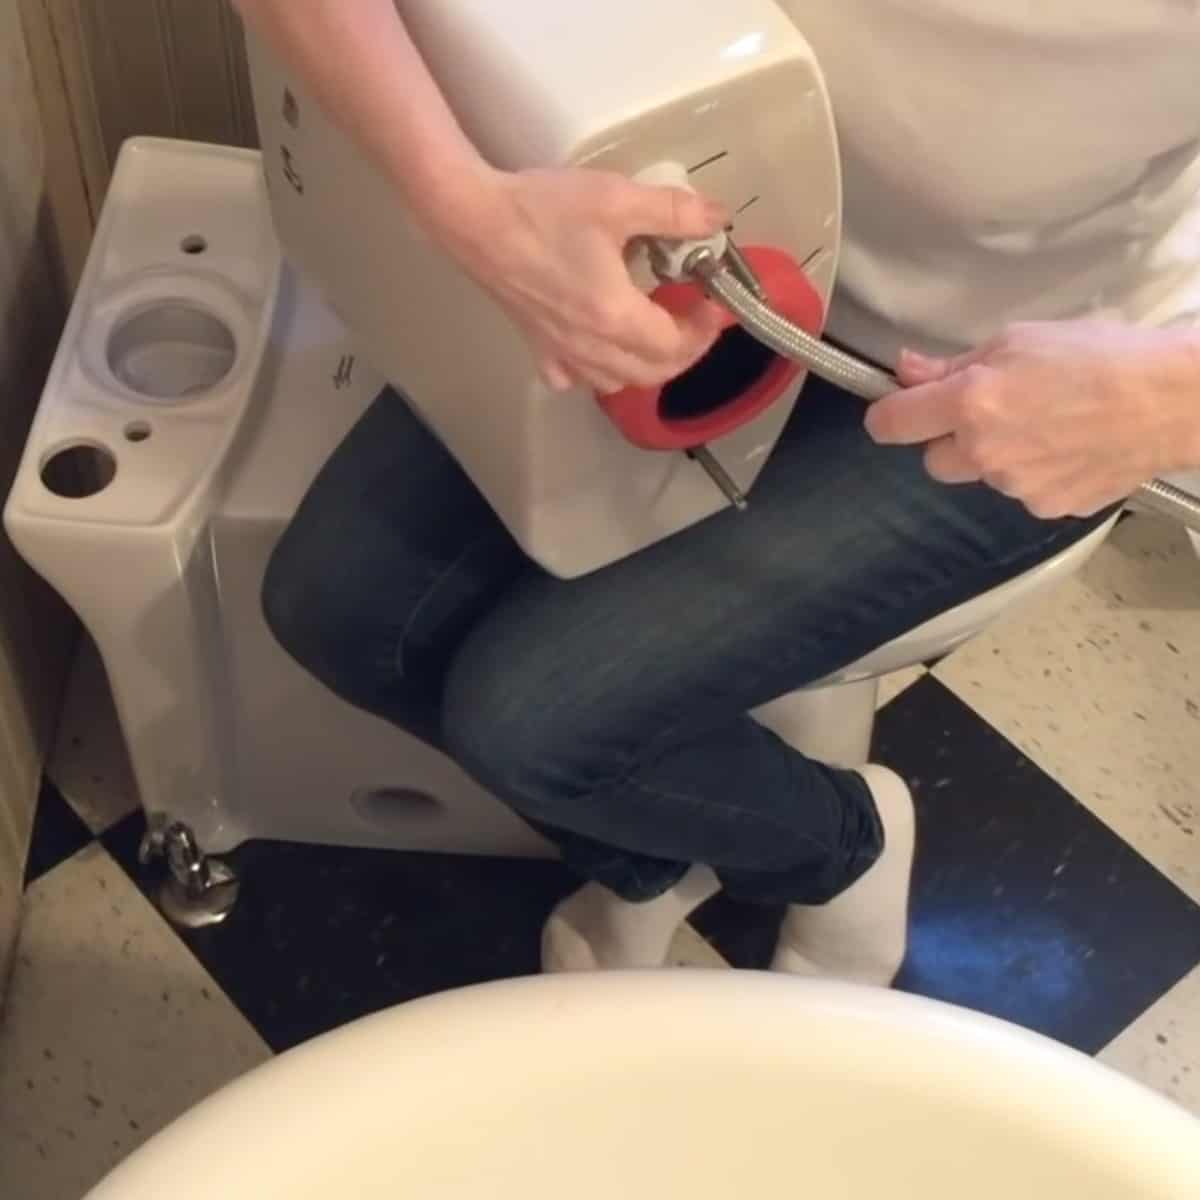
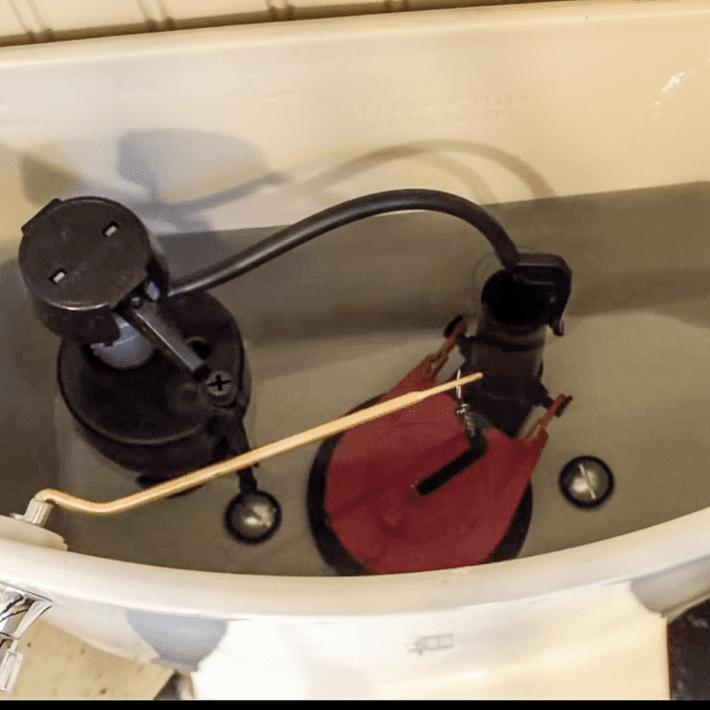
STEP 15. Secure the tank to the toilet bowl. My toilet came with a little tool for tightening the nuts. Hook the water supply line up to the water source.
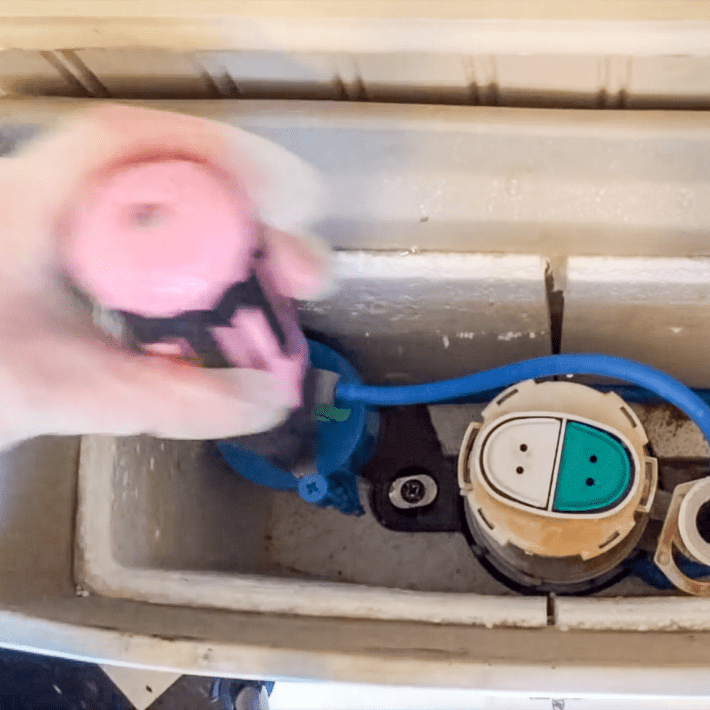
STEP 16. Flush the toilet, check for leaks and adjust the float. If you have leaks from the water line tighten the connections. If the leak is from the tank tighten the tank bolts. If it still leaks, remove the tank and make sure the gasket is placed correctly.
STEP 17. Flush the toilet again and check for leaks underneath the toilet. If there is leakage your wax seal wasn't set properly. You'll need to remove the base, remove the wax seal and attach a new one.
Those are your steps. Here is the video of me removing my old toilet and installing my new one. It shows me actually doing all the steps above, so watch this video before you install your own toilet.
It'll help make things much easier to understand and make you feel more confident that you can do this.
Installing a toilet with roughed in plumbing
If you're working with a new build and are working with roughed in plumbing there are only 2 extra steps you'll possibly have to take.
- Installing a soil pipe.
- Adding on the closet flange.
All the other steps will be the same.
Toilet Buying Tips
1. Check the MaP (Maximum Performance) rating of your toilet. Anything over 800 is good. Over 1000 is GREAT. Avoid anything that has a MaP rating under that if you want a powerful flush and little chance of clogging.
2. Pay attention to the bowl shape. Round bowls are shorter and elongated ones are longer. If you are really cramped for space you'll save a couple of inches by getting a round bowl.
3. One piece toilets are usually heavier and harder to install yourself. If you're doing this on your own, a two piece toilet make not look as sleek, but it'll be easier for you to maneuver into place and drag up the stairs by yourself.
4. Bowl height? Yes, toilets come in different heights with the majority of toilets now being "comfort height". Which are only comfortable if you're relatively tall. If you're short you may find your legs dangling.
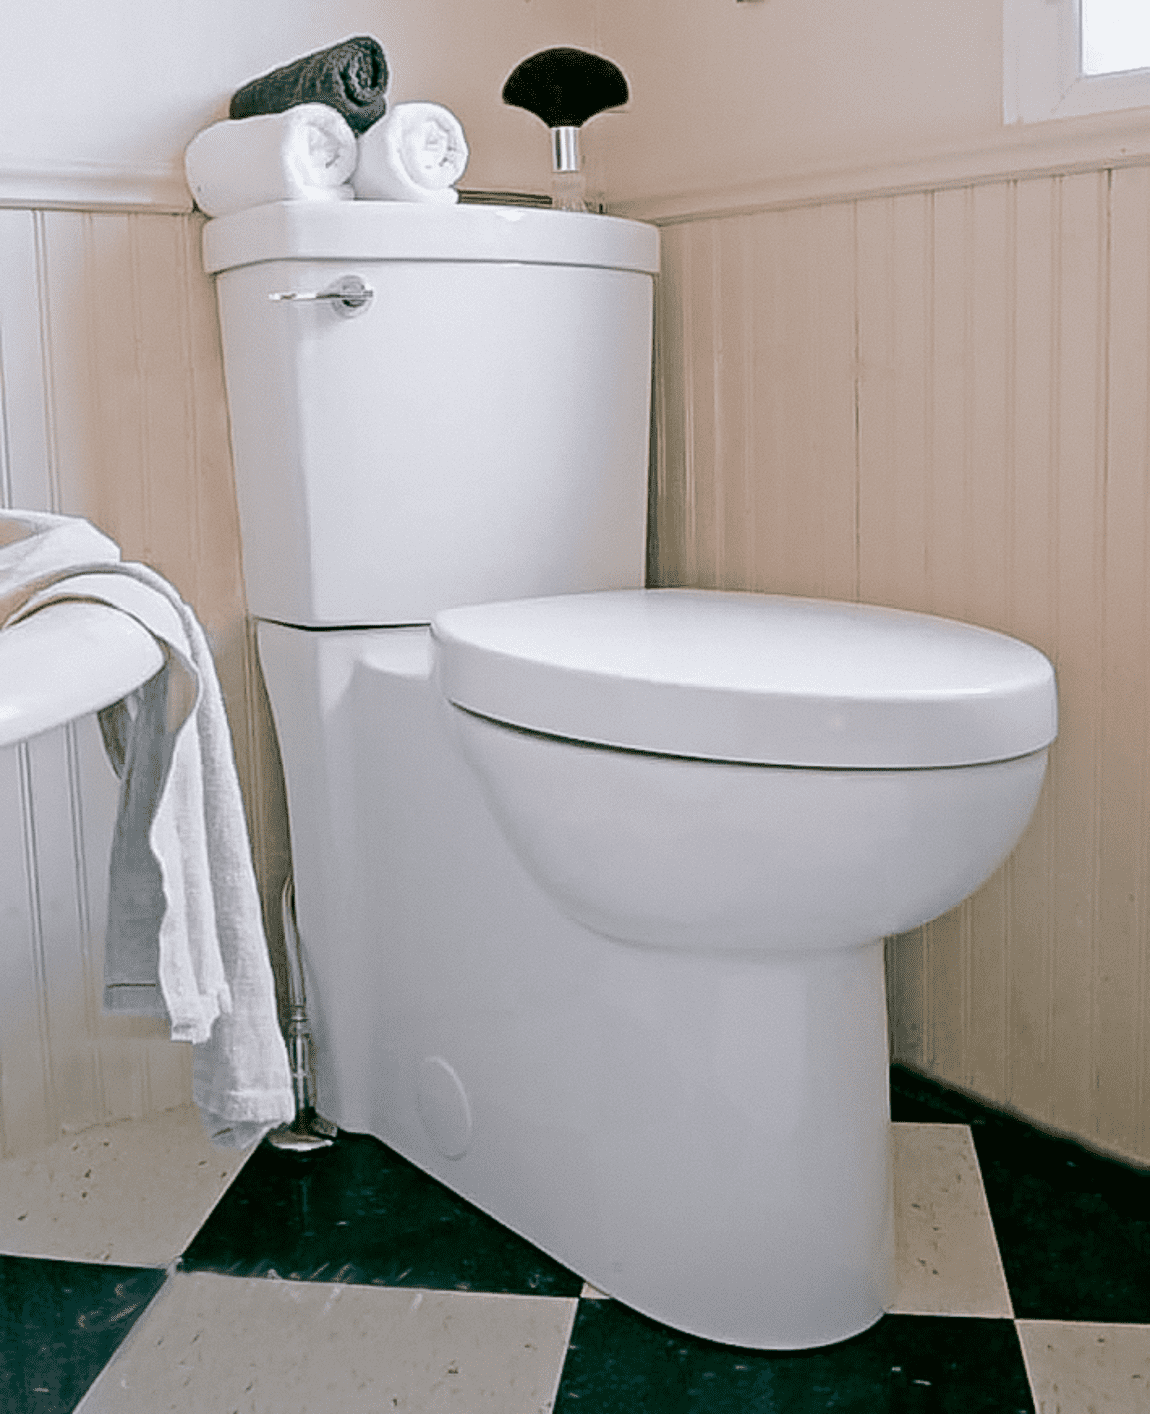
5. If you hate looking at the side of a toilet that looks like its colon is showing, get a skirted bowl. The "guts" of the toilet are concealed, so the toilet has nice smooth sides that are nicer to look at and easier to clean.
6. The toilet seat is where you'll actually set yourself down on so get a good one. Options are heated seats, bidet seats and slow close (slamless) seats.
The bowl that I went with has a MaP rating of over 1000 (the Cadet). I had NO idea there was such a big difference in toilets and how well they flush. Like I said, I just figured low flow toilets didn't work well. As it turns out, only certain low flow toilets don't work well.
This one works great.
As a general rule it's pretty darn easy. It just looks scary. But it takes time and of course is terrifying because you've never done it before and you're afraid it isn't going to work.
Nope. If you're just removing an old toilet and replacing it with a new one any homeowner can do it themselves.
Most building codes require that toilets be caulked to the floor after installation to help keep the toilet stable and to prevent odour and gases from leaking out of the sewer line.
If your bolts are tightened and everything is set properly but your toilet has a bit of a wobble to it, add shims. They'll stabilize it and prevent it from cracking.
That's really all there is to installing a toilet. Sure something's gonna go wrong. The water line is going to get knocked and spray water everywhere, or you're going to get part of the wax seal in your hair or you'll find out your water supply line is too short for your new toilet and you have to go buy a new one.
But all in all, installing a toilet is really one of the easiest jobs you can do in your home.
And definitely easier than using your neighbour's bathroom every time you have to go because you're too afraid to use your own crappy toilet.
→Follow me on Instagram where I often make a fool of myself←


Karen..... you just rock girl. No other way to say it. I honestly feel like I could do this, if i did not have a handyman husband. Thank ya.
You could absolutely do it and you should try! O.k. well you don't have to try, but there's quite a roaring sense of accomplishment when you instal a toilet yourself. :) ~ karen!
Crazy! Karen I just sent a text to my plumber....we bought an old farmhouse and he is going to inspect all the lines. But you have convinced me after I tile the bathroom, I should try and install the toilet myself!
Disposing of a large heavy chunk of porcelain can seem difficult. Cover it with an old blanket or piece of canvas and beat the crap out of it(no pun intended) with a ball peen hammer! The resulting shards can be easily put in your regular garbage over several weeks.
Nice idea. And I am so in the mood to smash something about now.
After 18 some years of owning one and/or two houses and being too cheap to hire a plumber, I now know far more than I ever wanted to about plumbing. (sh1t runs downhill and payday is on Friday is my previous understanding of that field).
I have now replaced at least 8 toilets. (Don't ask)
I am always doing it by myself because I am too manly too ask for help, especially of my wife. So I have lugged several 80 lb toilets up the stairs and down the hall. (fortunately lugging the old one DOWN the stairs is easier, except for the unpleasant brown sludge that runs down my legs.)
The first half dozen or so, I dutifully replaced the nasty gooey wax ring with a brand new nasty gooey wax ring. I inevitably replaced it with at least three new nasty gooey wax rings, because trying to lower an 80 lb toilet precisely over the closet flange(why do they call it that?) in a cramped bathroom,. up against a wall three inches away makes it impossible to see where the toilet is. So I destroy the ;new nasty gooey wax ring the first two or three times before I get it right. I then discovered that they make indestructible foam rubber rings that really work. They work (almost) all the time, unless the location of the closet flange is too high and the foam ring is too thick.
I have now invented a better way of installing a toilet.
1.
Remove toilet.
2.
Clean old nasty gooey wax ring off of bottom of old toilet, or take shinny new toilet out of box.
3.
Clean closet flange/drain to remove all of the old nasty gooey wax ring remains.
4.
Place mounting bolts in keyhole slots. It helps to wedge them in place with old wax, paper towels or anything that keeps them from moving around. (If they shift and don't lock in place, you will have to pull the toilet back out and redo)
5.
Put a stack of wooden planks 1/2 to 1/4 inch thick on either sides of the bolts.
6.
Place the wax ring on the closet/drain.
7.
Pick up the toilet and move over the drain, place it on the stacks of planks.
8.
Nudge the toilet around until the bolt holes are directly over the bolts.
9.
One by one, remove the shim boards alternately, allowing the toilet to drop down over the bolts.
10.
When all the planks are removed, the toilet should have dropped over the bolts and squished the wax ring.
11.
Install the nuts on the bolts.
12.
Squeeze a bead of caulking around the edge of the toilet at floor level. Do not use too much. If the toilet is glued to well to the floor, the next removal(it WILL happen someday!) will damage the floor. Plain old cheap caulking will suffice.
13.
Open an ice cold beer and celebrate.
Having a video really helps with getting a visual in things, absolutely love it. That is a proper way of DIY toilet replacement/installation with flying colors. Thanks for sharing Karen
Love your concise post. It sure helps me a lot. Especially your writing skill. It amazes me.
Another curiosity, ok nosey, question . . . what brand o' toilet did they talk you out of at the store? And thanks a lot for all the helpful info. There's soooo much stuff out there, my head may explode.
Thank you so much for your post. I have been looking into toilets for my hallway bathroom, as I will be replacing it once I'm done with the tile and grout around my tub. That project started about 7 months ago, until I was interrupted with finding out I had cancer n going through chemo, and radiation, and now waiting for my body to get back to some kind of normal where I'm not out of breath from tasks that used to be so simple. We had an elongated toilet ? put in our bedroom bathrm a few yrs ago, and Alto it is a great flusher, I'm barely 5'3" and I'm not comfy on my tippy toes. So your recommendations were fantastic to see.
I'm a diyer, you name it, I've probably done it. I enjoy doing things myself for one, I know I'm not getting ripped off, and two, I know its done correctly. Thanks for great post and great video!
Oh, you're welcome Jane! It's really a fun job but oh so impressive, lol. So sorry about your fight. Cancer is a real asshead and I'm glad you're showing it whose boss. ~ karen!
Grams per flush was the catch phrase used when we bought toilets for our cottage. American Standard Cadets were what we bought. They flush like a dream!
I work in a big box store in the kitchen and bath dept. One hundred percent right on Cadet toilets. We see the Cadet and American Standard Champion being the toilets preferred by plumbers. And women in particular light up at the sight of an enclosed trap- especially great in tight areas. Another trick is using a product to turn the water in the trap to gel so you don't wear the water during removal.
I'm bookmarking your post for customers and definitely using the to in the hole trick- genius!
Also don't forget to measure your rough-in which is the distance from wall to bolts. Getting the toilet up two flights of stairs, unpacking, and finding its the wrong size sucks!
Thanks Alex! Glad you liked the post. :) ~ karen!
Bravo! I wish I could do these things but I have really bad knees so can't squat or sit on my knees at all. I'll be calling a plumber!
awesome sauce !!!! really cool video, thanks for that.
saaaaay, is there a reason you stuffed some Styrofoam into the old tank? i'm really curious bout that.
k, bye
Hi Karin, the tank came like that. It's usually referred to as an insulated tank. Not sure if it's to stop sweating on the outside of the tank or reduce noise or both! ~ karen!
aaaah, i see. thanks.
you make it look so easy and it feels like it's kinda easy.... but then i remember that it took me three trips to the hardware store just to get the right handle for my toilet after it broke....
;0B
Ok, I get why you went with the Cadet tank so why not the whole thing? I've flipped back and forth about 23 times between the two and the bowls look pretty similar except for the seat profile. What am I missing? Besides youth and brains?
Also, if you haven't had a slow close toilet lid and seat before, be careful about folks not realizing that and forcing it closed. We have one that no longer works due to visitors pushing it down (I'm thinking my old Dad but what the heck it's only a toilet seat). Unfortunately, American Standard says they are unrepairable.
good point Jan,
one of our friends manages to slam our slo-mo lid every time, harsh words and twisting ears won't help *rolleyes* some people....
what's equally funny is my husband at his parents or friends house. you hear this might SLAM! once he's done his duty, since he's just so used to just giving the lid a slight push and it's doing its slo-mo thing. cracks me up every time.
Karin
Hah! You're so right Karin! Funny you should mention that, since we have 2 slo-mo seats, one works and one doesn't and I'm the guilty lid slammer!!
OMG! Al Bundy would love this!
I have only installed dishwashers alone so far, which I found very easy, but I would never install a toilet alone: I would let someone help me (you know, with the lifting and positioning on the bolts, etc.) But then again: you are way cooler than me!
It's like you're reading my mind. We are planning on building two new bathrooms in our house in the next 3-6 months. And then quite probably destroying the one we have now. But after a kitchen remodel that meant I had to wash coffee cups in the (terrible) bathroom sink for 4 months, I determined that I would not go any amount of time without a bathroom. So new bathrooms before remodel this time. It may sound weirdly excessive but we have one bathroom upstairs and one toilet on a pedestal in our basement. So, we'll be turning that toilet on a pedestal into a bathroom with a shower before l demo my upstairs nightmare. Thanks for helping me pick out a new toilet or 3!
You must be in Pittsburgh! The famous Pittsburgh Potty in the basement. Some of the older homes here were built with only the one toilet - in the basement - and lots of folks raised families who all had to run downstairs to pee!
Small suggestion: in the list before the video, you left out the step to disconnect the water supply.
Wow I need this info thank Karen!
We are diy people have properties i. Florida woodedretreats.com. Our website doesn't have the most recent property the H20 island house but you can see it at homeaway.
Sitting in a a chair at H2o island house now just finished putting shiplap in one of the bathrooms. 7 hours later and enjoying an adult beverage which is greatly deserved. Easy pissy.....ha!
Fun stuff. I have to ask when are you coming to Florida? Seems like the rest of Canada is here. Which I love by the way! Hopefully I can get time to email you other pics not taking your blog real estate...or does it matter?
Wow...I seriously want to be you when I grow up...
When I was little I would watch my dad change the toilet. I always thought the wax seal was a clump of poo and that was why he was fixing it. Thank you for the memory. Seriously.
That toilet with the skirt is da- bomb! I hate, hate, hate cleaning the sides of mine. Do you have an opinion on metal bolts-vs-plastic ones for the seat?