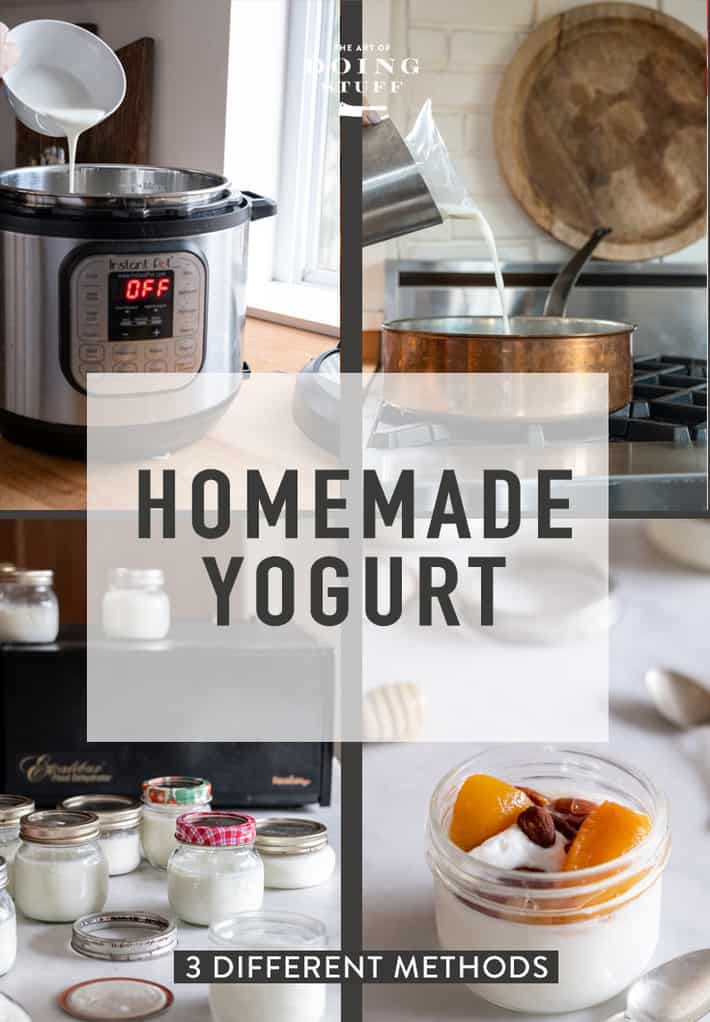
How to make yogurt every which way. Instructions for Instant Pot, stovetop & making yogurt in a dehydrator. And NOPE. This doesn't mean I now like my Instant Pot. Plus a new trick for thickening it that I learned in the past month.

Don't want to read my witty entertaining babbling? Skip right to the recipe.
I started making my own yogurt because of my imaginary world. This is the world many of us let our minds wander to when we should be thinking about insurance rates, mutual funds or other gross things.
In my imaginary world I'm usually at the cottage (that I don't own) and everyone is gathered around when we all realize, much to our horror, that we don't have any butter, or bread or ... in this case ... yogurt. "Everybody calm the hell down.", I say, my arms outstretched, palms facing the ground, in the internationally known gesture of "calm the hell down". "We have whipping cream, flour, yeast and milk. We've got this."
Butter as you know is made by shaking whipping cream.
Bread is made with flour, water, salt and yeast.
And Yogurt ... is made with milk. (And a little bit of yogurt. But that ruins imaginary world where I miraculously produce yogurt with just milk. So.)
Therefore years ago I started making my own so if I ever own a cottage and am ever stranded there with a group of starved people that I need to impress, I will be able to impress them.

Table of Contents
Yogurt Facts that'll make your head spin
(not really, it's remarkably dull actually)
- You can use whole, 2%, 1% or skim milk. The higher the fat percentage the more calories.
- Do not use ultra pasteurized milk.
- To "activate" your yogurt, you need 2 Tablespoons of plain yogurt with active cultures. Just look for the words probiotic or active cultures. Some people have had success using sour cream in a pinch as an activator/starter.
So the Instant Pot. The gadget I love to hate. There are two things it can do well. Make a small batch of chili and make yogurt. It's more complicated than just doing it on the stove. But it does work and has some pros to it.
However, I know a lot of you love your Instant Pots so I thought I'd better show you how to make it in the Instant Pot because 1) the instructions that come with the Instant Pot for almost everything are useless and 2) even online instructions for making yogurt in it don't cover the little things.
If you INSIST on buying an Instant Pot, even if you're only cooking for one, make sure you get one that's at least 6 quarts.
The process is the same no matter what you're using to make it.
The Basic Process
- Heat milk (to 180°F)
- Cool milk (to 115°F)
- Add starter culture (yogurt)
- Keep at 115°F (for 8 hours)
Here's how to accomplish that with an Instant Pot.
Instant Pot Method

THE HEATING PHASE
- Pour 2 litres (½ gallon) of milk into the inner pot. I use 1% but you can use any kind.
- Lock the lid on.
- Turn the vent to "sealing". (although I've forgotten this step before and my yogurt still turned out fine.)
- Press "Yogurt" button then,
- Press "Adjust" button. The light will switch to "more" and the word "boil" will show up.
- Wait. The Instant Pot does its thing for 35-40 minutes, heating the milk to 180° F.
- "Yogt" will show up on the display when it's done.
- Remove the lid. CHECK THE TEMPERATURE. After this part is done my yogurt is NEVER at 180° F. It gets to 175. So I put the lid on and restart the process of hitting "Yogurt" then "Adjust" to boil again until it registers as being 180° F.
- NEW TRICK below ⇓ (I learned this from Team Yogurt)
- Keep the yogurt at 180° F for 5 minutes. To do this, Press "Yogurt" then "Adjust" again. This will keep the unit warm enough to keep the yogurt at 180° F. Leave it like this for 5 minutes. Don't put the lid back on. (doing this helps to make it thicker)
- Press "Cancel" at the end of 5 minutes.

THE COOLING PHASE
-
Unplug the Instant Pot. Remove the inner pot and either let it rest on the counter until the temperature drops down to 115° F, OR put the pot in a cold water bath in your sink. This speeds up the cooling time a LOT. (instead of taking half an hour it will only take a few minutes, so keep an eye on it)
THE INOCULATION PHASE
- Put 2 tablespoons of yogurt (with active cultures) into a bowl and then temper it with a ladle of the hot milk and stir. This just makes it easier to disperse the yogurt through the entire pot.
- Pour bowl of yogurt/milk mixture into the inner pot of the Instant Pot and stir.
- Set the inner pot back into the unit.
THE INCUBATION PHASE
- Push the Yogurt button. Add or subtract with the (+) key until you reach a minimum of 8 hours. You can also let it go for 11 hours for tangier yogurt. You can even let it go longer than 11 hours for tangier yogurt. I often incubate my yogurt for 12 hours or more.
- At the end of your cycle "Yogt" will appear on the display and it's done.
- Pour off the whey from the top (or scoop it out with a spoon) and put the yogurt in mason jars or other glass containers.
** For extra thick Greek yogurt, strain the yogurt as shown in the straining method below.

Making it on the stovetop is simpler and has FAR fewer steps.
Stovetop Method
- Heat 2 litres (½ gallon) of milk in a pot on the stove until it reaches 180° F.
- Turn the heat off, put the lid on and let it sit for 5 minutes.
- Cool the milk to 115°F on the counter or in a cool water bath in the sink.
- Mix together some hot milk with 2 Tablespoons of yogurt to thin the yogurt then add the mixture to the rest of the hot milk. Stir.
- Pour into a good thermos (one that will retain the heat) and wait 8-11 hours. (or follow Dehydrator instructions)
**If you don't have a thermos then pour the hot milk into mason jars and store them in a good quality cooler wrapped in towels for 8-11 hours.


Yup. That's it. In my opinion this is much easier and faster than fiddling with the erratic behaviour of an Instant Pot.
Would you like to save this stuff?
The drawback is if you forget your milk on the stove while heating it, it can boil over.
Dehydrator Method
To make yogurt in a dehydrator, you're not really using the dehydrator for anything other than holding the yogurt at temperature.
Follow the stove top method up until the part where you hold the yogurt at 115°F for 8-11 hours. Instead of putting it in a cooler or thermos you can hold it at temperature perfectly with your dehydrator.
- Follow steps 1-4 for stovetop yogurt.
- Turn the dehydrator on and set it to 115°F
- Pour hot milk into glass mason jars. Screw on lids.
- Remove trays from dehydrator and place the jars inside.
- Set the dehydrator timer (if it has one) for 8-11 hours.
Straining to Thicken
- Dump your incubated yogurt into a sieve lined with cheese cloth or a flour sack tea towel set over a bowl or pot.
- Let drain for up to an hour or until it has reached the consistency you like.
- After 1 hour around 4 cups of whey will have drained away, leaving you with 4 cups of Greek yogurt.
When the process has finished its 8 hours of incubating it will have a lot of whey in it. That's the liquid stuff you see on top of yogurt or sour cream that you buy at the store sometimes.
Straining willt get rid of most of the whey resulting in a thicker, higher calorie yogurt. If you like it thinner you don't need to strain; just pour off the bit of whey on top and you're good.
YIELD: NOT STRAINING VS STRAINING
- Unstrained yogurt will get you the same amount of yogurt as milk used. 8 cups of milk will result in 8 cups of yogurt!
- Strained yogurt will get you thicker yogurt, but less yield. 8 cups of milk will result in 4 cups of greek yogurt.*
*the exact yield depends on how long you strain it and how much whey you remove.

Unstrained has a similar consistency to a very soft jello.
Straining is how you get that thick, Greek style yogurt.

Strained is so thick it will sit high on the spoon and even stick to it when you turn the spoon over.

I love a big spoonful of plain, tart Greek yogurt, but there are times I want to have something a little more dessert or breakfast like. THOSE are the times for toppings.

Topping Ideas
- Jam (Strawberry, raspberry, apricot etc. etc.)
- Nuts
- Granola
- Canned fruit
- Chia seeds
- Bananas
- Coconut Flakes
- Chocolate Chips
- Cocoa powder
- Honey
- Maple Syrup
- Cinnamon
- Nutmeg
- Poppyseeds
- Orange slices
- Mashed sweet potato
- Lemon zest
- Brown sugar
- Apple sauce
- Cookie crumbs

How to make Yogurt.
Ingredients
- 2 litres milk (whole, 2%, 1% or skim)
- 2 tablespoon active yogurt plain
Instructions
Instant Pot Yogurt
- Pour 2 litres (½ gallon) of milk into the inner pot. I use 1% but you can use any kind.
- Lock the lid on.
- Turn the vent to "sealing". (although I've forgotten this step before and my yogurt still turned out fine.)
- Press "Yogurt" button then,
- Press "Adjust" button. The light will switch to "more" and the word "boil" will show up.
- Wait. The Instant Pot does its thing for 35-40 minutes, heating the milk to 180° F.
- "Yogt" will show up on the display when it's done.
- Remove the lid. CHECK THE TEMPERATURE. After this part is done my yogurt is NEVER at 180° F. It gets to 175. So I put the lid on and restart the process of hitting "Yogurt" then "Adjust" to boil again until the yogurt registers as being 180° F.
- Keep the yogurt at 180° F for 5 minutes. To do this, Press "Yogurt" then "Adjust" again. This will keep the unit warm enough to keep the yogurt at 180° F. Leave it like this for 5 minutes. Don't put the lid back on.
- Press "Cancel" at the end of 5 minutes.
- Unplug the Instant Pot. Remove the inner pot and either let it rest on the counter until the temperature drops down to 115° F, OR put the pot in a cold water bath in your sink. This speeds up the cooling time a LOT. (instead of taking half an hour it will only take a few minutes, so keep an eye on it)
- Put 2 tablespoons of yogurt (with active cultures) into a bowl and then temper it with a ladle of the hot milk and stir. This just makes it easier to disperse the yogurt through the entire pot.
- Pour bowl of yogurt/milk mixture into the inner pot of the Instant Pot and stir.
- Set the inner pot back into the unit.
- Push the Yogurt button. Add or subtract with the (+) key until you reach a minimum of 8 hours. You can also let it go for 11 hours for tangier yogurt. At the end of your cycle "Yogt" will appear on the display and it's done.
- Pour off the whey from the top (or scoop it out with a spoon) and put the yogurt in mason jars or other glass containers.
Stovetop Yogurt
- Heat your milk in a saucepan over medium heat to 180 F (almost boiling, this happens quickly).
- Remove pan from heat and allow milk to cool to 115 F. This will take around 30 minutes on the counter or a few minutes in a cool water bath in your sink.
- Once the milk is at 115 degrees add some hot milk to a bowl with 2 tablespoons of yogurt in it and incorporate. Add this mixture to your pot of hot milk.
- Now your job is to keep this concoction at 115 degrees for the next 8 hours. There are a few ways to do this.
- Pour your milk mixture into a mason jar (or similar) with lid and place the entire jar into a small cooler filled with warm water. Leave for 8 - 11 hours. OR ...
- Pour your milk mixture into a good thermos, wrap it in a towel and leave it for 8 hours.
- Your yogurt is now done. Store it in glass jars and refrigerate. (If you want you can strain it to make it thicker.) Straining instructions in notes.
Dehydrator Yogurt
- Follow steps 1-3 for stovetop yogurt.
- Turn on the dehydrator and set to 115°F.
- Pour yogurt into serving sized mason jars for convenience (or use full sized mason jars).
- Set the jars into the dehydrator and allow to incubate for 8-11 hours.
Notes
- The longer you let the yogurt incubate the more tart it will be.
- 2 litres of milk will make 8 cups of yogurt.
- For extra thick Greek yogurt, strain the yogurt after it has set by pouring it into a cheesecloth lined sieve over a bowl. In about an hour 4 cups of whey will have drained out leaving you with an incredibly thick remaining 4 cups of yogurt.
- If your oven goes as low as 115°F then you can set the jars of yogurt in the oven for 8-11 hours as well to incubate it.
Nutrition
How healthy is homemade yogurt?
Really good natural yogurt is way more accessible now than it ever was. There was a time that the only yogurt you could buy was yogurt with premixed fruit and about a pound of sugar per serving.
Homemade has no sugar and no additives. Adding these two things will decrease the health benefits of this lively culture.
Homemade concoctions can be sweetened with honey, maple syrup or agave and you can add fresh fruit like peaches or strawberries as well.
By making your own you're controlling what milk it is you use to create it. Even some of the best brands of yogurt don't use the best milk and often come from cows that have been fed grain (GMO corn or soy). That means when you get that store bought healthy seeming yogurt you're actually consuming GMOs through the milk of the cow. If that's the sort of thing that worries you then homemade really is your best choice.
THOUGHTS ON WHICH IS THE BEST WAY
If I were in some sort of battle that required I choose only ONE method to make yogurt for the rest of my life what would it be?
A combination of the stovetop method for the initial heating and cooling and then finishing it in a dehydrator.


Deni
Delicious and quick. Recommend using an Instant Pot.
Osasuyi
Hello Karen, thank you very much for the tutorial i am really great full
Jackie Spence
Hi Karen
Im not sure that you're going to use the instapot for yogurt ever again, but like you, mine beeps at about 170degrees. I don't press boil again, instead I put it on saute, and stir regularly until it's up to temp. Usually only 2 minutes.
Maureen A
This is awesome. My son and I had been talking just a week or so ago about making yogurt! Printing this out to have some fun.
Karen
Enjoy! ~ karen
Sandra Blackwell
I make yogurt pretty regularly on my stove. Once it reached 180 i put it in the sink with ice water, cause I am impatient. Once I have mixed my starter yogurt in, I stick it in the oven, that I may or may not have heated a little bit then turned off. In the morning I have yogurt. I don't hold it at temp for 8 hours.
Karen
Well, you kind of hold it at temp for 8 hours because you're putting it in the oven. Even being in the oven is insulating it some and maintaining the heat of it. By not keeping it at 115 degrees you just aren't getting a proper thick yogurt. 115 (or thereabouts) is the temperature at which the bacterias that ferment the milk are activated. The closer this temperate that you keep it the better the yogurt is. And the longer you keep it at that temperature the tangier it gets. But if you like your yogurt (and I'm betting you do) then keep on doing it that way! ~ karen!
Erin
Hi Karen, thanks for these instructions!
It seems like you're using store-bought milk, as am I. But since store-bought in Ont is always already pasteurized, why do we need to pasteurize it again before cooling to 115 degrees & adding the yogurt starter? 🤔
Thanks again!
Sarah
I love making yogurt in my big dehydrator - have been for years. Friends thought it was silly but it works great! In the summer it can set outside on the porch. You did clear up a few points I always waffle about. Thanks! I may give some of that cheese making a try some day.
Tzatziki tip; remove the seeds then grate and drain those cukes for more cucumber flavor (some recipes say to just chop the cucumber but that method leaves too much fluid). We eat a lot of tzatziki in the summer.
Susan Alexander
What a wonderful post!
Loved the detailed instructions...loved the different methods offered...loved the pictures!
Damn....this was an excellent post!
Plus, all the comments were excellent, as well!!
The "Karen" community is a basketfull of wonderful individuals with the same terrific sense of humor...really, really.
Have to save this entire post...thanks to all of you,one way or another, I'll be making yogurt during the Nascar race this Sunday, for sure!
Hugs!
Karen
Thanks Susan! Yep. It has turned into quite a community here. :) ~ karen!
Lesley
Dear Karen,
Have you ever tried kefir? Not the store stuff(it is super bland and full of extra weird ingredients), but real, made-it-on-the-counter kefir? It's like a thinner, drinkable yogurt, great for smoothies, and has an even broader range of probiotics. And....it likes to ferment at room temperature! No muss, no fuss, no IP. You just put the REUSABLE starter "kefir grains" (not grains, but a type of SCOBY) in milk, and leave it out on the counter for about a day.
Karen
I have but I have this thing about drinkable yogurt, lol. (oh! sorry, i haven't had homemade kefir, just store bought) I've never bothered to make it because it's really the superthick Greek yogurt that I love. Although anything that *doesn't* involve an instant pot is great with me. ;) ~ karen!
Kim
I make yogurt in my Instant Pot almost weekly and have a few variations in technique:
To make it easy to have the 2 tablespoons of "seed" yogurt on hand, I buy a big container of plain Greek yogurt with active cultures and spoon it into ice cube trays, freeze, then pop the yogurt cubes into a zippy bag and put in the freezer. The night before I am making yogurt, I take one yogurt cube out and put it into a very small mason jar and put in the fridge. When it comes time to temper, I spoon a couple of tablespoons of the hot milk into the jar, whisk with a small whisk then stir it into the big pot of milk. In a pinch, you can use your home-made yogurt as the next seed yogurt, but I have found that each batch gets a little thinner so I prefer the above method.
Instead of 2 quarts (litres), I use three, still using two tablespoons of "seed" yogurt. My preference is 2% milk but have tried them all and they all work.
Stirring the milk occasionally during the heating phase will help it heat faster, but if it hasn't reached 180F after the 'boil' cycle ends, I simply turn the Instant Pot to sauté on low for a few minutes, stirring after a couple of minutes. This heats it quickly (less than five minutes or so). Generally, it takes about an hour it heat it. I set a timer on my phone for the heating and cooling phases.
To cool down the milk, I put the pot into a sink full of cold tap water, filled to the yogurt line on the pot. I used to add ice cubes to the water but didn't find it made that much difference in the time it took to cool. It cools in 20 minutes or less in cold tap water.
To make Greek yogurt (strain it), I use a cotton tea towel set over a big strainer over a big salad bowl. I leave it overnight in the fridge. It drains off so much whey that even lactose intolerant people usually have no problem digesting it. I use a ladle and canning jar funnel to pour it into mason jars. It stores for up to two weeks in the fridge and is super creamy and yummy. Since I strain so much whey out of it, I get about two large and one smaller mason jar. YMMV.
Once you've done it a few times, it's so easy peasy.
Jane
I've been making my own kefir and yogurt for more than a decade now. It started because I wanted them made with skim milk. As I'm ultra lazy, I bought cultures for certain types of Scandinavian yogurt that do not require all the heating and cooling. Just add the culture to milk (straight from the fridge) in a jar (I use glass, but it can be anything), cover the top with a coffee filter (to keep out flying critters), and let sit in room temperature (out of direct sun) for 12-24 hours (depending on how warm the room is and how much culture is in the jar). Make sure you keep some to make the next batch before eating it all.
Katt Hunsaker
Oh thank you, Jesus, that I am not the only one that isn't in love with their instapot. Saute in it, they must be joking
Karen
I personally feel like it's ridiculous but a LOT of people love it beyond belief. There must be something magical about it that you and I just don't get, lol. ~ karen!
Catt-in-KY
Karen, thank you for this wonderful post on yogurt making. My friend makes hers in a crock pot and loves the results. Here is an amazing article about making yogurt in a crock pot (slow cooker), all the ways to use the left over whey, etc.
https://www.daringgourmet.com/easy-homemade-greek-yogurt/
ecoteri
well, I hadn't made yogurt in a while, but I got my dehydrators (yes, plural) down to do some pineapple that was on sale, and decided to make some yogurt the way I do, in the dehydrator - whisk about 250 mil of yogurt with about a cup of milk until it is smooth. pour it into a big 2 litre jar, fill the jar with milk (all of this cold, mind you, just out of the fridge). put the lid on, put the jar in the dehydrator, set it for the yogurt setting, and forget it for about 12 or 16 hours. put in fridge to thicken, then carefully spoon/pour into a sieve and let drain for however impatiently long you want. you should end up with about a litre of yogurt and a litre of whey. Whey is a great substitute for water when making waffles - top the waffles with yogurt, applesauce and maple syrup. YUM.
Wilma
A giant spoonful of Meyer lemon curd is so good with a small serving thick whole milk yoghurt.
Karen
I bet it is! ~ karen!
june
I came here to say the exact same thing. Heaven!
Personally the best way to enjoy it is put the lemon curd on the side and give each spoonful of yogurt a tiny dip into the lemony goodness. Don't mix them!
K
Hello, Karen, I enjoyed your post! :) And, not to be a know-it-all either, something I JUST learned from reading "Gut and Psychology Syndrome" by Dr. Natasha Campbell-McBride MD, is that yogurt should be fermented for at least 24 hours (pg 218). Also, if you can possibly use raw milk, it is far and away better, and does not need to be heated to a high temperature as with pasteurized milk. There are whole books written on why raw milk from healthy pastured animals is good and pasteurized is not. Above and beyond the health aspect of products from pastured animals, I could go into a rendition on the horrendous conditions animals endure in commercial animal treatment (concentrated animal feeding operation, CAFO) over humane treatment, but that is more than you want to hear. I love my really healthy homemade raw yogurt! If you can possibly obtain raw milk, I hope you will try it. Either way, please at least think about fermenting yogurt longer for better probiotics. :) I lift a beautiful glass of yogurt to your health! :)
Tina
I have been making yogurt for years. A gallon at a time. Used to keep it warm by setting slow cooker on warm, Inverting a steamer basic in the base and setting the crock on top of that. Now I put in in my bread riser(more control over temp). I recently started using raw milk but am afraid that heating it to 180 will destroy the good natural probiotics I want to keep. Any info on that? What is the reason for heating to 180?
tonya
made yogurt for the 1st time saturday. it was wonderful. ready 2 eat by supper sunday. hubby can not stand yogurt. i whined and pestered him into trying a bite. he had 2 helpings!! i got up monday after he had left for work- he had finished off the rest. so made 4 pints tonite. it's all cozy and incubating in the kitchen right now. hope he leaves me some. making yogurt is going to be a regular part of my life now.
Karen
It's great isn't it?! I'm making some tomorrow. :) ~ karen!
unicorn
how long dose it keep
Marna
I use to make yogurt about 40 years ago, maybe more. My husband didn't like it, but I did try to make cheese out of it, it was more like cream cheese. I experimented with different herbs and spices. I ate it and like it. Once I had children I didn't really have time to do it. I will have to try it again, thanks.