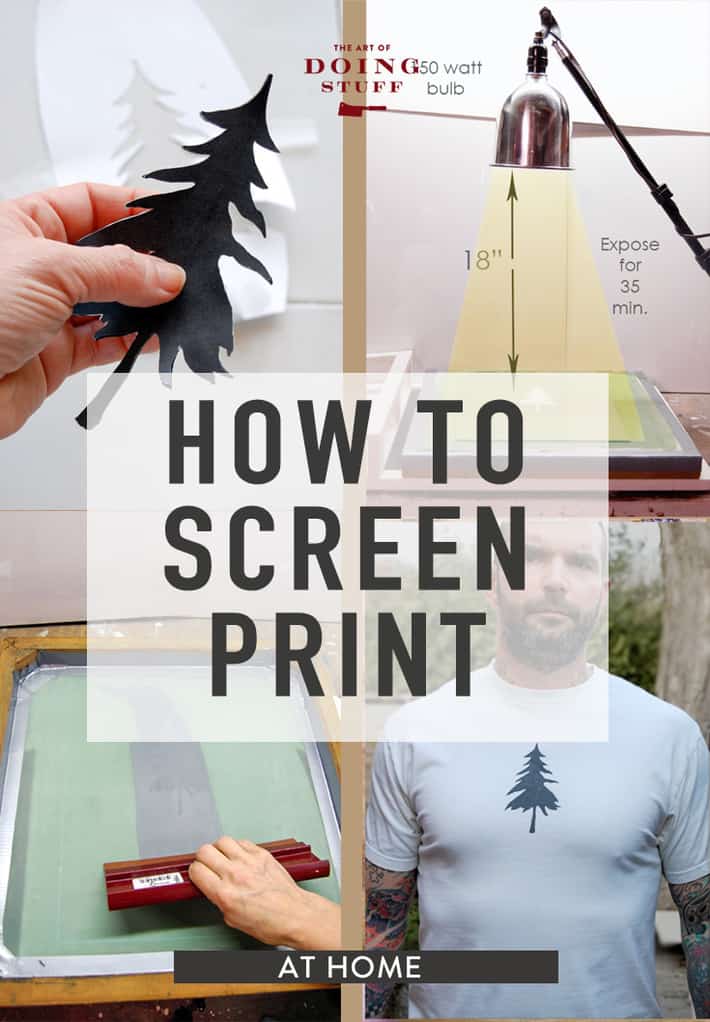
Screen printing at home isn't as hard as you might think. If super-high hippies can do it then you can too. It's an easy technique, and kind of the gold standard of DIY.

You want to try screen printing. Or at least see how hard it is. Rest easy.
As long as you have a 250v generator and a counterfeiting machine in your house you'll be good to go.
Just kidding. You will need a few things though like a screen, fabric paint, emulsion ... it's all in the post.
I've printed onto tee shirt blanks, flour sack tea towels, and even wood over the years and you can too.
How to Screen Print at Home

In this how-to I'm going to show you:
- How to make your own screen printing frame.
- How to burn an image onto your frame.
- How to use your frames to screen print on any fabric.
Table of Contents
The Basics of How To Do it
Screen printing is a series of steps:
- picking an image
- burning that image onto a framed screen using light sensitive photo emulsion
- finally the actual process of running a squeegee down the screen, pushing ink into the fabric underneath (and running in circles with joy.)
You can make this as DIY as you want. I made everything that I used in this tutorial, but you can make screen printing even easier by buying the things that I made.
Materials
Click below to buy the item. At the bottom of the post there are links to buy an entire Screen Printing Kit which is the most economical way to try this little hobby out.
- Screen printing frame
- photo emulsion
- 150 watt lightbulb (or LED equivalent)
- screen printing squeegee
- printer
- fabric paint (for screen printing)
- 2 pieces of glass (like those from a cheap picture frame)

Pick & Print an Image
These are your basic steps on how to screen print. I'll have a full step by step tutorial at the bottom of the post.

1. Decide on an image you want to print. For this tutorial I'm using a basic tree. For your first screen printing subject try something that's just a silhouette and one colour. Something like my tree or simple lettering is perfect.

2. Print your shape or letters onto a regular piece of paper. You can also print it on transparency paper but that's not necessary until you get to more detailed images. Carefully cut out the image with an Exacto knife.
TIP
When you get into more detailed images you'll want to invest in the transparency paper which you can buy on Amazon or at Staples. The image you print has to be OPAQUE because it needs to block all light from going through it.
If you're unsure as to whether it's dark enough, hold your image up to the light. If light comes through, it isn't dark enough. Either print another copy and double them up on top of each other, or colour in your paper with a black marker.
Make a screen printing frame
Now you need to grab your frame. A screen printing frame is a wood or metal frame with "silk" on it. The silk is actually polyester. I recommend you buy your screen and frame pre-made, but you CAN make your own by stapling "110" polyester mesh to a square wood frame.
You can buy 110 polyester mesh on Amazon or at a craft or art supply store store.
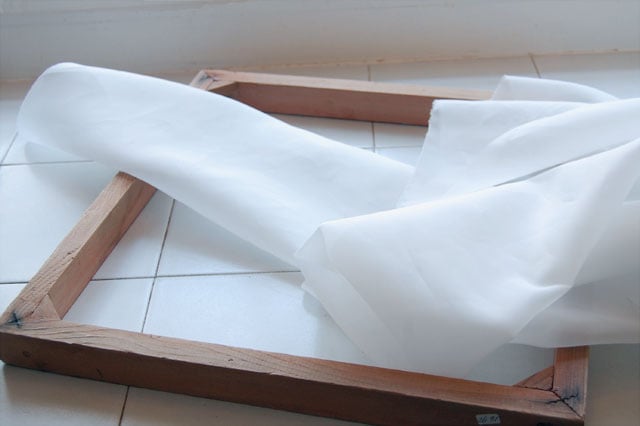
- To make your own screen printing frame screw 2x2's into a frame. It doesn't need to be perfect, just solid and flat. This isn't the time to use up your warped wood.
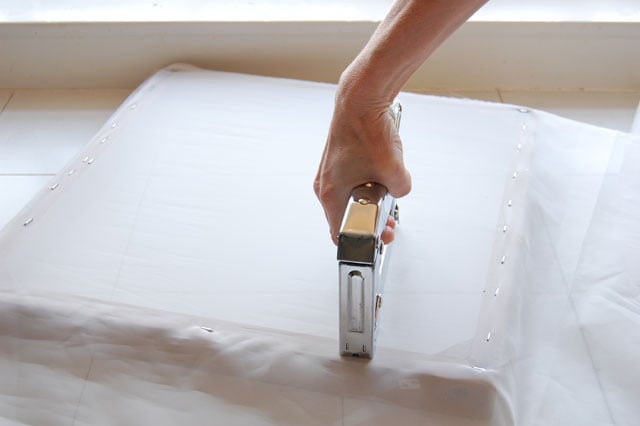
- Then you staple your "silk" onto it so it's very tight.
To apply the silk just use a regular staple gun. Pull it tight, but not so tight that the silk rips through the staples. You can also fold the silk under so it isn't as likely to rip.
Make sure your staples are pressed right in because your screen needs to lay flat when you flip it over. Staples that aren't pushed right in will make the screen wobble.
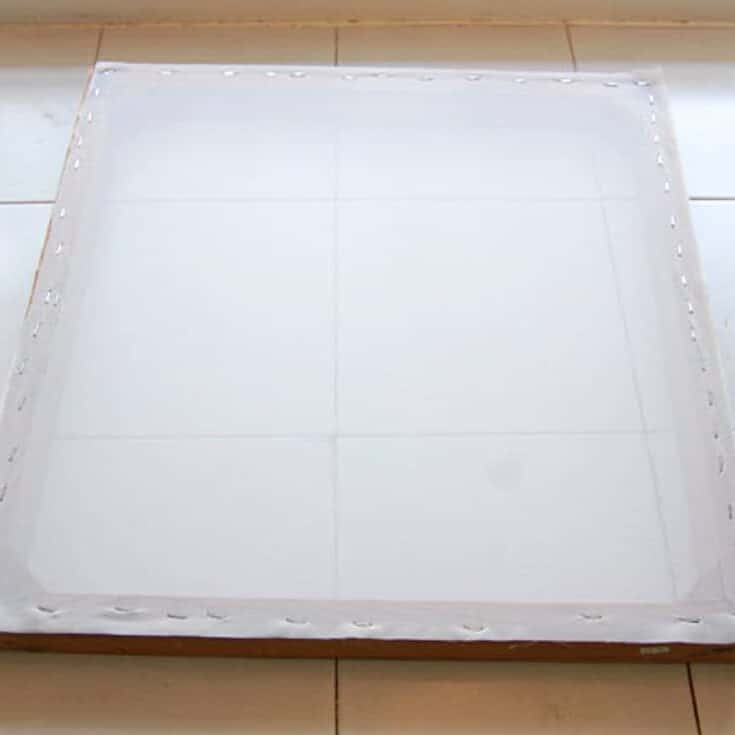
- Once your screen is stapled, trim the edges.
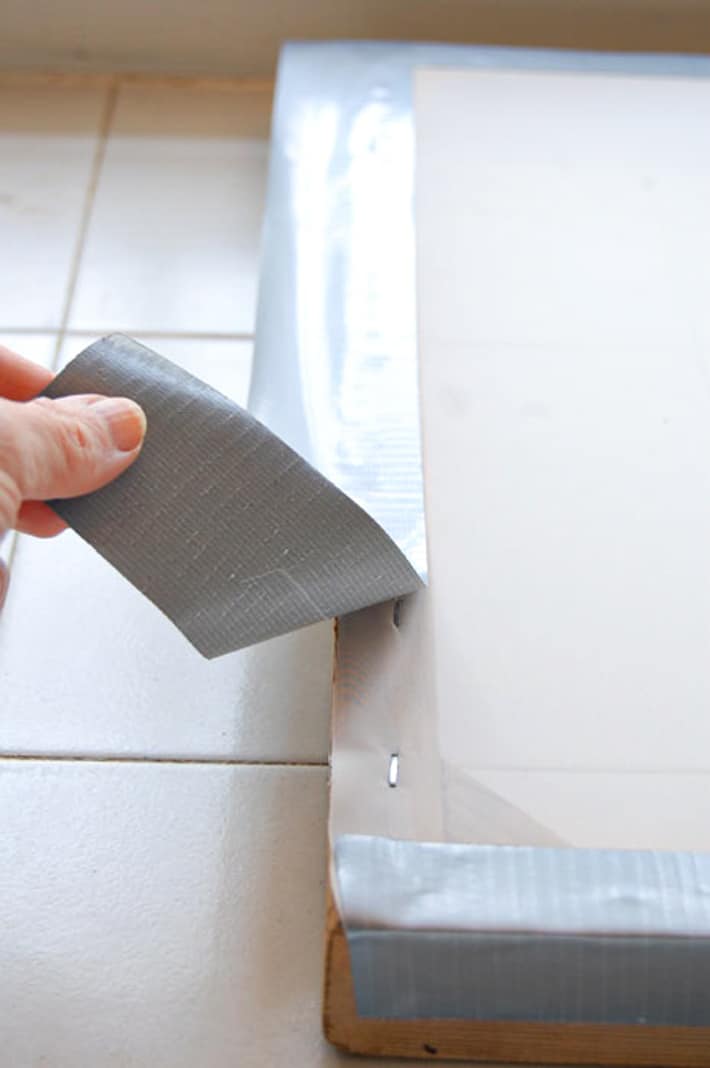
- Tape the outside and inside of the silk so paint can't drip through. USE PAINTER'S TAPE. It's the best choice. I was out and had to use duct tape. (not a great alternative but it will work)
Prepare and Burn Your Screen
Preparing and burning your screen is a 4 step process:
- Painting the screen with emulsion (done in a completely dark room) and letting it dry for a couple of hours.
- Placing your cut out image onto the prepared screen once dry.
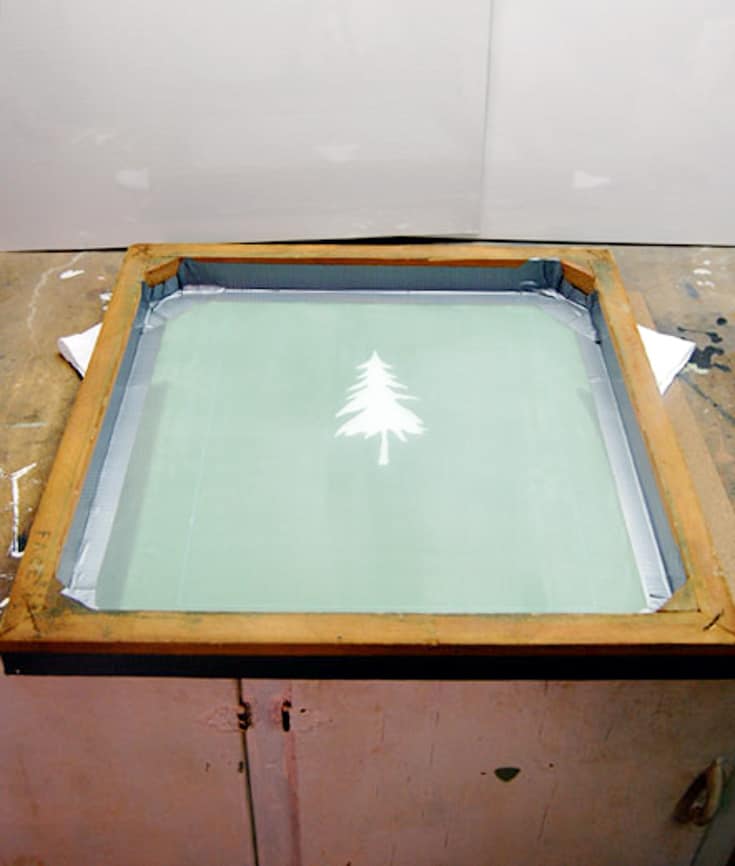
- Turning on a light to cure all of the photo emulsion. The emulsion on the screen that is exposed to light will become permanent. The emulsion that's UNDER the image you printed won't receive any light, and will be washed away at the end of the screen burning.
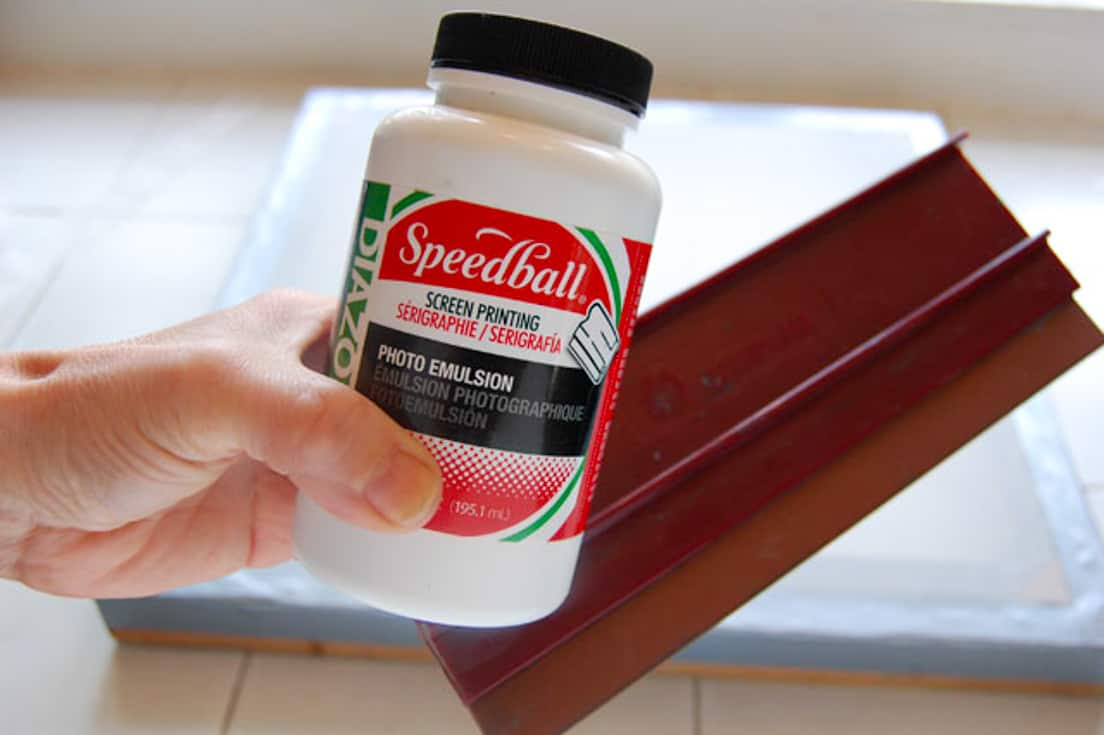
- Get your screen, squeegee and mix your photo emulsion according to the package directions.
(photo emulsion comes in 2 parts, one bottle of emulsion and 1 bottle of activator)
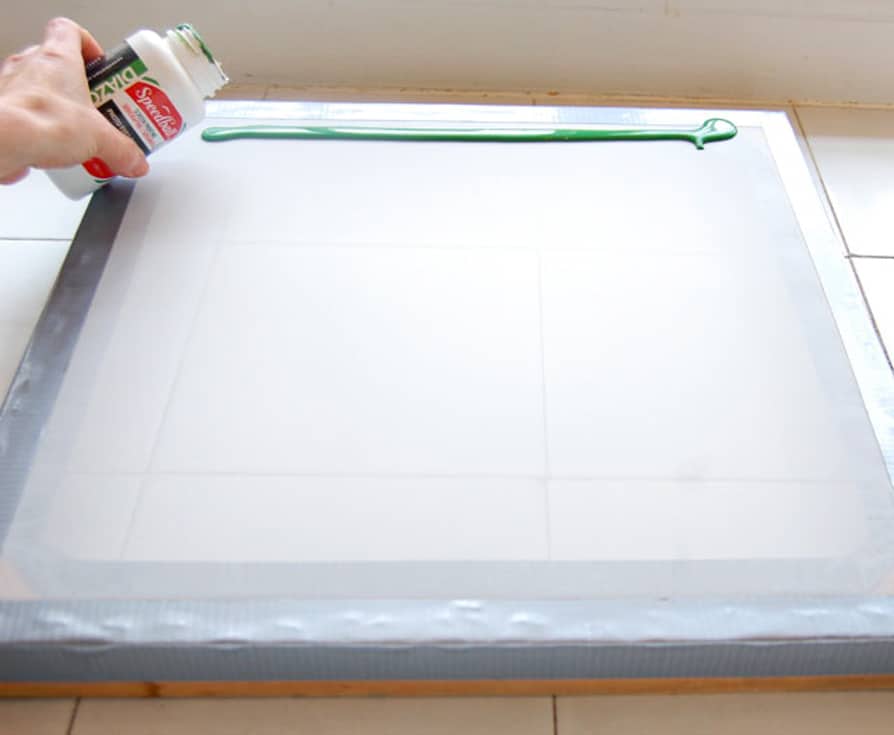
- In a dark room, run a bead of emulsion across the top of your screen.
The photos of the process were taken in a bright room so you can see what I'm doing.
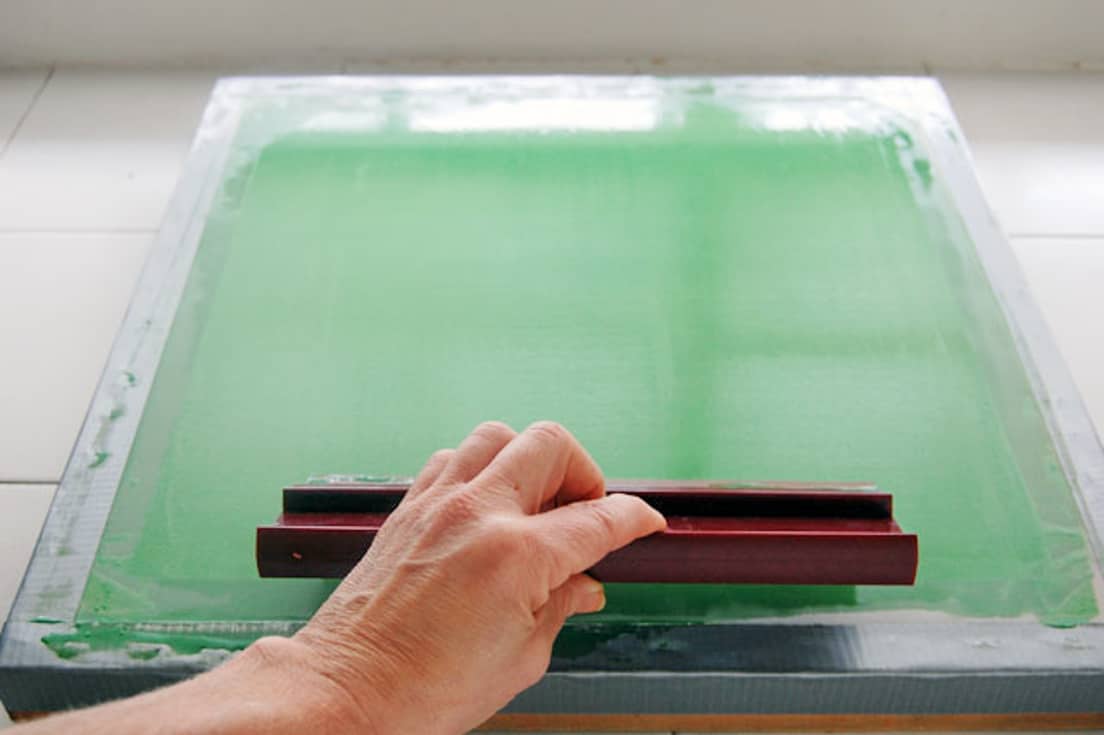
- With your squeegee, draw the emulsion down over the entire screen on both sides. You want the thinnest coat possible. Make sure you have a nice even coat, but work quickly. Do one side, then the other and then immediately put the screen in a dark area to dry.
Work quickly if you're in an area that has light so the emulsion doesn't start to cure. As soon as you have covered the screen get it into a dark room to dry.
WARNING: You need a completely dark room for your screen to dry in. I do my screens in a closet with no windows then I hang a towel on the door so no light can come in any cracks.
- Set the frame down horizontally, not vertically in a completely dark room to dry. Depending on how thin you put your emulsion on, drying will take 1-3 hours.
(update: Since taking an advanced screen printing course I've learned you can also turn a fan on low pointed at the screen to speed the drying time. With a fan it will take around half an hour to dry)
Exposing Your Screen
Once the screen has dried you can now transfer the image you want to screen print onto it. THIS is where people usually get stuck because most tutorials recommend you use a lightbox. You DON'T NEED A LIGHTBOX.
The easiest way for you to expose the screen if you're just starting out is with a 150 watt lightbulb. This can be a regular 150 watt incandescent bulb or a 20 watt LED bulb which is the equivalent.

Your photo emulsion jar will tell you how long you should expose your image depending on the size of your screen. It will also give you the distance your light source should be from your screen.
I've rigged up one of my photography lights to use as my light source. It has a reflector on it, so this helps focus the light where I want it - on the frame, instead of spilling out to the sides.
If you do not have a reflector to concentrate your lightbulb you can either McGyver one out of a tin pie plate, or expose your image for 3 minutes longer.
You also need something that's matte black to put your screen on for the exposure. I've used an old chalkboard. A black piece of cardboard or bristol board would work well too.
1. Place a light with a 150 watt incandescent lightbulb or a 20 watt LED bulb shining down onto a black matte surface. Bristol board would work well.
2. Carry your prepared screen over to your light area. Keep the screen covered with a towel to prevent light from hitting it until the second you're ready to expose it.
3. Place the prepared screen on your black matte background. The "back" of the screen (the non recessed part) will be facing up.
4. Place your cut out (or transfer paper printed) image onto the screen IN REVERSE.
TIP
Hold the image in your hand so you're looking at the image how you want to see it on your tee shirt, then flip it over and place it on the screen.
5. Place a clean piece of glass over the image to hold it tight against the screen.
6. Turn your light on. Expose for the required time.

You'll notice my tree image looks white now. That's because I've flipped it over and the dark portion of it is now touching the screen.
Because of the screen size my image required 35 minutes of exposure with a 150 watt lightbulb set to 18" away from the image. Yours may be different, but if your screen and image are around the same size as mine this exposure time and distance should work for you too.
Set your timer and leave your image alone. Don't push, prod or bother it. Just go away and forget about it.
Once the time is up, remove your glass and paper cutout (or transparency if you're using one). You'll see a faint image right away.
All of the emulsion surrounding your image is now cured hard. The spot where your image covered it up has not been cured and therefore will wash away.

7. Wash your screen with any high pressure tap. Your shower head or outdoor garden hose work well. Spray the screen with luke warm water focusing on the image area. Not hot, not cold.
Just keep spraying and eventually you'll see the image start to appear more and more as the emulsion washes away. You've just made your first silkscreen. You're very impressive. Eat a cookie.

How to Screen Print (the fun part)
NOW IT'S THE FUN PART! You're going to lay your tee shirt (or whatever) out, place your newly burned screen onto it, run a line of paint and squeegee your first item. It's all very exciting.
Video
Since this is your first time and maybe you don't have your technique down perfectly yet, plan to do a few test runs before. Practice over and over on an old tee shirt until you feel like you've got it under control. THEN move onto your real tee shirt.
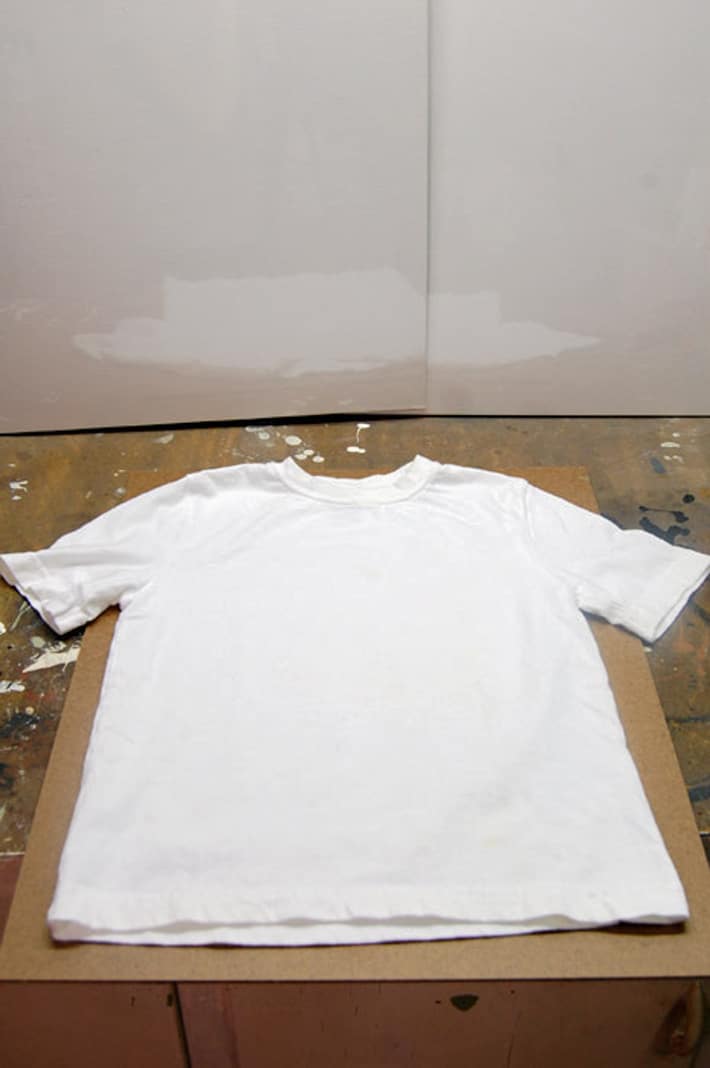
- Lay your tee shirt out and smooth it.
- Put your newly created silk screen over your tee shirt so the recessed side of the screen is facing upwards.
You can see in this photo that I also taped the inside of my screen. That isn't necessary on a store bought screen. I only did it because I had a few gaps.
IMPORTANT TIP - Taping your screen
Before printing, hold your screen up to a light source. If you see any pinholes where emulsion is missing from parts of the screen cover that area with a small piece of tape. Otherwise ink could seep through the hole and

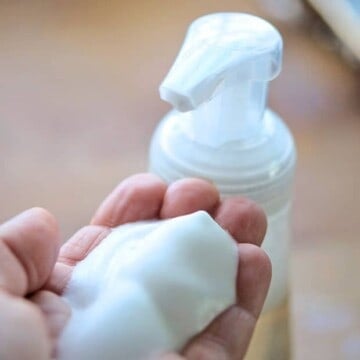
- Run a glug of paint across the top of your screen. My paint/ink is a mix of black and white to make a very, very dark grey. Your paint will dry MUCH darker than it appears when wet.
- Drag the paint over your image with your squeegee without applying pressure . This is called flooding the image.
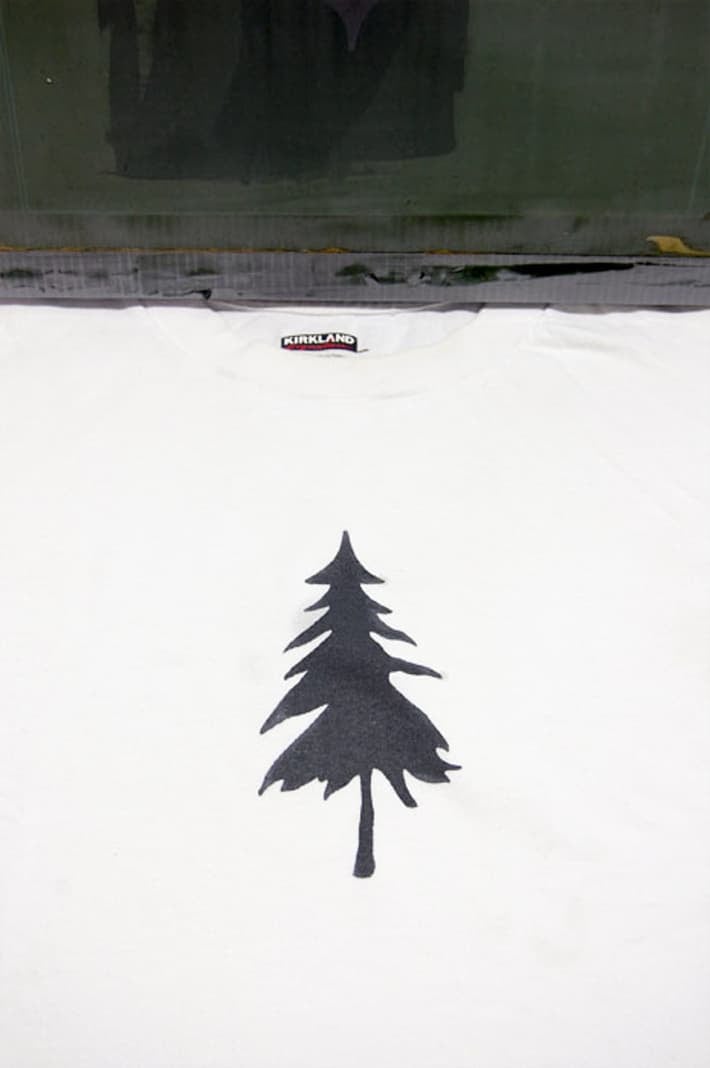
5. Then, going in the same direction, run over the image with the squeegee again with some pressure to push the ink through the screen on to the fabric.

6. You're done! CAREFULLY remove the screen from the tee shirt (it'll stick a little bit) by lifting it up.
7. Hang your piece to dry.
8. When you're done printing all your items, wash your screen right away by running cool water over it.
9. When the ink is very dry, heat set the image by pressing it with a dry iron.
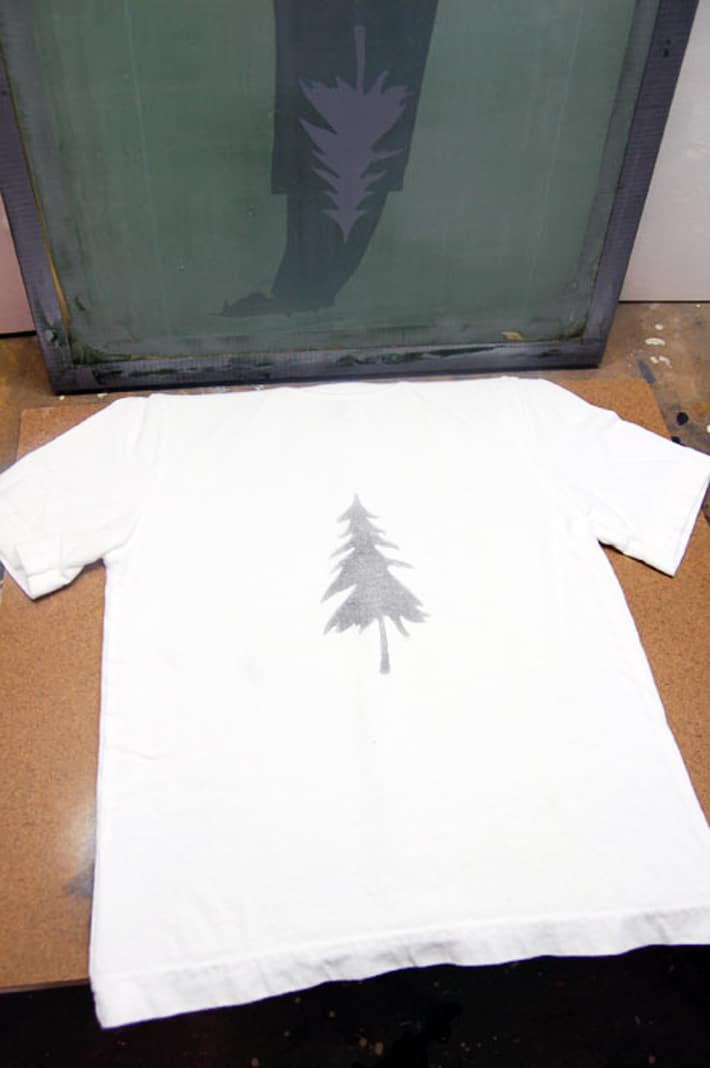
If your print looks faded like this, just add more pressure to your squeegee the next time you print.
More pressure will get you a more solid image.

Here it is in video.
And that's it. How to screen print in 742 steps or less. It really isn't all that difficult and for what it takes in energy it more than gives back in fun.
Much like Dodgeball. Or shoving a lima bean up your friend's nose.

How to Screen Print at Home
Screen Printing tutorial for the beginner.
Materials
- Squeegee – $9
- Photo Emulsion – $10 (good for many, MANY screens)
- Ink – $8.00 (good for many, MANY tee shirts)
- Frame with screen – $20
- 150 watt lightbulb – $3
- Tee shirt - $5
Instructions
PICK AN IMAGE
- Decide on an image you want to print. For this tutorial I’m using a basic tree. For your first screen printing subject try something that’s just a silhouette and one colour. Something like my tree or simple lettering is perfect.
- Print your shape or letters onto a regular piece of paper. You can also print it on transparency paper but that’s not necessary until you get to more detailed images. Carefully cut out the image with an Exacto knife.
- Now you need to grab your frame. A screen printing frame is a wood or metal frame with “silk” on it. The silk is actually polyester. I recommend you buy your screen, but you CAN make your own by stapling “110” polyester mesh to a square wood frame. You can buy 110 polyester mesh on Amazon or at a craft or art supply store store.
MAKING A FRAME
- To make your own screen printing frame screw 2×2’s together like I’ve done below. It doesn’t need to be perfect, just solid and flat. This isn’t the time to use up your warped wood.
- Staple your silk onto the frame with a regular staple gun, so it’s very tight.
- Trim the edges the silk.
- Tape the outside of the silk onto the frame with painter's tape.
COATING WITH PHOTO EMULSION
Mix the 2 parts of the photo emulsion together.
In your dark room, run a bead of emulsion across the top of your screen.- With your squeegee, draw the emulsion down over the entire screen on both sides. You want the thinnest coat possible. Make sure you have a nice even coat, but work quickly. Do one side, then the other and then immediately put the screen in a dark area to dry.
- Set it down horizontally, not vertically. Depending on how thin you put your emulsion on, drying will take 1-3 hours.
EXPOSING YOUR SCREEN
- Place a light with a 150 watt lightbulb shining down onto a black matte surface. Bristol board would work well.
- Carry your dried screen with the emulsion on it over to your light area. Keep the screen covered with a towel to prevent light from hitting it until the second you’re ready to expose it.
- Place the prepared screen on your black matte background. The “back” of the screen (the non recessed part) will be facing up.
- Place your cut out (or transfer paper printed) image onto the screen IN REVERSE.
- Place a clean piece of glass over the image to hold it tight against the screen.
- Turn your light on. Expose for the required time. (instructions for required time will be on your box or bottle of photo emulsion)
- Wash your screen with any high pressure tap. Your shower head or outdoor garden hose work well. You're washing away the emulsion over your image. Use lukewarm water.
PRINTING!
- Lay your tee shirt out and smooth it.
- Put your newly created silk screen over your tee shirt so the recessed side of the screen is facing upwards.
- Run a glug of paint across the top of your screen. My paint/ink is a mix of black and white to make a very, very dark grey. Your paint will dry MUCH darker than it appears when wet.
- Drag the paint over your image with your squeegee without applying pressure . This is called flooding the image.
- Then, going in the same direction, run over the image with the squeegee again with some pressure.
- You’re done! CAREFULLY remove the screen from the tee shirt (it’ll stick a little bit) by lifting it up.
- Hang your piece to dry.
- When you’re done printing all your items, wash your screen right away by running cool water over it.
- When the ink is very dry, heat set the image by pressing it with a dry iron.
Notes
- When you get into more detailed images you’ll want to invest in the transparency paper which you can buy on Amazon or at Staples. The image you print has to be OPAQUE because it needs to block all light from going through it. If you’re unsure as to whether it’s dark enough, hold your image up to the light. If light comes through, it isn’t dark enough. Either print another copy and double them up on top of each other, or colour in your paper with a black marker.
- You’ll have two choices when buying a screen printing frame. Wood, or aluminum. Buy an aluminum frame. They’re only a few more dollars and infinitely better. This is a good, inexpensive starter frame.
- If your print looks faded just add more pressure to your squeegee the next time you print.
IF all this DIY seems like a lot of work you can buy an entire starter screen printing starter kit that includes THE SCREEN, PHOTO EMULSION, FABRIC PAINTS, A SQUEEGEE and more.
The Easiest and Most Economical Way to Start is with a Screen Printing Kit
Get the starter screen printing kit for on Amazon US.
Get the starter screen printing kit for on Amazon in Canada.
If you have any questions feel free to ask me. I probably won't answer them but I might chase you down and shove a lima bean up your nose.
→Follow me on Instagram where I often make a fool of myself←


Hi Karen!!
What a great tutorial! Im looking for supplies locally but having no luck at Michael's, Hobby Lobby or Joann's. Any other ideas?
Thanks!
Hi Chelsea. I'm not sure if you're around a Curry's art supply store but you can get everything you need there. Otherwise you might have to order from Amazon. I've done that in the past when I needed a special paint colour like gold or something. ~ karen!
Hey Karen, I've been wanting to get into screen printing for years and finally find the drive to get started. You mentioned that this method isn't the best for detailed work, any suggestions on what would be better? I'm noticing that most of what I want to print are line drawings. Thank you so much for the great guide!!
I already have some T-shirts that have been printed but not iron set I can't find online with the directions are setting with an iron. You say it's on the bottle but I don't have a bottle I just have the shirts and iron please help
Hi Jessie - Just put a white tea towel or tee shirt over the screen printed area and hold the iron down for several seconds. Do this around the entire print so it all gets set. That's all there is to it! ~ karen
Hello,
Just wondering how you go about doing more than one print do you have to repaint with the photo emulsion where your last image was or do you just go over it with a new image, also are you printing this image with a regular printer? onto regular paper or is there something special?
Thankyou,
Meghan
Hi Meghan. I think I can help you but I need you to clarify a bit. Do you mean how to you reuse your screen for a different image after you've finished printing with your first image? You can use any paper to do the image but it has to be completely opaque so no light can get through it when you're doing your burning. ~ karen!
Hello! I'm about to get the ball rolling with my printing project and had a quick question. I found a speedball video that says to coat both sides of the screen in photo emulsion and you only coat the bottom side, any reason? Thanks for sharing!
what kind of paint you are using for your prints on the clothes?
Hi Vaiva - It's Speedball paint for screenprinting on fabric. If you don't have an art/craft store near you that sells it you can buy it online in about a billion different colours. ~ karen!
Great tutorial. It works like a charm. I am very pleased with my silk screen. Great job.
Thanks for coming back to let me know Linda! I'm glad you did it! ~ karen
Hello,
Great tutorial!!! I was wondering, how many times can you re-use the screen? If i wanted to make multiple shirts would I need to wash the screen between each one?
Thanks!
~Sam
Hi Sam! You can use the screen many, many, many times. Hundreds and hundreds if you are careful about cleaning it. You don't have to wash it in between each tee shirt, but you have to work fairly quickly. No doing a shirt, going for a beer, doing a shirt, going for a beer ... lol. You can do many shirts all in a row as long as the screen stays clean. If you're using the proper pressure then the screen will be completely dry after you pull a print. You only need to wash it if you start getting muddy looking prints, or when you're done and are going to put the screen away. ~ karen!
IPADS Starting at $150, GSA Pricing, Small Business Discounts, Student Discounts, Dell Deals, CISCO Deals and
What if you have an image that has more detail and cutting it out would be a nightmare? Is there a way to skip spending the day with the Exacto knife?
I'm excited to try this! One question: does the room where you expose the screen have to be dark except for the one bright light? Or can you do it in normal lighting with the bright light added?
Good question. :) love to know too
Sorry if you already answered this but what type of ink did you use? It looks very lightweight. Great tutorial!
thank you so much for the insight. i am an artist?designer and decided to look into various Technics i could use to incorporate the art side into my clothes and accessories i make. i often thought it was hard and only some professional geniuses with skills and super powers the common man doesn't have. (me) thank you once again!!1
No problem Tendayl. If you're still intimidated, Speedball makes an entire kit for printing on fabric including everything you need. The paints, screen, squeegee, even the light. ~ karen!
I have read a few questions about how you got out of the dark room but do not see an answer.
Where is it indicated that its "110 mesh "
If you want to be environmentally friendly then, look at http://www.franmar.com
They manufacturer screen cleaning and washing items from soy. :)
We use them in our shop.
First, let me say that I love this post, your humor, and the fact that years later you are still responding and helping newbies out! (Haven't ran out of Lima beans, eh? ;))
I was hoping you might have some thoughts to help... I bought a very cheap screen print set which is similar to your tutorial, but it was limited to being printer paper in size and i had bigger landscapes in mind. :) I ventured out then and had some success with ironing on freezer paper stencils using various diff paint, but, mostly failed when it counts with blurred edges and paint seeping under my "sealed" ironed edge.
Most recently, I ran across a DIY on using hose & modpod. I'm instantly hesitant as in those posts, the "end results" appear to all have blurred edges and I can definitely tell they are home made designs. A light bulb went off and I am curious if making the screen alone (prior to the photo emulsion stage) will work well when partnered with the freezer paper iron on. Meaning, substitute the design being ON the screen and just use the screen as a tool to evenly apply paint over the ironed on stencil? Know what I mean? Thoughts on this method? I would just try it out, but moving this week and all my craft stuff are packed, but my curiosity is getting the better of me and in googling to see if anyone else has tried, I found your page. A score to find your page, but not what I was initially expecting to find. (In a good way) :)
i have been trying silk print for three day my problem is the ink cannot pass though the mesh. how do we apply photo emusion(thin or thick)
Hi Binjana - From what I can figure out it sounds like you have made your silk screen but when you try to place it on the fabric you want to print on and squeegee the ink over it, it won't go through to the fabric underneath? My first question for you would be, are you using genuine silk/polyester for silk screening with the proper thread count? Or did you use something else for your pattern/silk screen? Let me know. ~ karen!
favourite bit of the internet. Love everyone here and everything about it. Thanks for the great tutorial.
You are officially my favorite person ever. :) Thanks for the rad tutorial.
Thanks Brandy. I kindda like you too. ~ karen