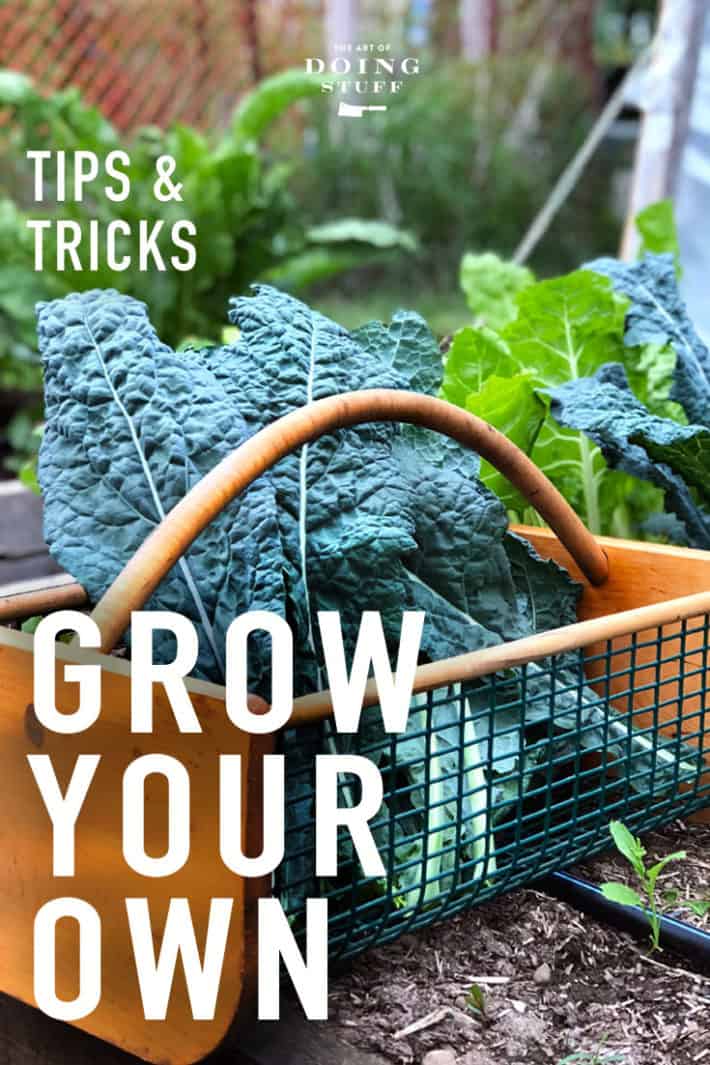
Get a few of my gardening tips by taking a quick walk through my early June garden.
 But I do write for The Old Farmer's Almanac and Lee Valley about gardening so I know a couple of things about gardening. Read about some of my tips and tricks.")
Table of Contents
Simple Gardening Tips You Can Use Right Now.
"Never plant your peppers before June 10th". I'd never heard that before but that's what one of my gardening friends said up at the garden the other day when I told him I had just finished most of my planting. It happened to be June 10th. Of course this would only apply to my area, zone 6b, because June 10th is when we're pretty much guaranteed not to have any nights below 15°C. That's the reasoning behind not planting before then. Peppers hate cool weather.
Unlike kale which seems to thrive in any weather or conditions. It's so unfair. Kale may be popular and good for you, but let's face it - ick.
 But I do write for The Old Farmer's Almanac and Lee Valley about gardening so I know a couple of things about gardening. Read about some of my tips and tricks.")
And while kale has cabbage moths attacking it, peppers have maggots. I might have a fix for maggoty peppers, which I'll show you a bit later on in this tour.
Above is the watering system that I installed last year. It's already made a huge difference in the growth of my vegetables. I was never what you'd call diligent about my watering efforts.
So I went with a drip system and my watering problems were solved. I can even work in the garden while my plot is being watered because the water just drips slowly into the ground and doesn't go spraying all over the place like it would with a sprinkler.
You can read my post on how to install a drip system and where to buy them here.
 But I do write for The Old Farmer's Almanac and Lee Valley about gardening so I know a couple of things about gardening. Read about some of my tips and tricks.")
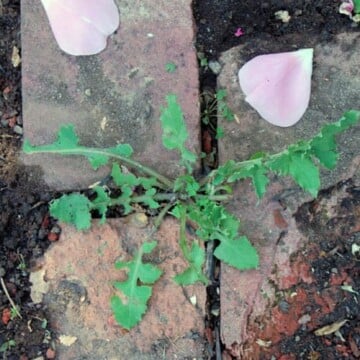
Most of the little squash plants you see above are now gone. Yup. Gone. Eaten by something in the garden. I've narrowed it down to chipmunks, voles, rabbits, cutworms, cucumber beetles, birds, mice, and my drip irrigation system since it was seen at the scene of the crime.
 But I do write for The Old Farmer's Almanac and Lee Valley about gardening so I know a couple of things about gardening. Read about some of my tips and tricks.")
Filling in any gaps in the garden are cutting flowers since I ran out of room in my actual cutting bed.
Now let's focus on what a terrible potato digger I am. Below you'll see my potato bed. It's not the garden ghost, the garden ghost is actually my garlic plants which I've covered to help protect them from leek moths.
It's the bed in the foreground with the big holes in it.
 But I do write for The Old Farmer's Almanac and Lee Valley about gardening so I know a couple of things about gardening. Read about some of my tips and tricks.")
As you can see my potato bed already has a huge potato growing out of it because I missed digging up a potato last year. That potato survived through the winter and sprouted up early in the spring. I really thought I had managed to dig up all my potatoes last year.
I did not.
How to Plant Potatoes
This year I'm experimenting with a new method for planting potatoes which I came up with when I was borderline delirious from exhaustion.
Instead of digging a trench, hammer a 2x2 stake into the ground 16" deep. Then plop your potato in, press it down with the end of the stake so it's making contact with the soil at the bottom of the hole, and fill in the hole with a few inches of soil.
As the potato grows the rest of the soil will fill in.
Planting potatoes this way eliminates the need to dig a 16" deep trench. Therefore you don't need to find anywhere to put all that dirt you dug out of your trench. You also don't have to worry about mounding because it'll happen naturally. If it doesn't you can easily fill in the holes a bit by hand.
Again - THIS IS AN EXPERIMENT. I haven't seen it done before (although for all I know every other gardener in the world is doing this), I just came up with it out of desperation.
 But I do write for The Old Farmer's Almanac and Lee Valley about gardening so I know a couple of things about gardening. Read about some of my tips and tricks.")
Behold the other potato bed teaming with potatoes that I didn't dig up. I really have to develop a new way of digging up potatoes.
 But I do write for The Old Farmer's Almanac and Lee Valley about gardening so I know a couple of things about gardening. Read about some of my tips and tricks.")
Cabbage moths on your cabbage? Cover it. Hoops, row cover and a few clips if you need them should keep the cabbage moths off of your brassicas. I hope you notice my use of the word "should" which is a very important word in gardening. Because this is gardening. And all hell can break loose at any moment.
 But I do write for The Old Farmer's Almanac and Lee Valley about gardening so I know a couple of things about gardening. Read about some of my tips and tricks.")
It looks way less sad and depressing in real life, I swear.
 But I do write for The Old Farmer's Almanac and Lee Valley about gardening so I know a couple of things about gardening. Read about some of my tips and tricks.")
The thing about a "community garden" is ... wait for it ... it's a community. So we trade and share information and stuff, like these pots that one gardener didn't want anymore. I grabbed 3.
 But I do write for The Old Farmer's Almanac and Lee Valley about gardening so I know a couple of things about gardening. Read about some of my tips and tricks.")
I'm attempting to grow back the squash plants that Kim Kardashian ate. Did I forget to mention she's on my list of suspects?
 But I do write for The Old Farmer's Almanac and Lee Valley about gardening so I know a couple of things about gardening. Read about some of my tips and tricks.")
Technically a potting bench but mainly I use it as a dance floor.
 But I do write for The Old Farmer's Almanac and Lee Valley about gardening so I know a couple of things about gardening. Read about some of my tips and tricks.")
I've planted both beet seedlings and beet seeds so I'll get harvests at different times. That's a handy little tip for you. Stagger your plantings, space them out, so you aren't inundated with 572 heads of broccoli (or rapini, or lettuce or corn) all at once.

That's one of my gardening neighbours Walter. I didn't grow him.
 But I do write for The Old Farmer's Almanac and Lee Valley about gardening so I know a couple of things about gardening. Read about some of my tips and tricks.")
Would you like to save this stuff?
Here's more of that sharing thing going on. Walter asked if he could have some kale since mine is growing so well because of my drip system and my DIY hinged hoop houses. I said sure. So Walter picked himself some kale. Walter is from Zimbabwe and last year he taught me about eating my squash plant leaves. This year I taught him about hinged hoop houses. Read my post on how to make one yourself.
 But I do write for The Old Farmer's Almanac and Lee Valley about gardening so I know a couple of things about gardening. Read about some of my tips and tricks.")
I took these photos about a week and a half ago. One strawberry was *just* starting to get ripe.
 But I do write for The Old Farmer's Almanac and Lee Valley about gardening so I know a couple of things about gardening. Read about some of my tips and tricks.")
Since then I've picked baskets of them and am now officially made up of 10% flesh and bone and 90% strawberry shortcake.
 But I do write for The Old Farmer's Almanac and Lee Valley about gardening so I know a couple of things about gardening. Read about some of my tips and tricks.")
It's sad isn't it? It always looks that way to begin with.
My luffa plant. No matter how much I take care of them and baby them, when I transplant the luffas they always end up going into shock for a few weeks. Then they usually start putting out new shoots and taking off.
You'll notice that word "usually". It's very much like the above mentioned word "should".
 But I do write for The Old Farmer's Almanac and Lee Valley about gardening so I know a couple of things about gardening. Read about some of my tips and tricks.")
My caterpillar free kale.
 But I do write for The Old Farmer's Almanac and Lee Valley about gardening so I know a couple of things about gardening. Read about some of my tips and tricks.")
Brussels sprouts, broccoli and ... peppers. All under the protection of a netted hoop house.
Preventing Pepper Maggots
If you want to protect your peppers from the dreaded pepper maggot, you can cover them with netting to keep the pepper fly out and prevent them from landing on your peppers.
The pepper fly has a little stinger (no judgement) and once the peppers are about the size of the tip of your pinkie they'll shove their little stinger into the top of the pepper and lay eggs in it. Those eggs hatch, turn into maggots, which then feast on your peppers from the inside out until they eventually rot and fall off of the vine.
The reason you can do this is because peppers self pollinate through the wind. They don't need bees.
 But I do write for The Old Farmer's Almanac and Lee Valley about gardening so I know a couple of things about gardening. Read about some of my tips and tricks.")
The Best Way to Grow Tomatoes
Want to grow twice the amount of tomatoes with half the chance of disease? String train them. You can plant them closer together and then just twirl them up the string as the season progresses. No cages, no sprawling and no big deal to do. Read my post on how to string train your tomatoes.
This year I'm also going to put down bark chips as mulch under the tomatoes to help prevent disease like blight even more.
 But I do write for The Old Farmer's Almanac and Lee Valley about gardening so I know a couple of things about gardening. Read about some of my tips and tricks.")
How to Grow Corn
I started my corn in trays outside. And then I waited. For 2 weeks I waited for that corn to sprout. That corn didn't sprout. So following a tip from my gardening friend Ron, I copied what commercial growers do. I laid down black plastic to let it warm up the soil.
A week later I poked holes in the plastic (which is actually biodegradable mulch) stuck a kernel of corn in each hole and covered it with soil. Keep an eye on my Instagram account if you want to find out when they actually sprout and how long it took.
The black plastic also keeps the soil from drying out which in turn helps with germination.
 But I do write for The Old Farmer's Almanac and Lee Valley about gardening so I know a couple of things about gardening. Read about some of my tips and tricks.")
The string method I mentioned before, for growing tomatoes is also great for growing cucumbers. You can read my post about string training cucumbers here.
 But I do write for The Old Farmer's Almanac and Lee Valley about gardening so I know a couple of things about gardening. Read about some of my tips and tricks.")
First year for growing celery root! Because it's always nice to have an alternative to mashed potatoes. Just kidding. Mashed potatoes always win, but I wanted to try celery root for fun. It does make a delicious mash.
 But I do write for The Old Farmer's Almanac and Lee Valley about gardening so I know a couple of things about gardening. Read about some of my tips and tricks.")
Best Way to Grow Melons?
My melon patch this year is more of a melon wrestling ring with the melons growing up against the ropes. I made the netting with nylon string woven between 2 metal posts in the ground. Again - I've lost some of these melons already to Kim.
This is an experiment and I'm not entirely (at all) sure how well it will work. Technically it should work and the advantage is that it takes up much less space than a traditional sprawling melon patch would take. I'm also hoping with the melons growing high up a wobbly length of netting it will deter raccoons from getting their hands on them the very day I'm going to pick them.
Once the melons are about the size of tennis balls I'll support them with nylon or maybe a bra to keep them from breaking off of the vine.
 But I do write for The Old Farmer's Almanac and Lee Valley about gardening so I know a couple of things about gardening. Read about some of my tips and tricks.")
It's only been a little over a week since I took these pictures and already the garden looks far less desolate. Again, I keep pretty good updates on the garden on my Instagram Instastories, even though I hate doing them and often comment about my hatred of Instagram stories during my Instagram stories..
 But I do write for The Old Farmer's Almanac and Lee Valley about gardening so I know a couple of things about gardening. Read about some of my tips and tricks.")
I always say I'm just "running up to the garden for a minute". I vow to come home after an hour. Two at the most. I'm often there until it's dark no matter what time I got there. It's an addiction. It's therapy. It's satisfying manual labour.
When it gets dark out I eventually do go home. Where it's so late and I'm so tired that I'll eat a box of crackers for dinner instead of this kale.
Also because unless I'm making this salad, kale - ick.
→Follow me on Instagram where I often make a fool of myself←


K
Hello! My husband and I saw your guide to make hinged hoop houses, but do you have a guide for your triangle chicken wire hinged house? We are trying to build this but can't really find guides for it.
Karen
Hi there! The brackets for that hinged hoop house were actually purchased. Then you build it out of 2x2s and a raised bed. The other way to do it without brackets would be to make simple triangle frames, with blocks in the corners for support. Then just staple the hardware cloth (the metal mesh) to it. Simply add 2 hinges to the back of the triangle so you can raise and lower it. ~ karen!
vincent
Very informative and useful advice, tips, and tricks in gardening. It's easy to apply. Thank you for sharing these tips.
Cathy Marsollier
I finally found a use for Kale. If you're making any kind of hearty soup , chili or stew, chop the Kale fairly small (a couple square inches) and cook in the stew. It will soften up and add a bit of zing to the flavour. I spent so many years hating Kale so I understand if this doesn't work for you.
AmyL
I was checking out your Instagram posts and saw that you were looking for a compost auger: I found what looks like - based on the wooden handle in your pic - it might be the very one you used from a site called Kaufmann Mercantile. The catch? It's "sold out" with no indication of it being available again. However, the description *also* says that it's made in Orangeville, ON by a retired forester named Jim Lindsay. That's more-or-less in your neck of the woods; perhaps you can track him down?
https://www.kaufmann-mercantile.com/product/149000043160/handmade-steel-compost-aerator
Karen
I saw that one Amy! I didn't have any luck tracking it down. But ... that's O.K., as you'll find out next week. ;) ~ karen!
June
Two things I have to tell you.
As for Instagram stories, most everyone's (not just yours) are kind of sucky. The one exception would be your recent one about the chickens eating your perennials in the backyard. While I roared with laughter, I truly did fear for that you might just pull out a roasted hen from that pot. It was fantastic!
Your veg garden is truly amazing. Please tell Walter that I especially admire his dimple.
June Reiter
Two things I have to tell you.
As for Instagram stories, most everyone's (not just yours) are kind of sucky. The one exception would be your recent one about the chickens eating your perennials in the backyard. While I roared with laughter, I truly did fear for that you might just pull out a roasted hen from that pot. It was fantastic!
Your veg garden is truly amazing. Please tell Walter that I especially admire his dimple.
Monica
Can we get a squash leaf recipe?
Sarah
I also came up with your potato method a few years ago - dig a hole to start, instead of trenching, etc. - and it works like a charm!