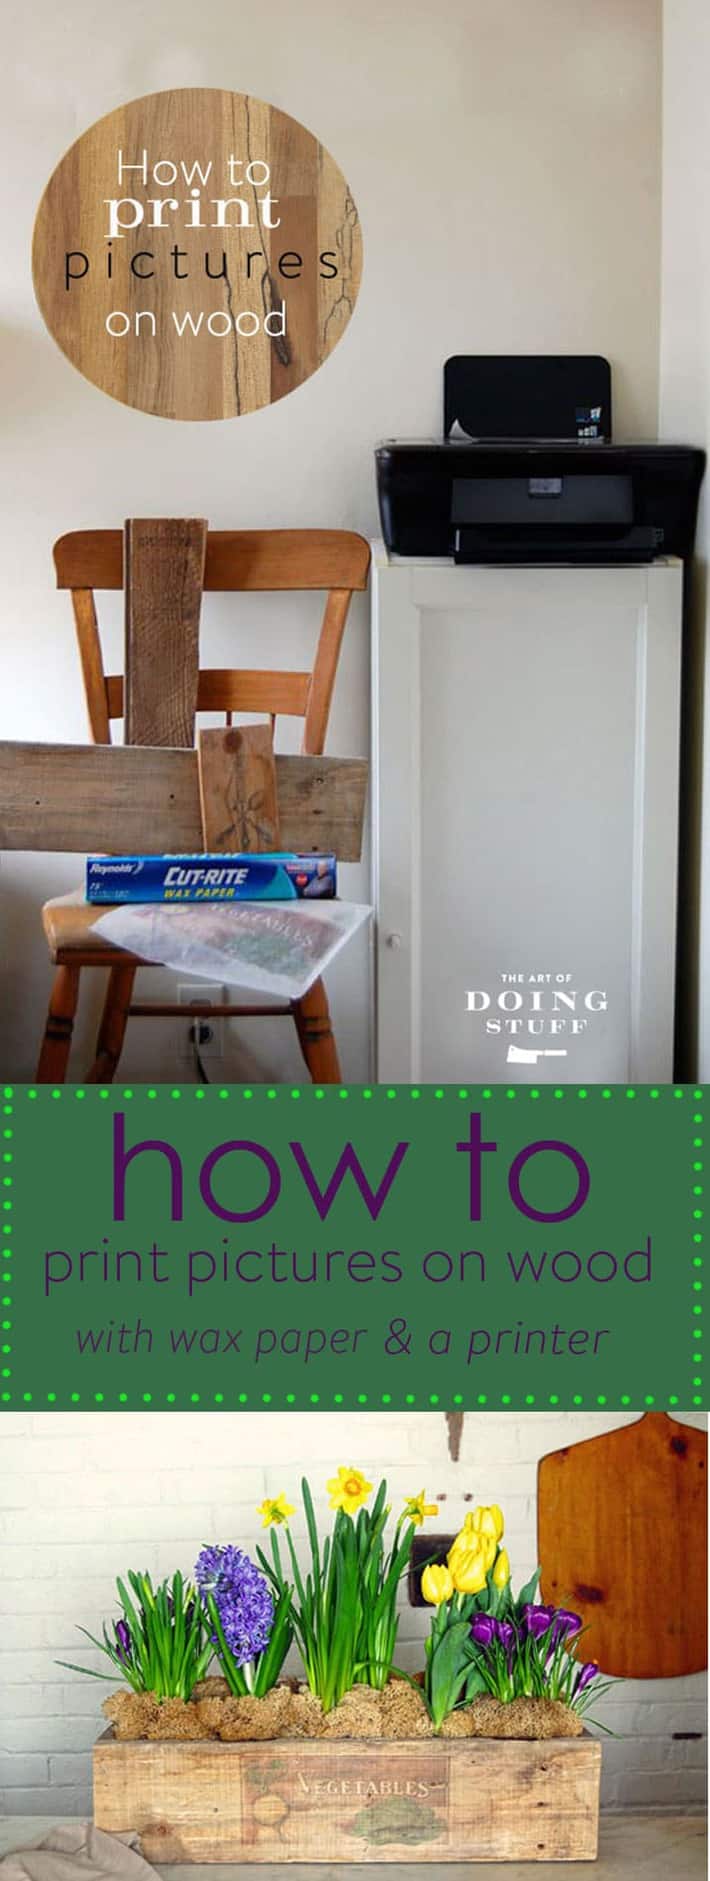
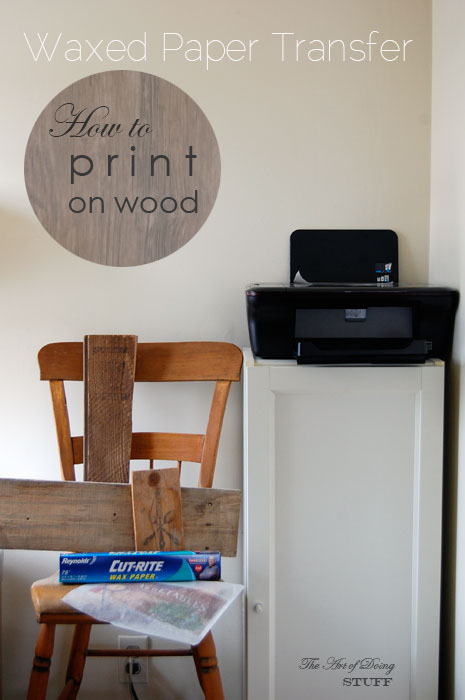
How to print on wood without any weird stuff you have to go to the store for. You need a printer, a piece of unfinished wood and waxed paper. That's it. Maybe a Tom Collins if that's your thing.

I'm funny. Sometimes ha-ha funny, sometimes left-out-of-the-fridge-too-long funny. But as we all know, there are times for funny and times for seriousness. This is one such time. For seriousness that is.
So this post will involve no funny. No laughing, no snickering, no coffee spitting. Because the information I'm about to introduce you to deserves a reverence that can't be accomplished when diluted with hilarious jokes or cutting sarcasm. When I first published this post in 2014 it got a bit of attention. Mainly because it takes a simple idea and allows you to do it at home without any special equipment.
I'm going to teach you how to transfer any photograph or picture onto wood.
You don't need mod podge or any other weird thing that you don't have on hand.
You don't know it yet, but this is the greatest day of your life. You get to produce something beautiful without any pain or tearing of your woman bits. Plus it won't turn into a whirling, dangerous ball of hormones in 13 years.
I decided I wanted to try making something but it involved transferring a photo onto wood so I did a little research. Most of the tutorials I came across involved a few specialty materials like matte gel and the backing paper of printer labels. I didn't have any printer label paper handy and don't even know what matte gel is. Like most DIYers I wanted to DIY, NOW. Right this second, NOW.
So I kept looking for a simpler solution. Mid search I suddenly remembered my mother mentioning something Mag Ruffman had done a couple of years back. It was the perfect solution and it works GREAT.
Table of Contents
Can you transfer a regular photo to wood?
You bet you can. That's what this is all about. You can use this same technique to transfer photos, text or anything else you can print onto wood.
What kind of paper do you use to transfer pictures to wood?
All you need is regular old waxed paper. And a dream of course.
That's right. All you need is a regular inkjet printer (this one is the newer version of the one I use) and regular waxed paper. I have an HP wireless printer and this technique works with this printer. It's the only printer I can guarantee this works with, although it will work with most as long as it's an ink jet.
(update: since posting this a couple of years, there's been a lot of success stories and a lot of frustration stories, mainly due to the printer you're using. I can only guarantee this works with the kind of printer I have which is a cheap, old HP printer I got at Costco. )
How to Print Pictures on Wood
1. Cut a few sheets of wax paper to the size of a standard piece of printer paper.

2. Find a smooth, light coloured piece of wood. Actually find a few so you have some to practice on.

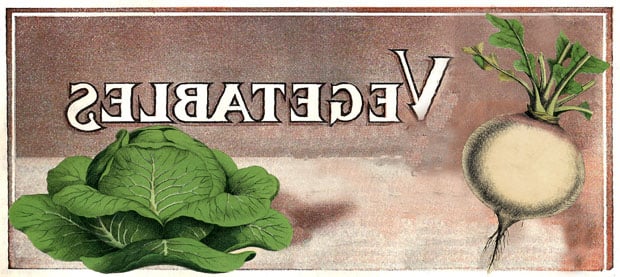
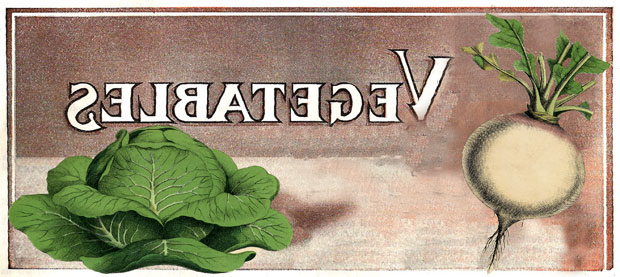
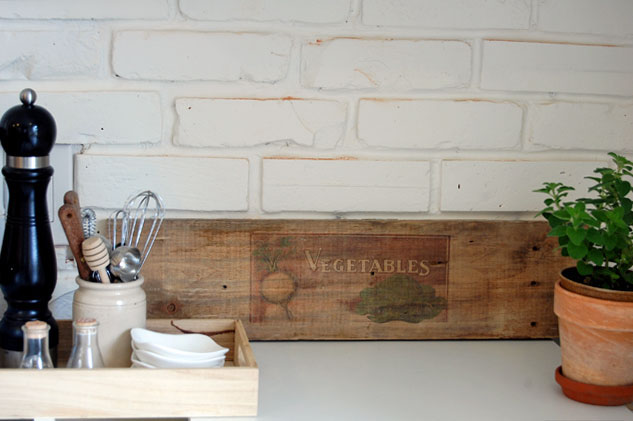
Find a high resolution image you like. Or make your own. The Graphics Fairy is a great place to start for copyright free, high resolution images.
3. Once you have an image you like, reverse it using whatever photo program you have on your computer. If you're not sure how to do that just Google it.
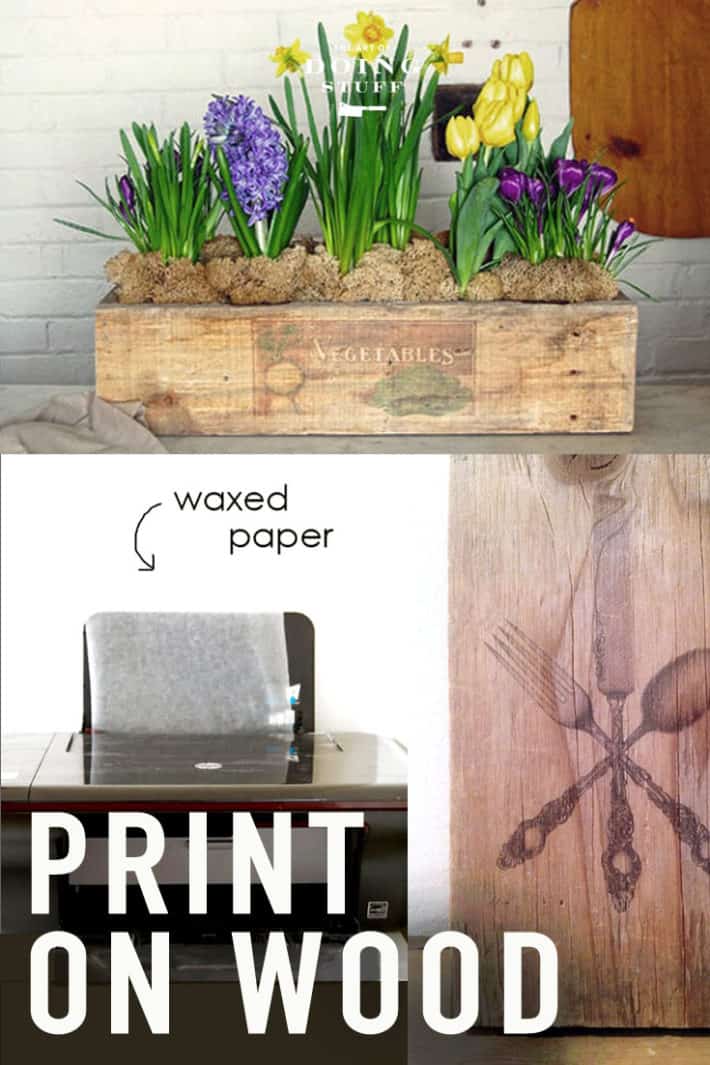
4. Put a sheet of your waxed paper into the printer and click print.
 5. As the waxed paper comes out of the printer, gently guide it. You have to be careful it doesn't roll under itself or touch itself in any other way because it will smear the ink.

6. Put your image exactly where you want it on the wood. Remember ... this can be any unfinished wood. A bench, table, box, or anything!
Once you place your image you can't move it. Do not move it. It will smudge. You will be sad. Then you will cry and it will smudge some more.

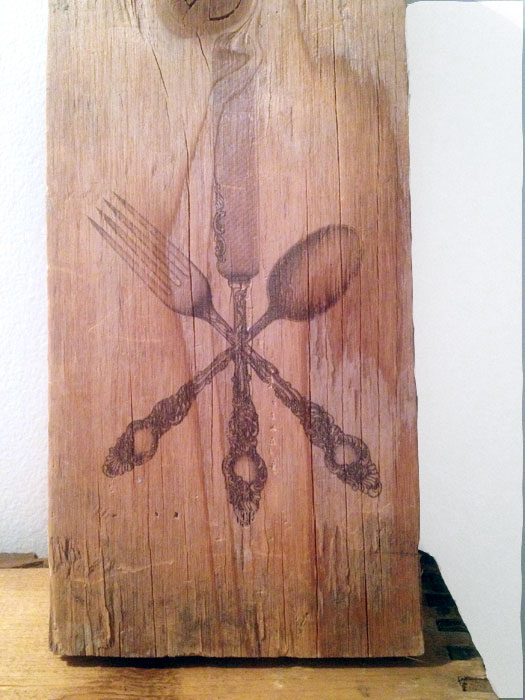
7. Holding the transfer tight to the wood, and working quickly, swipe the edge of a credit card across the image. This pushes the ink from the waxed paper down into the wood, which absorbs it.
Don't be wimpy about this. Push hard, but not so hard that you rip the waxed paper. You can gently lift the paper to see if it's transferring well. If you notice spots that haven't transferred, rub it some more with the credit card, this time burnishing it.

8. When you're pretty sure that you've transferred as much ink as possible lift off your waxed paper and get ready to call someone. Because that's the first thing you're going to want to do because this method works so well.
You'll be stunned.
You'll naturally want other people to be stunned. It's a DIYer thing.

I tried a few images just because it was so fun.

Like I said earlier you can use this technique on any smooth, unfinished wood like old crates, tables, or chairs. For anything that's going to have wear and tear, just remember to spray it with a a clear matte finish after you do the print. Any wood sealer will protect it.
If you don't have a table, chair or dresser you want to print on, you can just find a nice old board and prop it against the wall, or hang it.

Quick Reference Directions:
Waxed Paper Transfer
1. Cut sheets of waxed paper to the size of computer paper.
2. Print your image onto the waxed paper with any Inkjet printer. (must reverse image first using whatever photo program you have) In answer to some of your comments, no, it doesn't matter which side you print on. Both sides of waxed paper are waxed.
3. Carefully place the image on your wood (wet side down) and then rub over it with a credit card.
4. Removed waxed paper and the ink is now transferred to the wood.
5. Seal with a matte spray wood sealer if you like.
TIPS
- Use smooth wood. Rough barn board won't work, but smooth barn board will.
- Darker colours on lighter wood works best.
- Dampening the wood a bit with a sponge will make the transfer darker, but it might blur and smudge if you're not extremely careful.
- If the waxed paper won't feed through your printer, tape it to a piece of regular printer paper before feeding it into your printer.
- Some readers have also had success by using the slippery side of freezer paper so you can try that.
I made my piece of printed wood into a rustic planter. Read how to make your own in this post.


How to Print an Image on Wood.
Print anything on wood with wax paper and a printer.
Materials
- Wax Paper
- Unfinished Wood (board, tray, table, stool etc)
Tools
- Ink jet Printer
Instructions
- Cut a few sheets of wax paper to the size of a standard piece of printer paper.
- Find a smooth, light coloured piece of wood. Actually find a few so you have some to practice on.
- Once you have an image you like, reverse it using whatever photo program you have on your computer. If you’re not sure how to do that just Google it.
- Put a sheet of your waxed paper into the printer and click print.
- As the waxed paper comes out of the printer, gently guide it. You have to be careful it doesn’t roll under itself or touch itself in any other way because it will smear the ink.
- Put your image exactly where you want it on the wood. Remember … this can be any unfinished wood. A bench, table, box, or anything!
- Holding the transfer tight to the wood, and working quickly, swipe the edge of a credit card across the image. This pushes the ink from the waxed paper down into the wood, which absorbs it. Push hard but not so hard that you rip the waxed paper.
- When you’re pretty sure that you’ve transferred as much ink as possible lift off your waxed paper and get ready to call someone. Because that’s the first thing you’re going to want to do because this method works so well.
Notes
- Once you place your image you can’t move it. Do not move it. It will smudge. You will be sad. Then you will cry and it will smudge some more.
- Use smooth wood. Rough barn board won’t work, but smooth barn board will.
- Darker colours on lighter wood works best.
- Dampening the wood a bit with a sponge will make the transfer darker, but it might blur and smudge if you’re not extremely careful.
- If the waxed paper won’t feed through your printer, tape it to a piece of regular printer paper before feeding it into your printer.
- Some readers have also had success by using the slippery side of freezer paper so you can try that.
Laughter may now resume.
→Follow me on Instagram where I often make a fool of myself←


Do you need to seal it? Would modge podge work for that. Sorry if it's a silly question. Just looking for new things to do.
Tried and failed...wax paper caught in printer, not fun! Any other suggestions? Email me please.
Hi Sara - Did you try taping the waxed paper lightly to a piece of regular paper to feed it through? ~ karen!
Oh no, I didn't but will try that, thank you!
My Dear Karen, this is a genius way of transferring to wood. I will give this a shot in due time. Have an brand new HP Printer (bought for my Son, hooked it up then he Never used it. Sitting for 3 years) This New Old Printer was headed out the door with the trash. Now I will have to rescue it, probably buy new ink...and play play play with this technique. Don't want to try my Canon just in case it would mess it up. I have to say you are amazing and quite admirable for staying with this post for a couple years. I did read nearly every post....I didn't want to miss a thing...LOL I was going to print it out...until it said 115 pages...Oh no not doing that at all...so bookmarked it to find it again. BTW found you on Pinterest and not Facebook. And I won't share you on FB... as that can get out of hand. When I get the printer working, and try this...I will come back and let you know how it all worked for me...Thank you for your great inspiration and simple instructions. I got it...now just to get it tried...LOL
Thanks Roni. Yes indeed it is Fun. F.U.N. I hope your printer works for it. If it's an old HP it should ... that's what mine is. :) And it hasn't harmed my printer at all. Keep me updated. ~ karen!
A very interesting process which I am yet to try; great decorative possibilities. While I haven't read all the comments and replies I have picked-up on the enquiries about using the process on other media. One that should accept the ink admirably would be untreated veg-tanned leather; although where construction is concerned all other processes such as sizing, edging, stitch-marking and awling should be done first to protect the image as much as possible, prior to finishing. I have a project next month that will be perfect for the technique, so I will make two - one with a conventionally carved decoration and one with a photo-transfer decoration and give the client the choice. I will report in due course.
Alrighty. ~ karen!
Does this only work transferring to wood or can I do it to transfer onto paper...like in a mixed media journal?
Jood
I love this idea so much. Would an image on a wood cutting board eventually fade?
DANG it all - we just replaced our broken inkjet with a monotone lazer jet (because we NEVER printed in colour before). Now I want to go out and buy an inkjet!
:) You can get them really cheap now Elizabeth. Maybe get one just for this. ;) ~ karen!
Okay, but like, using this to put printed guides for detailed engraving work onto the wood so you don't have to hand-draw all of that on with a pencil first. . . That way you can make the design digitally and work from there.
Thanks you for such interesting tutorial!!!
Hi is wax paper the same as greaseproof, I love this idea can't wait to try it.
Hmm. Well, I'm not sure Deborah, lol. I'm guessing it is if greaseproof paper is what you would have wrapped a sandwich in. Similar to freezer paper but with wax on both sides. ~ karen!
WANT A DARKER IMAGE with MORE VIBRANT COLORS?
This requires a bit of skill but works like a charm. Definitely practice a few times on a sample or scrap to get the hang of lining up the registration marks.
1- Create registration marks at all 4 corners of your image. Make them outside of your image & I'd suggest leaving at least an inch or so border around the image. That way you can avoid pressing the marks onto the board or sand them away later without getting too close to your image.
2- Print a handful of copies on wax paper depending on how dark/vibrant you want the colors to be.
3- Dampen the wood like several other posts have suggested, but ONLY FOR THE FIRST COPY. Then dry the image with a hair dryer to make sure the ink has fully cured on the first copy.
4- Line up your next copy using the registration marks & apply it exactly on top of the first one.
5- Repeat step 4 until you get the color density you're going for.
** If you screw up applying extra copies & the image is ruined, dry the ink as fast as possible so it doesn't seep down too far into the wood. Then sand out the bad image & try the process again.
If you apply at least 3 copies on top of each other, the colors will pop but still leave that vintage look. This makes the image more visible & looks much better from a distance if you're hanging it on a wall or on a high shelf.
Thisis so cool! Wondering if anyone has tried something similar with glass... like in picture frames?
You refer to John Mellenkamp in your opening line.
I can do this in plastics or only can be made in wood?
Hi Diego. It actually has to be wood because it needs something for the ink to soak into. With plastic it would just sit on top. Even if it did dry there and didn't smudge when you transferred it, it would scratch off really easily. ~ karen!
you guys are awesome,beayouteaful.
I have a question?
when we complete our project and
want to share with you,what's the right procedure,
also wants to register ourselves with handimania.
thanx
This is very cool, thank you for sharing this amazin DIY!!
Check as well my Product Designs here: https://goo.gl/YKUxjr
This sounds like a worthy project. Thank you. I recently did a similar thing with Mod Podge. (Mod Podge looks like white glue and may be the same. When I went to purchase more, I found that it is available in a photo transfer specialty bottle. The regular kind worked fine and costs less.) Print any photo onto plain copy paper - reverse it if necessary. I think black and white looks especially nice on wood. Paint a board with one thin even coat of Mod Podge then place your print with the print side down being careful not to leave bubbles or to smear the ink. Let it dry completely then with a wet sponge, scrub off the paper. You will love the result. I really like photos of people on light colored wood. Be sure not to have dark knot holes over a face or anything. My printer is an HP ink jet Officejet 6500A. I haven't tried this with a laser printer yet.
Hi Cindy! It's a RIDICULOUS amount of fun. The day I did it, I was actually planning on doing something more similar to what you do but didn't want to go out to have to buy anything special. This technique let's you do it with 2 things most people have around the house anyway. Waxed paper and a printer. But the way you're talking about works great too. ~ karen!
I read through tons of comments and questions, but didn't see the answer to one I have, so forgive me if this was asked and answered. Is the ink transfer permanent or is a process needed to make it so? Thanks so much for this incredible post!
Hi Julie! It's definitely permanent but if you're going to put it outside it would need to be treated with some sort of polyurethane afterwards once it's really, REALLY dry. I've had my seed box that I used this technique on for 2 years now and it still looks the way it did to begin with. I keep it inside so I didn't out any sort of protective coating on it. Hope that helps. ~ karen!
could you use this technique to transfer a picture to canvas?
It's possible Kendy but it might come out muddy. The other thing you can do is an iron on transfer for canvas, or if the canvas and your printer is cooperative (and small enough) you could try this method. ~ karen!
This is amazing and I adore you more than a stranger should. I love this idea as-is but I'm also thinking this would work great for transferring a pattern for wood-burning! I have 4 days to find out!
Oh you're right! It would be great for transferring a pattern. Never even thought of that. Also ... I'm actually a bit worried you don't adore me enough. What can I do to fix that? ~ karen!