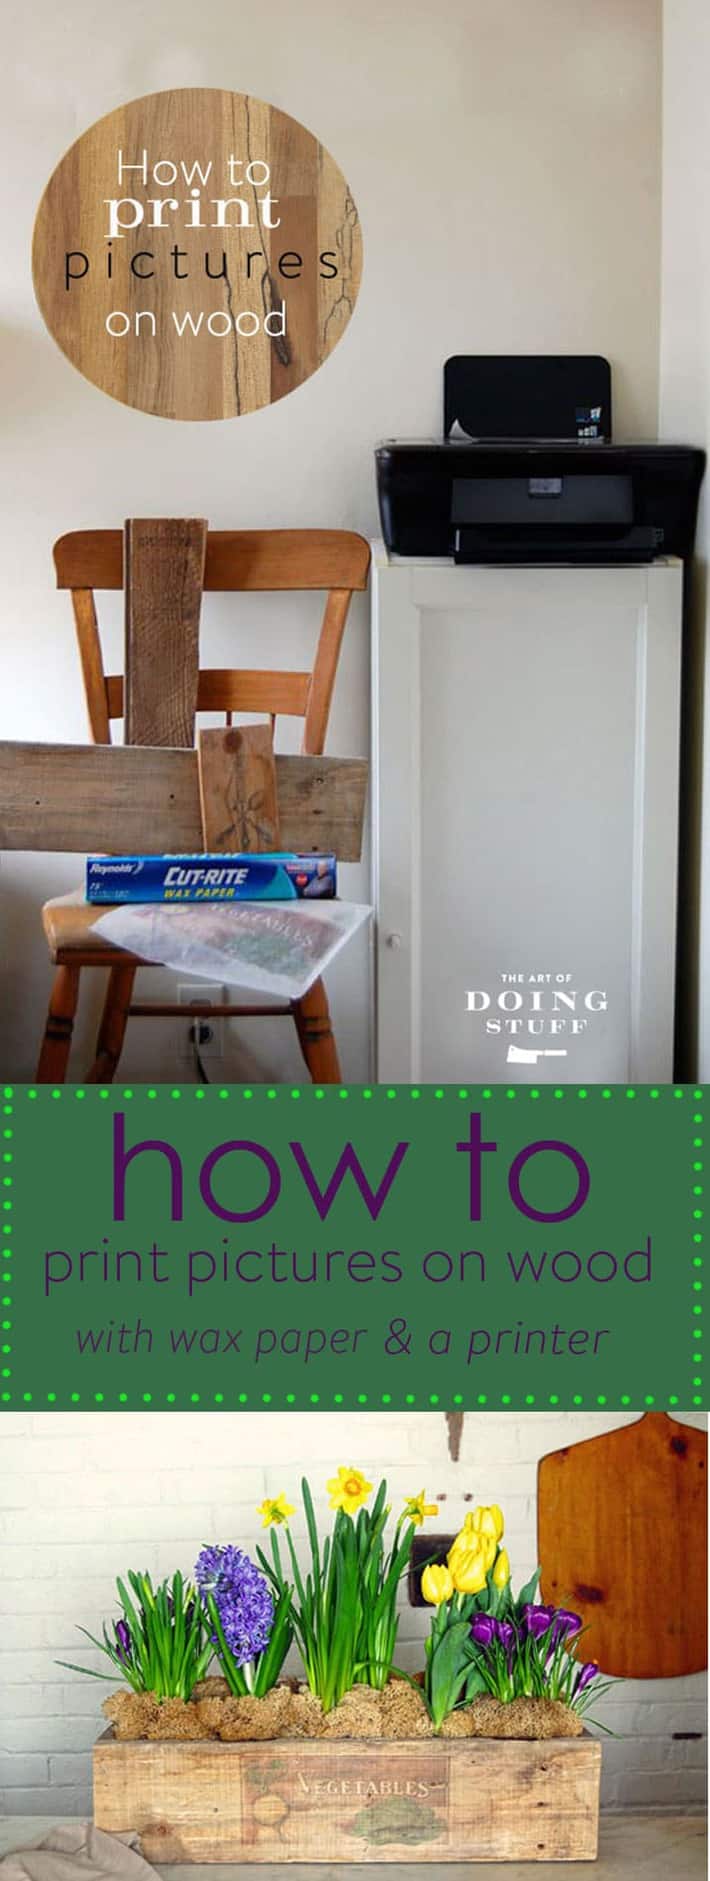
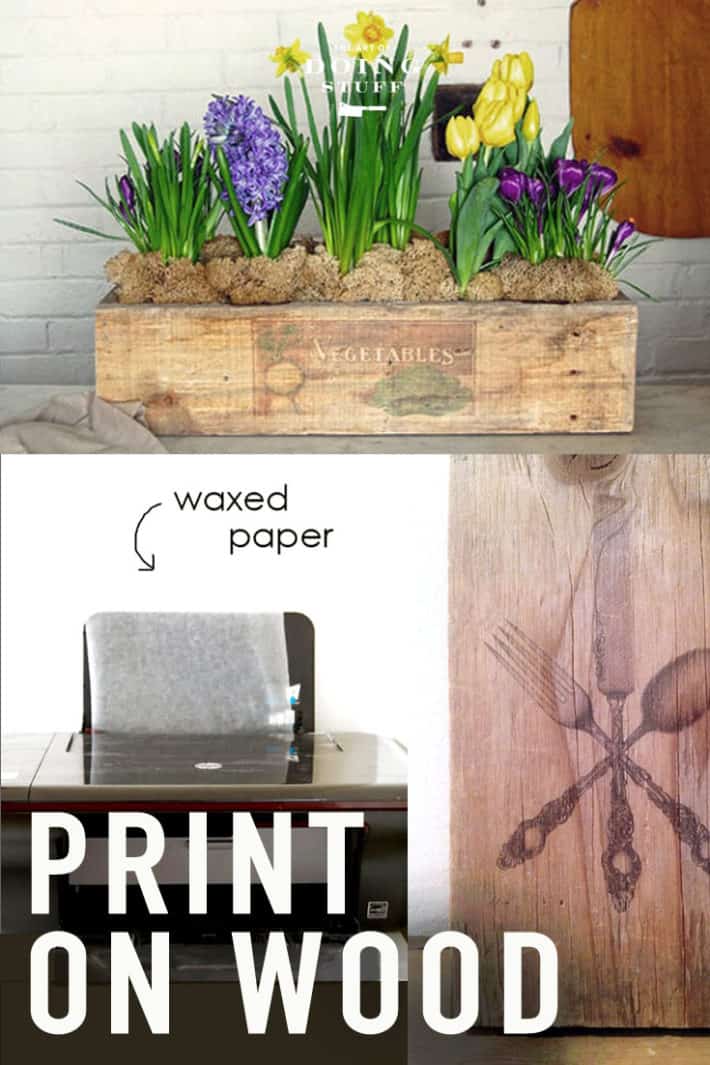
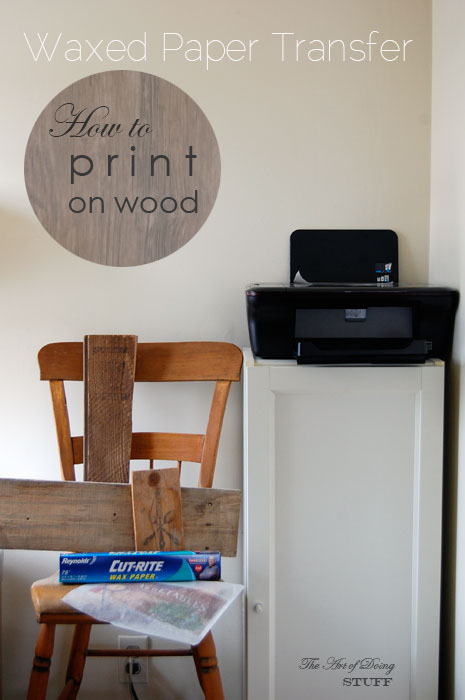
How to print on wood without any weird stuff you have to go to the store for. You need a printer, a piece of unfinished wood and waxed paper. That's it. Maybe a Tom Collins if that's your thing.

I'm funny. Sometimes ha-ha funny, sometimes left-out-of-the-fridge-too-long funny. But as we all know, there are times for funny and times for seriousness. This is one such time. For seriousness that is.
So this post will involve no funny. No laughing, no snickering, no coffee spitting. Because the information I'm about to introduce you to deserves a reverence that can't be accomplished when diluted with hilarious jokes or cutting sarcasm. When I first published this post in 2014 it got a bit of attention. Mainly because it takes a simple idea and allows you to do it at home without any special equipment.
I'm going to teach you how to transfer any photograph or picture onto wood.
You don't need mod podge or any other weird thing that you don't have on hand.
You don't know it yet, but this is the greatest day of your life. You get to produce something beautiful without any pain or tearing of your woman bits. Plus it won't turn into a whirling, dangerous ball of hormones in 13 years.
I decided I wanted to try making something but it involved transferring a photo onto wood so I did a little research. Most of the tutorials I came across involved a few specialty materials like matte gel and the backing paper of printer labels. I didn't have any printer label paper handy and don't even know what matte gel is. Like most DIYers I wanted to DIY, NOW. Right this second, NOW.
So I kept looking for a simpler solution. Mid search I suddenly remembered my mother mentioning something Mag Ruffman had done a couple of years back. It was the perfect solution and it works GREAT.
Table of Contents
Can you transfer a regular photo to wood?
You bet you can. That's what this is all about. You can use this same technique to transfer photos, text or anything else you can print onto wood.
What kind of paper do you use to transfer pictures to wood?
All you need is regular old waxed paper. And a dream of course.
That's right. All you need is a regular inkjet printer (this one is the newer version of the one I use) and regular waxed paper. I have an HP wireless printer and this technique works with this printer. It's the only printer I can guarantee this works with, although it will work with most as long as it's an ink jet.
(update: since posting this a couple of years, there's been a lot of success stories and a lot of frustration stories, mainly due to the printer you're using. I can only guarantee this works with the kind of printer I have which is a cheap, old HP printer I got at Costco. )
How to Print Pictures on Wood
1. Cut a few sheets of wax paper to the size of a standard piece of printer paper.

2. Find a smooth, light coloured piece of wood. Actually find a few so you have some to practice on.

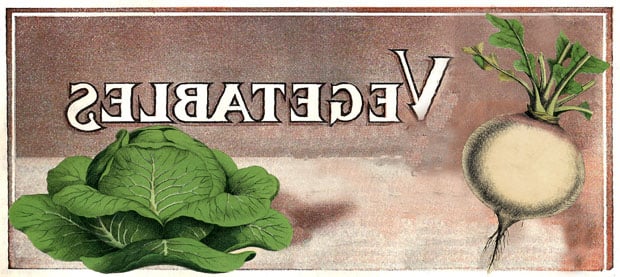
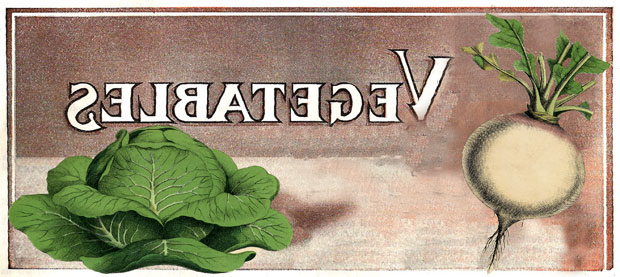
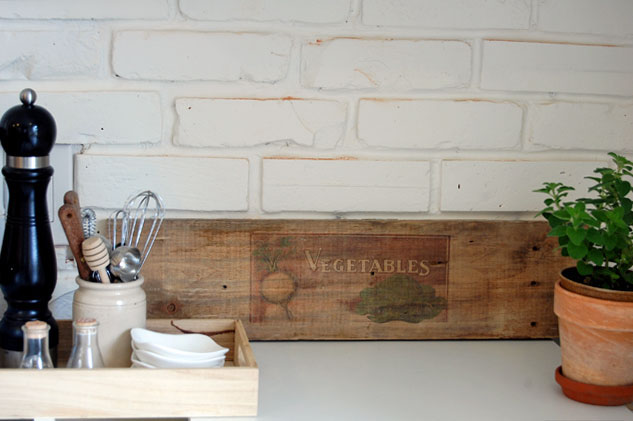
Find a high resolution image you like. Or make your own. The Graphics Fairy is a great place to start for copyright free, high resolution images.
3. Once you have an image you like, reverse it using whatever photo program you have on your computer. If you're not sure how to do that just Google it.
4. Put a sheet of your waxed paper into the printer and click print.
 5. As the waxed paper comes out of the printer, gently guide it. You have to be careful it doesn't roll under itself or touch itself in any other way because it will smear the ink.

6. Put your image exactly where you want it on the wood. Remember ... this can be any unfinished wood. A bench, table, box, or anything!
Once you place your image you can't move it. Do not move it. It will smudge. You will be sad. Then you will cry and it will smudge some more.

7. Holding the transfer tight to the wood, and working quickly, swipe the edge of a credit card across the image. This pushes the ink from the waxed paper down into the wood, which absorbs it.
Don't be wimpy about this. Push hard, but not so hard that you rip the waxed paper. You can gently lift the paper to see if it's transferring well. If you notice spots that haven't transferred, rub it some more with the credit card, this time burnishing it.

8. When you're pretty sure that you've transferred as much ink as possible lift off your waxed paper and get ready to call someone. Because that's the first thing you're going to want to do because this method works so well.
You'll be stunned.
You'll naturally want other people to be stunned. It's a DIYer thing.

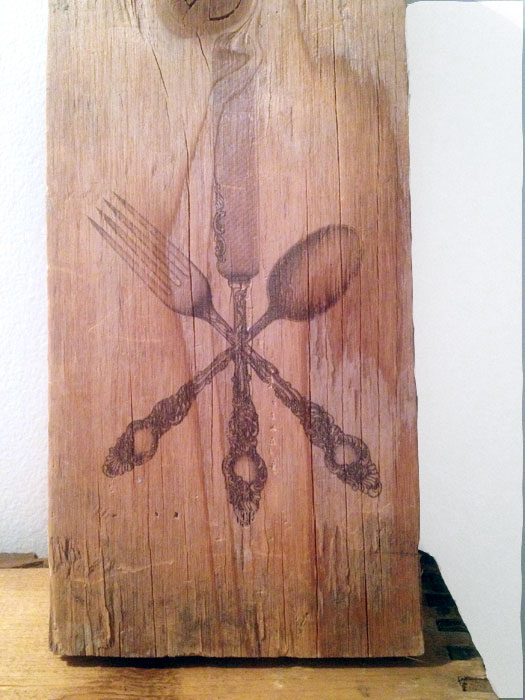
I tried a few images just because it was so fun.

Like I said earlier you can use this technique on any smooth, unfinished wood like old crates, tables, or chairs. For anything that's going to have wear and tear, just remember to spray it with a a clear matte finish after you do the print. Any wood sealer will protect it.
If you don't have a table, chair or dresser you want to print on, you can just find a nice old board and prop it against the wall, or hang it.

Quick Reference Directions:
Waxed Paper Transfer
1. Cut sheets of waxed paper to the size of computer paper.
2. Print your image onto the waxed paper with any Inkjet printer. (must reverse image first using whatever photo program you have) In answer to some of your comments, no, it doesn't matter which side you print on. Both sides of waxed paper are waxed.
3. Carefully place the image on your wood (wet side down) and then rub over it with a credit card.
4. Removed waxed paper and the ink is now transferred to the wood.
5. Seal with a matte spray wood sealer if you like.
TIPS
- Use smooth wood. Rough barn board won't work, but smooth barn board will.
- Darker colours on lighter wood works best.
- Dampening the wood a bit with a sponge will make the transfer darker, but it might blur and smudge if you're not extremely careful.
- If the waxed paper won't feed through your printer, tape it to a piece of regular printer paper before feeding it into your printer.
- Some readers have also had success by using the slippery side of freezer paper so you can try that.
I made my piece of printed wood into a rustic planter. Read how to make your own in this post.


How to Print an Image on Wood.
Print anything on wood with wax paper and a printer.
Materials
- Wax Paper
- Unfinished Wood (board, tray, table, stool etc)
Tools
- Ink jet Printer
Instructions
- Cut a few sheets of wax paper to the size of a standard piece of printer paper.
- Find a smooth, light coloured piece of wood. Actually find a few so you have some to practice on.
- Once you have an image you like, reverse it using whatever photo program you have on your computer. If you’re not sure how to do that just Google it.
- Put a sheet of your waxed paper into the printer and click print.
- As the waxed paper comes out of the printer, gently guide it. You have to be careful it doesn’t roll under itself or touch itself in any other way because it will smear the ink.
- Put your image exactly where you want it on the wood. Remember … this can be any unfinished wood. A bench, table, box, or anything!
- Holding the transfer tight to the wood, and working quickly, swipe the edge of a credit card across the image. This pushes the ink from the waxed paper down into the wood, which absorbs it. Push hard but not so hard that you rip the waxed paper.
- When you’re pretty sure that you’ve transferred as much ink as possible lift off your waxed paper and get ready to call someone. Because that’s the first thing you’re going to want to do because this method works so well.
Notes
- Once you place your image you can’t move it. Do not move it. It will smudge. You will be sad. Then you will cry and it will smudge some more.
- Use smooth wood. Rough barn board won’t work, but smooth barn board will.
- Darker colours on lighter wood works best.
- Dampening the wood a bit with a sponge will make the transfer darker, but it might blur and smudge if you’re not extremely careful.
- If the waxed paper won’t feed through your printer, tape it to a piece of regular printer paper before feeding it into your printer.
- Some readers have also had success by using the slippery side of freezer paper so you can try that.
Laughter may now resume.
→Follow me on Instagram where I often make a fool of myself←


GREAT IDEA! Can't wait to try it.
If your printer mangles the waxed paper, cut the waxed paper a little smaller than regular sized printer paper and tape the waxed paper to the printer paper. It should go through the printer OK. Then remove the tape and remove the waxed paper from the printer paper.
Awesome idea. I love to try these on brother's wedding. Let's see, how exciting it would be at first place.
Thanks for sharing the technique! You just made my project a whole lot easier!!
Hi! I haven't tried it yet but it looks like a great idea! Just a question...if used as a cutting board will sealing it protect the food from the ink?
What is wax paper I am in France is it the stuff you use for baking cakes ! Am I stupid !!
Wax paper it literally paper that has a light wax coating on it so when you wrap stuff in it it stays fresh. Not parchment paper. More like freezer paper. ~ karen!
Hi Karen!
Thanks for the great idea! I would like to do this on a cutting board I am making. I'm going to be putting mineral oil on the board - do you think it would be best to put the mineral oil on before or after transferring the ink?
Thank you!
My mind is blow, this is awesome!
So if i were to try to do this on a wood cutting board, i wouldn't be able to use it as a cutting board anymore right? It's purely decoration?
Hi! I'm thinking of making something similar for my sister-in-law for Christmas. My question is does it print okay on the waxed paper if I want to use a white for the font color?
Hi Karen,
Just stumbled across your site...love this idea. I recently found a piece of driftwood that is very smooth but curved and as its the only one of its kind I don't want to ruin it....any suggestions on how to transfer onto a curved surface? I have an HP Photosmart 7500 and am open to using wax paper or freezer paper. I'm planning on doing some dry (wet) runs on flat pieces first but not sure that whatever I learn will work on the rounded surface of the driftwood.
Think about a flat piece of paper lying on your desk. If you push from both sides of the paper towards the centre then the paper will rise away from the desk in the middle...that's what my driftwood looks like...oh dear...not sure that really helped visualize the shape?
Here's the result...
Definitely worth trying. I used whatever I found around the house and was very easy to do! The most time it took was looking up quotes and figuring out what types of font I wanted to use. Thanks much!!
Sandy! Your picture didn't upload. I'd love to see it! (The photo has to be jpeg format) ~ karen!
Ok, here it is. After doing this sign I tried hand painting one. It took much, much longer!
Very nice! You did a great job! It can be hard if you're doing letters and things that are centred to get them just right. ~ karen!
Hi Karen,
I tried reading through your comments, but gracious there were just too many of them. Hopefully this question hasn't been asked and answered repeatedly.
Have you tried this method using freezer paper with an iron (no steam setting)? I have seen this method used on fabrics and have seen this method used on wood using t-shirt transfer paper. I wondered if the ink would penetrate the wood and perhaps look a little bolder and brighter this way?
I am so eager to try this. This could change my walls and I have the supplies...
I'm just hoping I can find a way to make the transfer bolder.
I look forward to delving into your blog more.
Cheers!
Michelle
I haven't tried it Michelle, but if you have all the materials give it a shot! I find the colours you're using and the kind of wood you're using makes a big difference in terms of how dark the print comes out. The smoother the wood, the brighter/darker the print looks because there's literally more wood for the ink to absorb into. If the wood is rough, there are a lot of ridges so you lose a lot of the brightness and detail. I've done black on very smooth wood for instance and it comes out perfectly, as if I'd stamped the wood with ink. :) If you give the other methods a shot let me know how it goes! ~ karen
I just had to subscribe.It's the first time I've seen your blog and I am soooo impressed. i am really looking forward to your emails.impressive also are the many comments.I had to press the arrow on my laptop so I didn't take too long getting to 2016.You are amazing.Thanks.Anne
Well good, lol. You're quickly becoming my new favourite commenter Anne! ~ karen
can you not iron off prints from a laser printer? I don't have one so could someone else try it? Not to mention a great use of the office printer.( like they need it anyways) hot iron over grease proofed paper( i think this is to save the sole of the iron) use normal paper in the printer. again reversed image and rub it all over the paper.
Hi Richard. No, I'm afraid you can't use a laser printer for this because a laser printer uses powder and heat to burn the image onto paper, while an inkjet printer (ink) uses ink that's wet and can be transferred. :) ~ karen!
I'd like to transfer something to a cutting board and then seal it with something food-safe so it would still be functional. Does this seem like a feasible idea? Would the transfer work on finished wood (i.e. - store bought wood cutting board)?
Hi Caroline. A store bought cutting board wouldn't actually have a finish on it other than a food grade oil like mineral oil. There isn't anything you can really put over it that's food safe BUT if you put the design on a part of the board that won't be used or cutting. Close to the edge for instance. You might be able to get away with putting a thin coat of polyurethane over the design. You'd have to wait until the ink had set and was very dry though (a couple of days probably). And always do a test run on something else first to make sure there isn't going to be any bleeding or running of anything. :) ~ karen!
Will it work with HP Laser Jet PRINTER ?
Hi Lorraine! I'm afraid not. A laser jet printer burns the printing onto the paper which won't work. An ink jet sprays ink, which when wet can then be transferred to the wood, which is why only an ink jet printer will work. ~ karen!
any recommendations for me? the wax paper keeps jamming in my printer, i have tried everything
Hi Mary. Tell me what the everything is that you've tried and I'll see if I can help. :) ~ karen!
Am I missing something or is "The Graphics Fairy" website a subscription only site where you must pay either monthly or yearly to have access to any graphics? That is as far as I got on the website. Might you have other good copyright free website referrals?? Cheers!
Hi Bee. No, there's no subscription needed to get access to the majority of her graphics. I noticed today that she does have a premium service as well, and a pop up asking if you'd like to subscribe to her site, but most graphics are free. ~ karen!
Thanks Karen, will look-just kept getting hit with the page to sign up for a membership no matter what i tried searching. I had one other q if you don't mind. I tried reading thru all q&a's above, hope I didn't miss this but I was wondering if there can be a wait period from print to transfer or does it need been done right away following the print out to work. I assume if you wait and the ink dries more, the transfer might not work as well? Unless you maybe do the warm water on the wood thing, er? Also, I have a lot of thin boards laying around that seems to be less porous on one side (smooth with shiny feel). Thinkin they may be made of a fake wood or plastic materials. And have wood (maybe shelving) pieces that definitely have some sort of clear finish on them. Can it work on these or do I need do the stripping thing mentioned above? Thanks again!!
Out of all the tutorials I have seen about transferring prints to wood this is by far my favorite! This is an example of one of the few tutorials that actually is easy as 1-2-3 and actually use house hold items. A lot of these types of tutorials I have seen needed modge podge and other random things that no one simply has "lying around"
My only qualm about this method is that since we are printing it on wax paper, the colors can only be so bright- I know this is a general happening when printing on to wood however the wax paper seems like it retains the least amount of color. I will definitely use this method when I want a more vintage look. Ive been trying out various tutorials to get the colors super vibrant and still haven't found one. I got recommended this website that does it for you and the images come out extremely bright and clear, however I want to create something 100% handmade. However, if I can't figure it out I might just use this site and give up on my idea of being DIY-er because I can't really beat how clear these look. If anyone wants to check it out here is the link, also if anyone was able to get a image close to how these look please let me know! Here is the link to the site:http://www.plakthat.com/prints-on-wood/ )