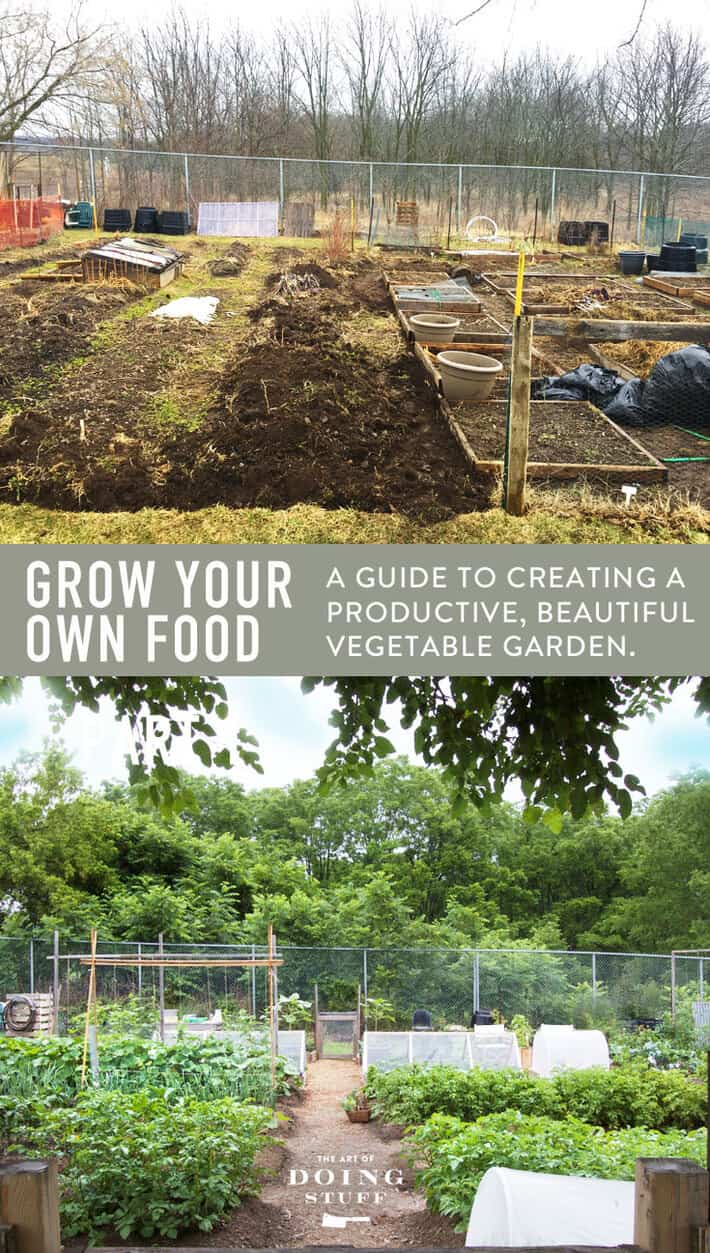
It's the reveal of my new vegetable garden PLUS 20 great tips. After 5 months of digging, levelling, hauling and hammering I finally have something other than resentment growing in my garden. I think I did it. I think I created vegetable Narnia. And here's how you can too.
By the way this all comes with years of experience and if you're discouraged with your garden don't worry about it. I'm discouraged with mine all the time, but it's always more exciting than it is discouraging.
Unless you're just learning to grow luffa. In which case it can be discouraging for a decade or so because luffas are assheads. If you'd like to grow loofah sponges but you don't know where to begin, read my guide on growing luffa. It'll save you a decade of discouragement.
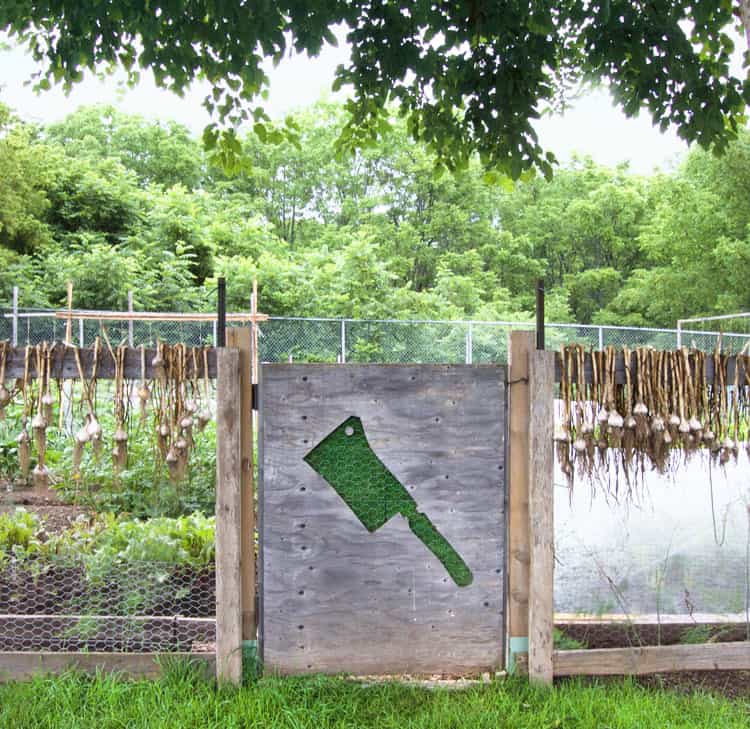
With each photo I'm going to include a little snippet or tip on why I did any particular thing. For instance, why did I make a cutout of my logo in my gate? Because it makes me happy. Why is the garlic hanging on the fence? To cure it.
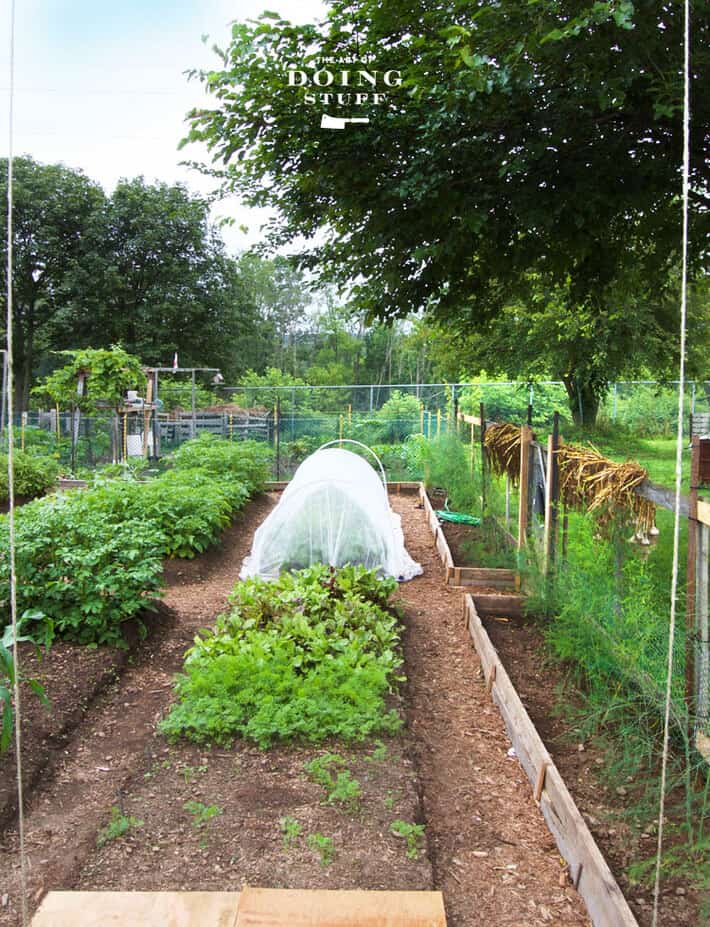
Tip #1 - Garlic needs to be cured for 2 weeks outdoors in the shade so it will store for a long time. (my garlic is under the shade of a tree and when it rains I cover it with a tarp)
Get the idea? Here we go.
At this very moment there are tomatoes ripening on the vine. Potatoes are growing under the soil, strawberries are bursting with colour and Honeydew melons are sweetening by the day. And this is how it will go until the end of summer unless I have to contend with ... the massacre. The massacre being the influx of voles, raccoons, rabbits and cabbage moth. I've done whatever possible to stop all of these pests. It was a lot of work to do what needed to be done, but it'll pay off by saving me time and vegetables later.
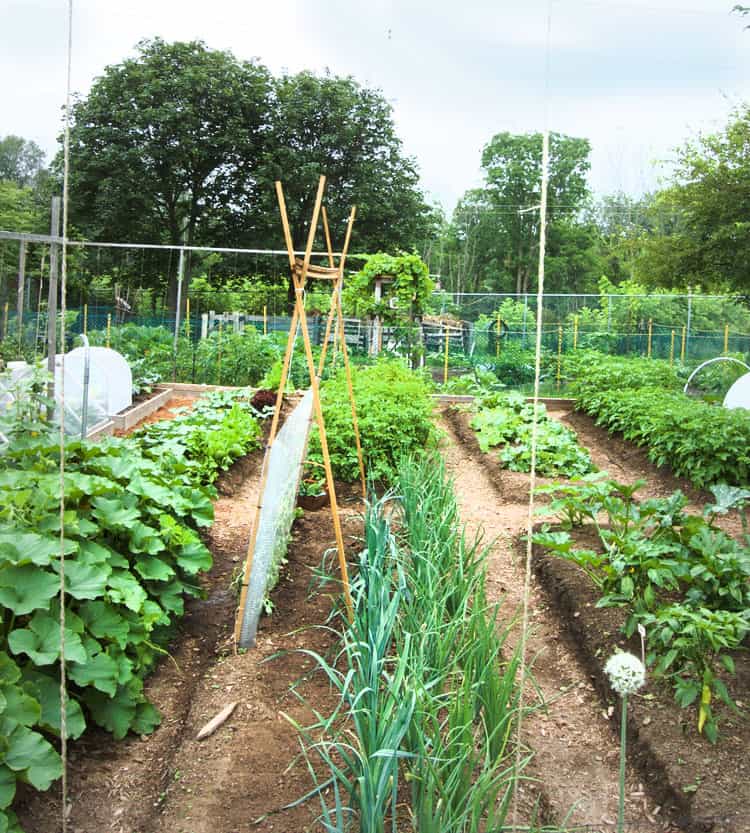
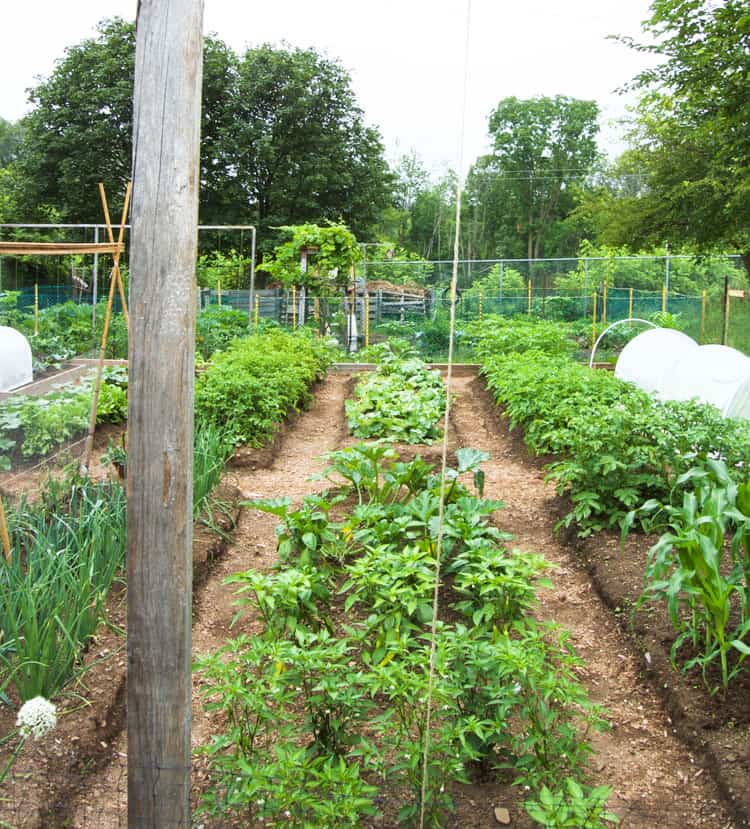
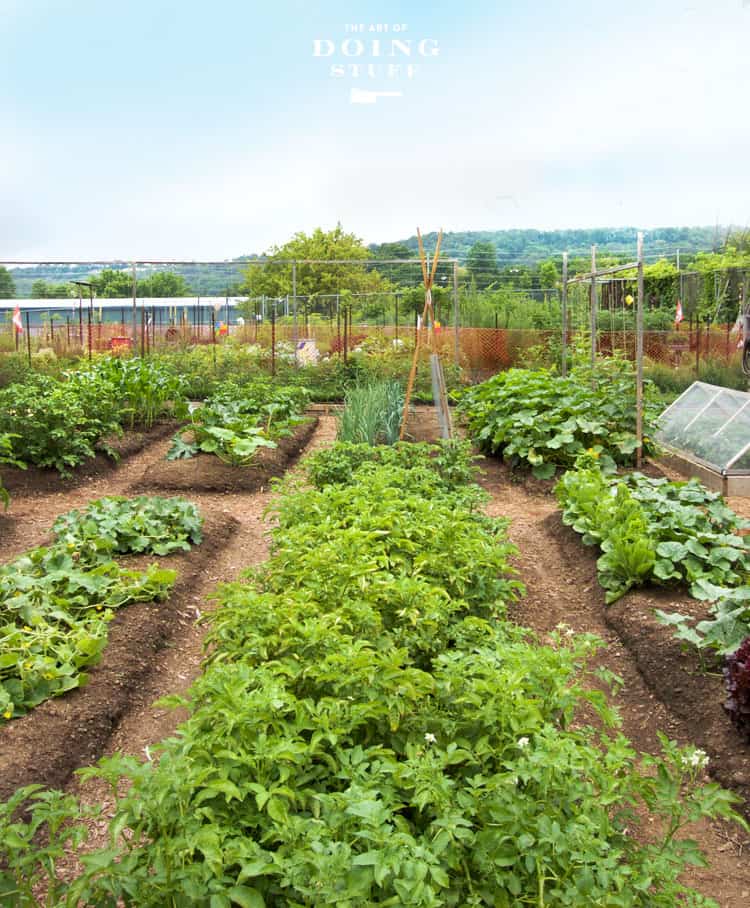
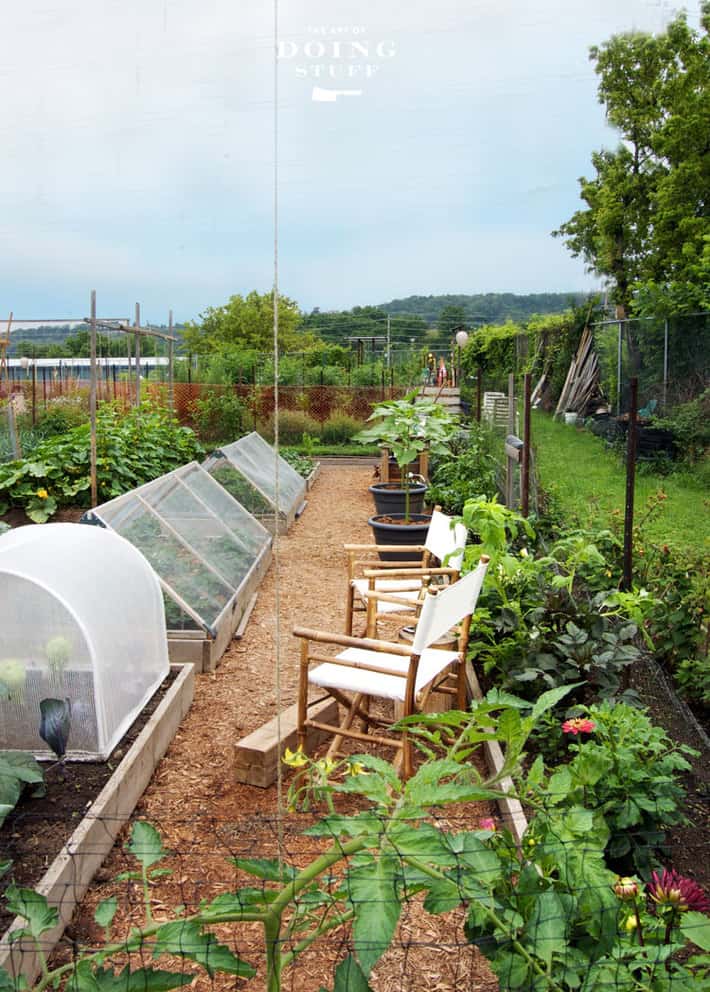
Let's start with the design of the garden. I went with classic rows as opposed to the trendier 4' x 4' square foot raised beds because I could fit more in this way and because I actually prefer the look and feeling of long rows in a garden. It feels nostalgic to me.
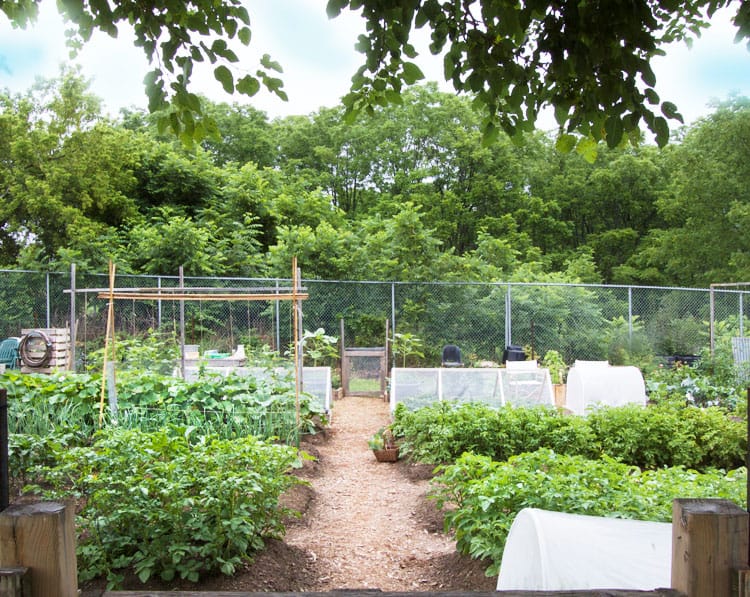
The garden consists of a central path that runs from the front gate to the back gate (so I can access things I have beyond the garden fence like a compost bin, building materials and my raspberry bushes.) Off of either side of the path are 16' rows each planted with a variety of things. How's that for specific. More on what I'm growing as the photos progress.
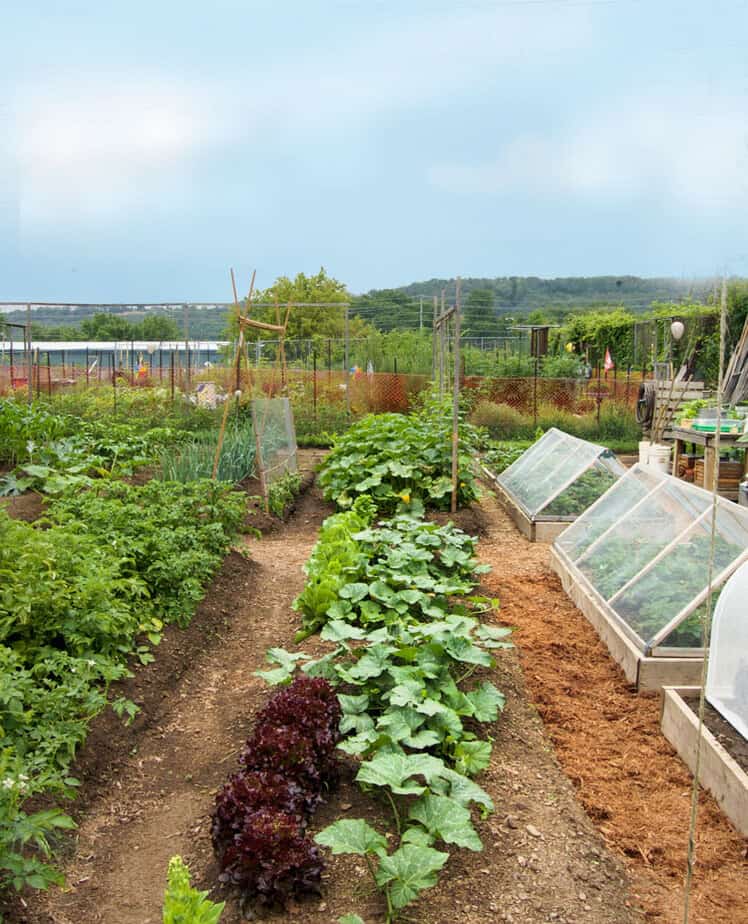
You can see the beds are raised but they aren't boxed in with wood. The advantage to this is cost and effort. Boxing in that many huge raised beds would cost hundreds of dollars and they'd all start to rot in a few years. I'd then have to deconstruct the beds, get rid of the massive pieces of rotting wood, buy more and rebuild the beds.
The disadvantage is the soil can fall a bit around the edges so you can't plant as close to the edges as you can in a traditional, boxed raised bed. The REAL disadvantage though is that weeds grow on the sides of the beds so it's a lot more weeding than you'd have with a boxed raised bed.
I'll think about gradually turning them into boxed in beds if it all drives me nuts this year, otherwise I'll stick with the raised, boxless beds.
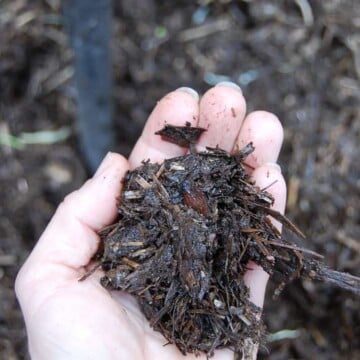
Tip #2 - No dig gardening. I'm going 100% no dig gardening from here on in. That means you do NOT till, poke, prod or lift the soil at all. Ever. Each year you add a few inches of compost on top of your beds and plant directly into that. Worms are magical little creatures for aerating beds and so are plant roots. Do. Not. Dig. (the only exception are potato beds which don't do as well with no dig)
The bean trellis! How do you do it?
Tip #3 - To make a bean trellis that'll last a year or two buy some 1 x 1's. Either hammer them into the soil or dig a 1' deep hole and place a length of wood into each hole. Pull the pieces of wood together at the top and attach with twine. Add another piece of wood lengthwise at the top and attach that. You can either run string back and forth between the wood to create a trellis or use plastic netting or chicken wire for the beans to grow on.
What's between the beds? I've mulched it.
Tip #4 - To stop weeds in either beds or paths lay down a layer of newspaper then top it with 2-3" of natural, cedar mulch. I've had a total of 3 weeds poke through in the entire summer. And actually they weren't "weeds" they were quack grass. The newspaper eventually decomposes at which point you just need to top up your mulch every year.
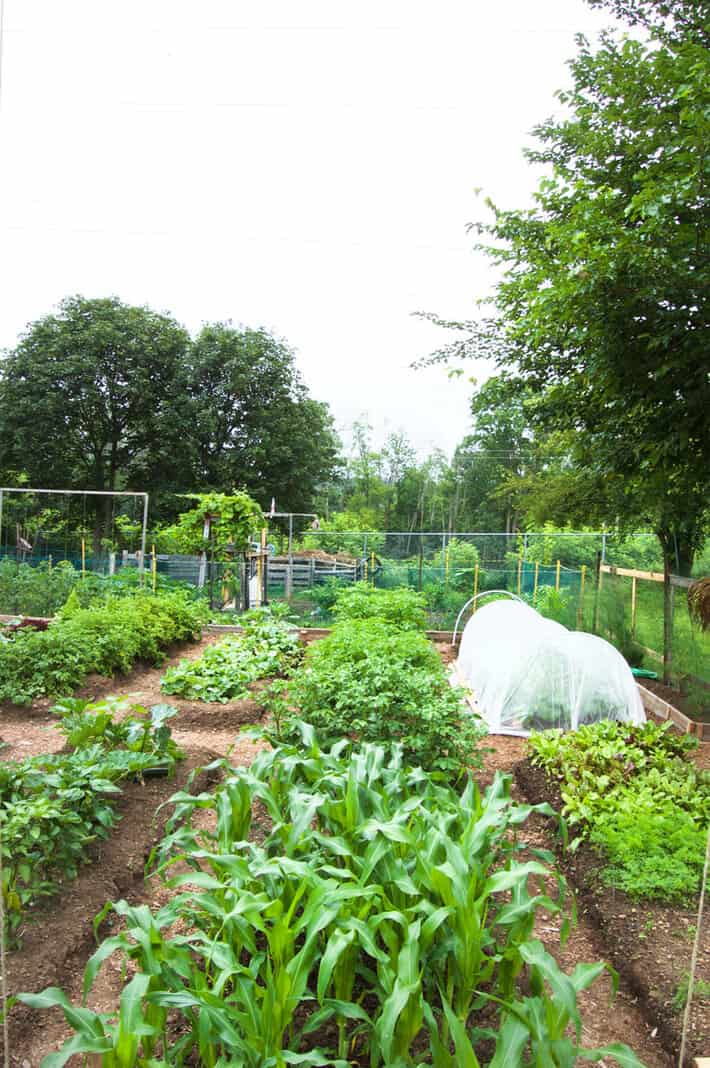
Corn is one of my favourite things in the garden because it's a hit with me and it's a hit with kids. Last year I had my niece, nephew and friends come to the garden to pick their own corn, then we went straight to my house and cooked it. I make a bet they forget 85% of what they did last summer but they'll definitely remember the corn.
Tip #5 - Don't grow corn in a single row. Each corn stalk pollinates those around it and it does a much better job of that if it's grown in a clump. So a square bed of corn will be way more successful than a long row. Also don't grow two varieties of corn near each other (especially ornamental and edible) because they'll cross pollinate and you'll end up with some weirdass corn.
You can just barely see the plywood on the ground here. A more religious woman would use it to pray to the Gods for carrot germination. I use it to guarantee carrot germination.
Tip #6 - To get carrots to germinate, plant the seeds into watered soil and then cover them up for a week. Flat wood is your best option because it presses down and helps the seeds maintain contact with the soil. The wood also helps keep them dark which they like and most importantly keeps the soil damp. If the soil dries out, your carrot germination is screwed and since they're so close to the top of the soil carrot seeds tend to dry out immediately unless you use this little trick.
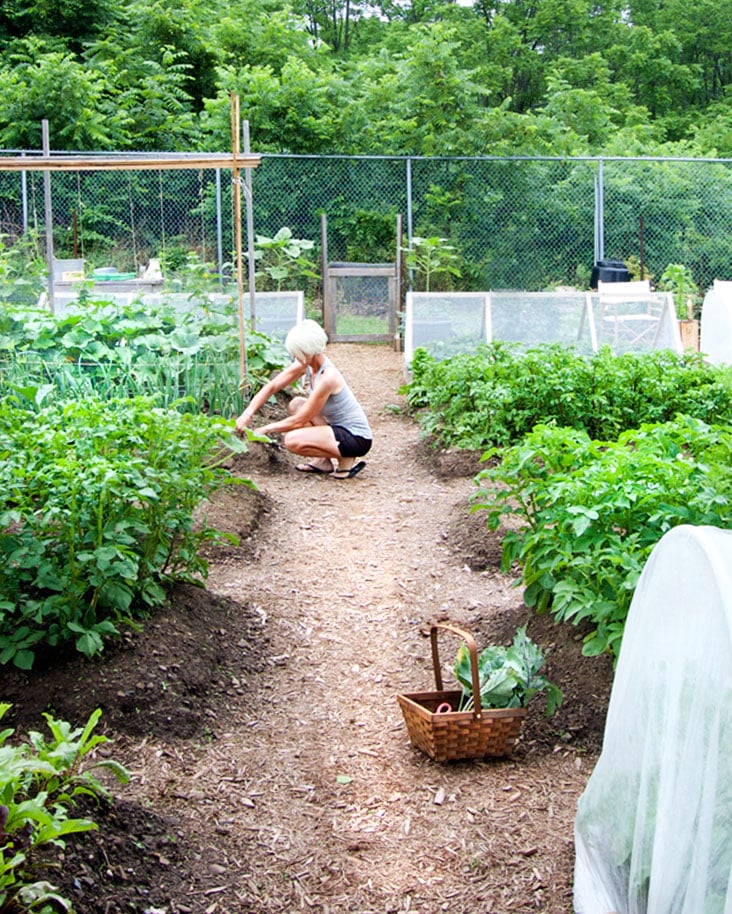
ALWAYS keep something in your garden for putting vegetables in to take home, whether your home is 20 steps away or a 5 minute drive. How the hell do you think you're going to carry it all? And if you think you'll always remember to bring a bag or basket whenever you go into the garden you're wrong. We're not that smart.
I bring this (or any other basket) to and from the garden. For the times I forget it, which is you know ... almost always ... I also have a tupperware container under my garden table filled with grocery bags.
Tip #7 - Keep bags or baskets for carrying vegetables RIGHT in your garden at all times. Also, don't wash your vegetables right away if you want them to store well. Brush the extra soil off of them and leave it at that. Wash them just before you're going to prepare them to eat.
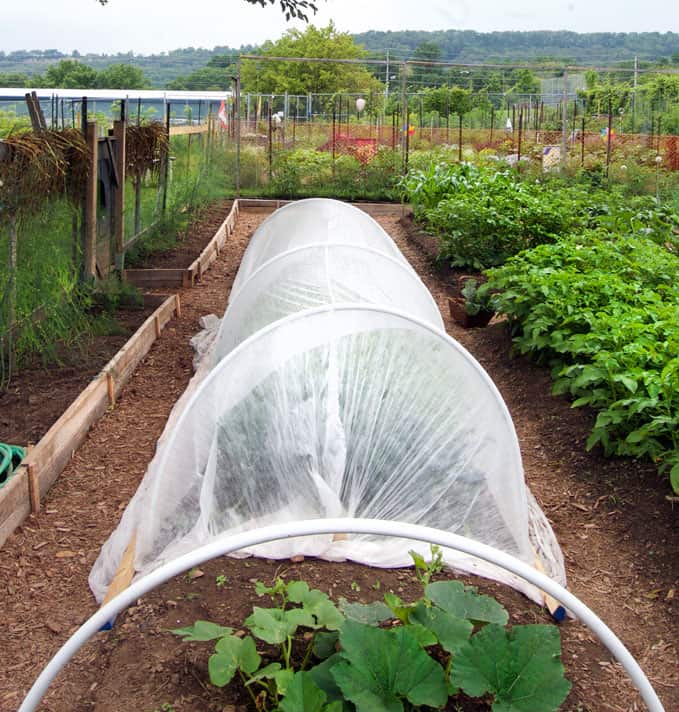
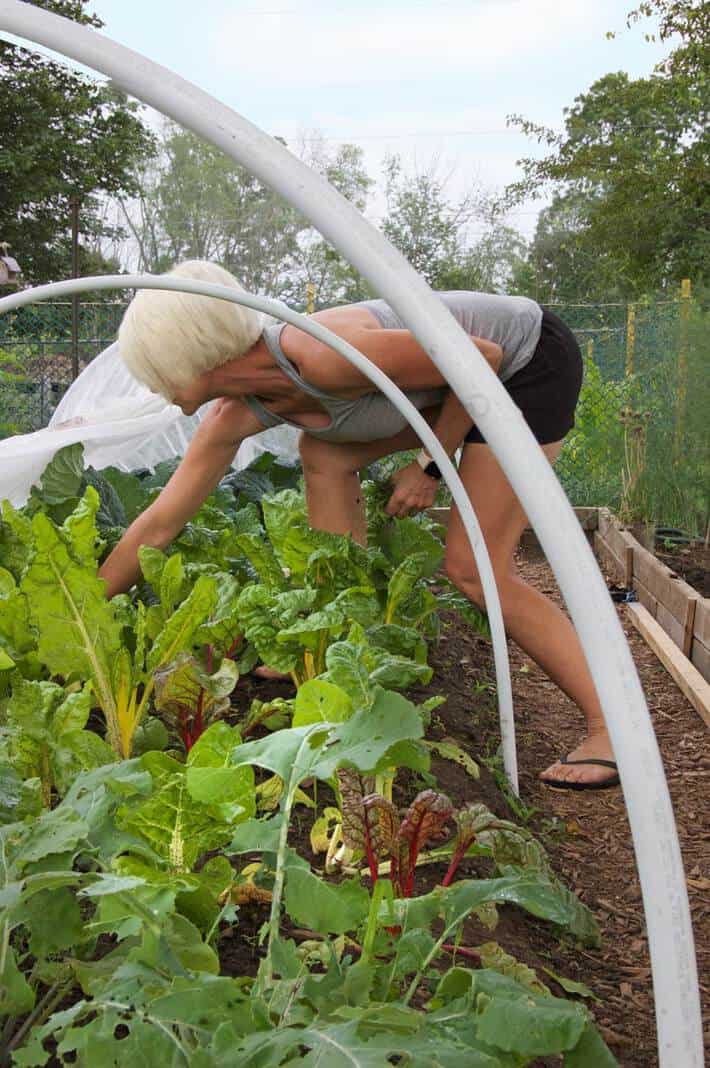
Is there a boy in that plastic bubble? No. And it's actually row cover that feels kind of like paper and kind of like cloth. Row cover is a very lightweight material that rain and sun can get through but bugs cannot. Not even the tiniest little midges. It is the ONLY way to grow hole free kale, cabbage, swiss chard. It's also the only way to grow broccoli that isn't filled with cabbage worms.
I got mine from Dubois Agrinovation 3 years ago and I still have a HUGE amount of the roll left. It's only $85 Canadian for ... wait for it ... 330 feet of 11 feet wide row cover. That's almost hilariously cheap. You can also get it in 6 feet wide for $58. Dubois is an agricultural supply company for farms so the prices are really good for everything. It you're a backyard gardener or allotment gardener like me it'll last you a lifetime. I'll be installing a drip watering system I got from them in the next week or so.
You can even buy row cover with the hoops already attached. I've never used it myself but it looks pretty genius.
Tip #8 - To keep crops clean use row cover. You can either just "float" it right over the plants, holding the edges down with rocks or wood or you can make hoops out of flexible plumbing pipes. This is more necessary for tall vegetables like kale. To make the hoops, hammer rods or bamboo sticks into the ground on either side of the bed. The rods/sticks must be smaller than the circumference of the plumbing pipe so the pipe can slip over the rod. This will hold the hoops in place. Then just drape the row cover over the hoops and secure with rocks or strips of wood. Or you can buy hoops for around $2 per hoop.
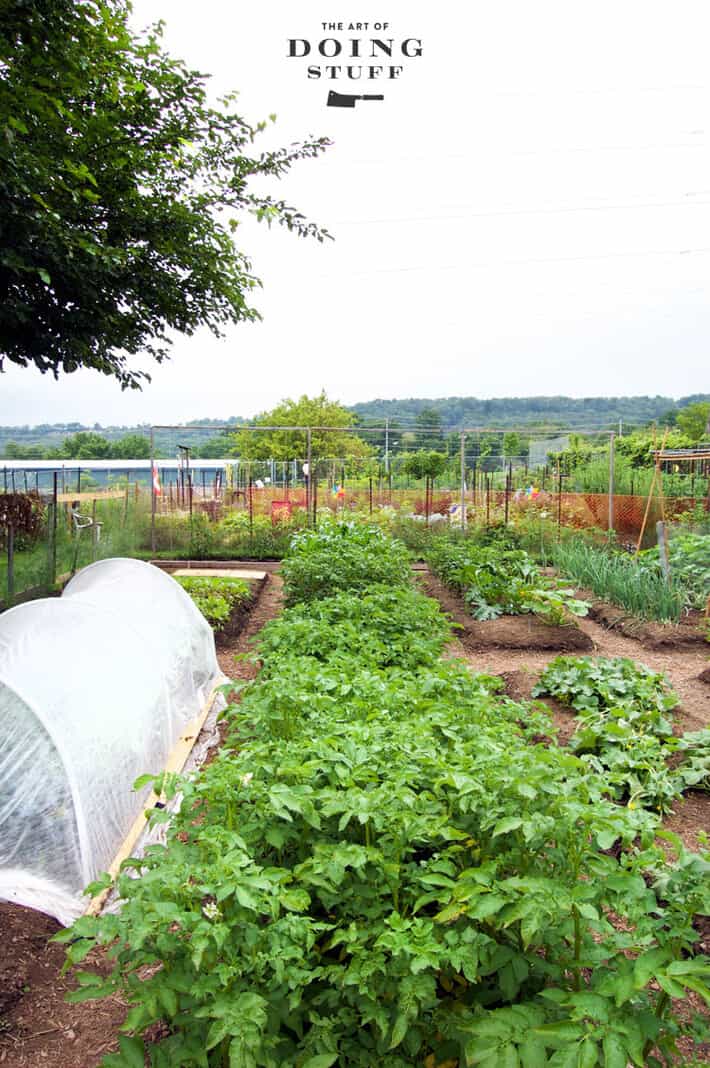
I think it goes without saying that I have a love of all things potato. Although clearly, I still feel like saying it. Potato chips, french fries, mashed potatoes, gnocchi, scalloped potatoes, roasted potatoes (recipe coming up Wednesday for the very BEST, crispy roasted potatoes). I never met a potato I didn't eat. So I grow a lot of them. This year I'm growing Russet baking potatoes, Kennebec potatoes (which are my preferred variety for french fries), Chiefton red (red potatoes make the best potato salad), and an epic variety of purple potatoes called Russian Blue that is dark, dark purple on the inside and out PLUS it retains it's colour after cooking. I've spent a lot of time experimenting with potatoes and making them easier to grow and I've come to decide this ...
Tip #9 - If you don't have it in you to hill your potatoes ... don't. I have never noticed any huge loss of potato production from not hilling. I have on the other hand experienced HUGE potato loss by using that stupid "grow in straw" method. Was it easy? Was dropping a potato onto the ground then covering it with many feet of straw easy? Kind of. Until I had to clean up all the straw at the end of the season. Mainly the method was awful and useless and resulted in a harvest of about 3 potatoes. You may have experienced differently, but this is how it went for me.
The other huge hit in the garden with kids are the melons. You haven't experienced life if you haven't sat down in a garden and consumed a just picked Honeydew still warm from the sun
Tip #10 - Don't water your melons as they're getting to the point of ripening. You'll just dilute them. Less water when ripening = sweeter melons. The more melons ripening on the vine the less sweet they'll be because they all have to share the sugars the vine leaves have produced. If you have 2 or 3 melons of around the same size growing on the same plant pinch 2 of them off if you want a really sweet melon.
Looks good right? Well yeah, I was taking pictures of it for a blog so of course I cleaned it up a bit. But this year I actually vowed to keep on top of things no matter how busy I was. Because once a garden gets out of hand there's no coming back from it. You might as well just pack it in, call it a day and accept that you're a big loser.
Tip #11 - Every time you go out into your garden pull weeds. Make it a habit. The more you weed the less weeds you'll have. Weeds flower and go to seed fasttttt; in about the same length of time as a Quentin Tarantino movie runs. THIS is the crucial point. If you don't get the weeds before they go to flower and seed you're starting the cycle all over again and it will never end. If you take the time in the spring and especially for that first year to get rid of all the weeds as they appear and never let them go to seed you'll make every subsequent year more and more weed free. We're talking about actual weeds, not weed-weed. If you want to grow weed-weed that's a whole other post entirely and one I wouldn't legally be allowed to write until next July of 2018 in Canada.
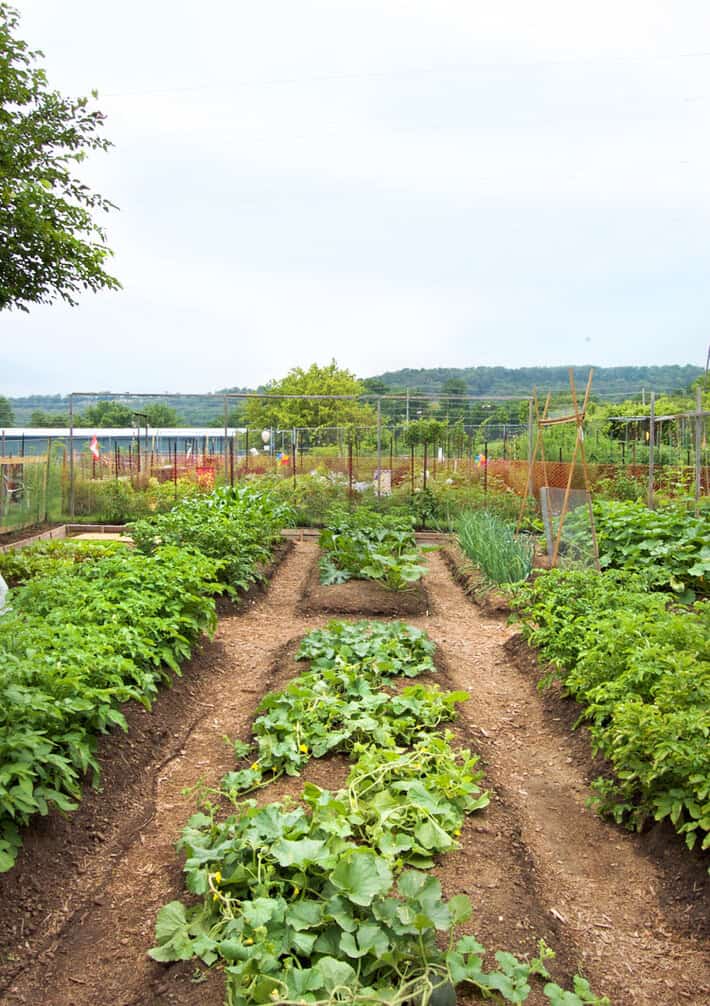
This little row of squash is the Honeynut squash that Blue Apron recommended we grow. It's leaves are way less prolific than the Grey Ghost I have growing on the other side of the garden BUT ... these leaves are edible. All pumpkin leaves are edible but the ones with the white veining are the ones my fellow gardener from Zimbabwe told me they eat.
ALSO, the Honeynut squash is the only squash in my garden this year not to be attacked by the Squash Vine Borer. I'm not sure why but thanks for the recommendation Blue Apron.
- Also Blue Apron is extending their discount of 3 meals for free to my readers today. (this isn't a sponsored post, just a shout out for the Honeynut Squash recommendation.)
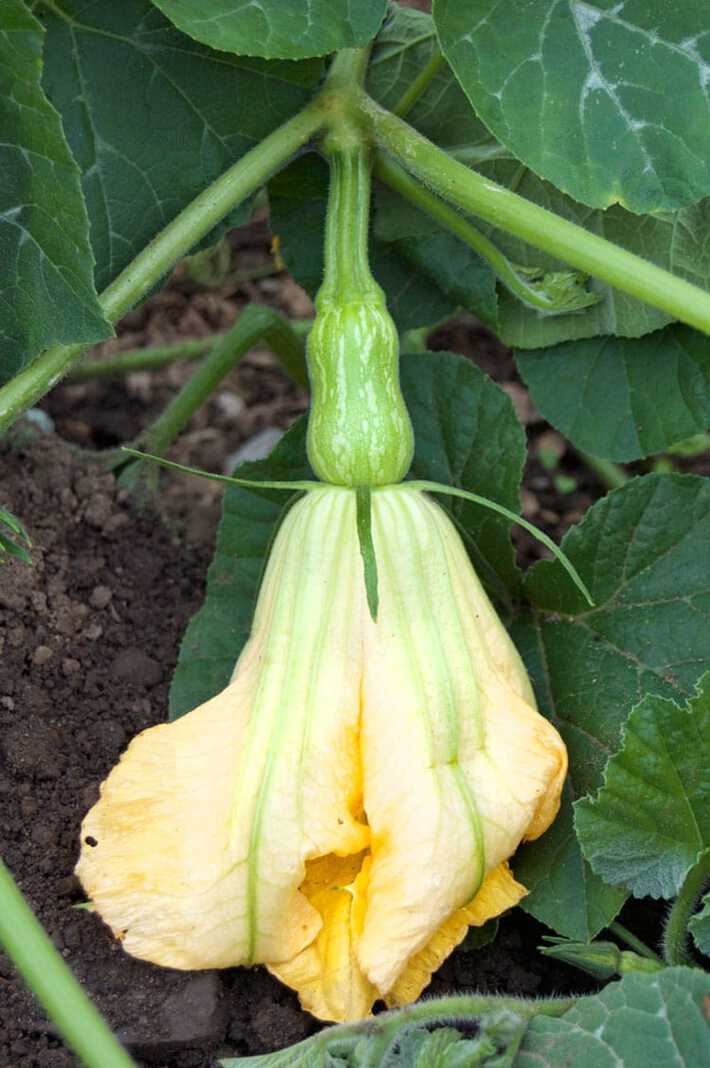
Tip #12 - Zimbabwe pumpkin leaf recipe! Food is food and North Americans sometimes forget that. Pumpkin leaves are one of the many edible leaves we tend to just ignore. Just pick the smaller, more tender pumpkin leaves, boil them in water with some baking soda (to help soften them) for a couple of minutes, then sauté them with tomatoes and onions. The boiling also helps get rid of the prickles on the squash leaves and stem.
I think we need to take a break here so I can let you know I realize this is probably the least hysterical post I've ever written. But there's a lot of information to get through and my brain is focused on teaching. If I can muster up the energy I'll throw in a knock knock joke later on.
O.K. let's talk about that cute little hoop house. It goes with the Lee Valley self-watering raised bed I have at home. I don't need the hoop house on it right now so I brought it up to the garden to protect my cabbage and it's GREAT. I love this thing. My cabbage had been decimated by asshead cabbage worms so I pulled all the mangled leaves off, washed off the caterpillar poop and covered them with this little hoop house. It's been magical ever since.
Tip #13 - Cabbage will grow 2 or 3 more small heads after you harvest the initial large head. Just cut the cabbage off instead of pulling up the whole plant and leave it. Within a couple of weeks it'll start growing a couple of new heads off of the same stalk which are a FAR more reasonable size for eating. They're perfect for roasting as a side dish.
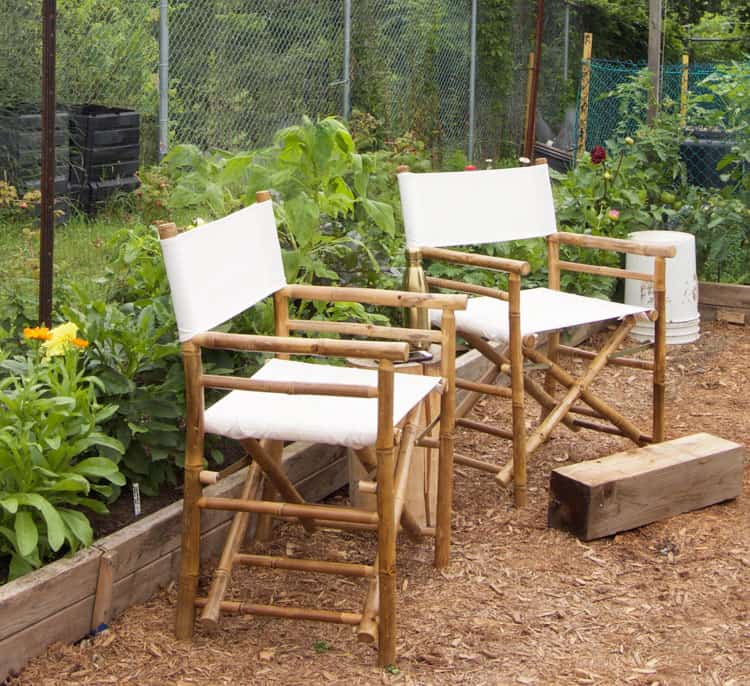
When I was first working on redoing this garden in the spring I had to set a timer on my phone to remind me to sit down and drink water every hour or so. I had a hard plastic chair and only one of them so when anyone came up to the garden only one of us could sit. It kind of worked out actually because that meant I could force my 83 year old mother Betty into pulling the plough while I lounged and played on my iPhone.
Since them I've seen the error of my ways. You need at least one, maybe even two relatively comfortable places to sit down if you hard core garden.
Tip #13 - Make things convenient. Keep a chair in the garden so you can sit on something civilized as opposed to the dirt. Or a snake. ALSO I keep an overturned bucket in every corner of my garden so when I'm weeding I'm never far from a bucket to throw the weeds into.

Since you're really old and stuff, I imagine you already know that nothing makes a better jail cell than loosely woven dental floss. Why actual penitentiaries haven't figured this out is a mystery to me. This black netting, technically called deer netting, has so far provided the best protection against raccoons getting into my garden than anything else I've tried. If it keeps them out I expect it would also keep inmates in. This makes perfect sense since raccoons, in my experience, are generally more clever than 95% of the population in prisons. Or the world's population in general.
Tip #14 - The best way to keep rabbits out of a garden is to dig heavy metal fencing 6" or so into the ground around your garden. Rabbits will dig but generally not that deep. They'll chew but generally not through heavy metal. The best way to keep raccoons out is with flimsy fencing. Building a sturdy tall fence will do nothing other than give the raccoons something to thank you for. Sturdy and tall is easily climbable. Flimsy and lightweight isn't. So the perfect fence is one that has a couple of feet of chicken wire or hardware cloth dug into the soil around the bottom, with 6' high loosely hung deer netting behind it.
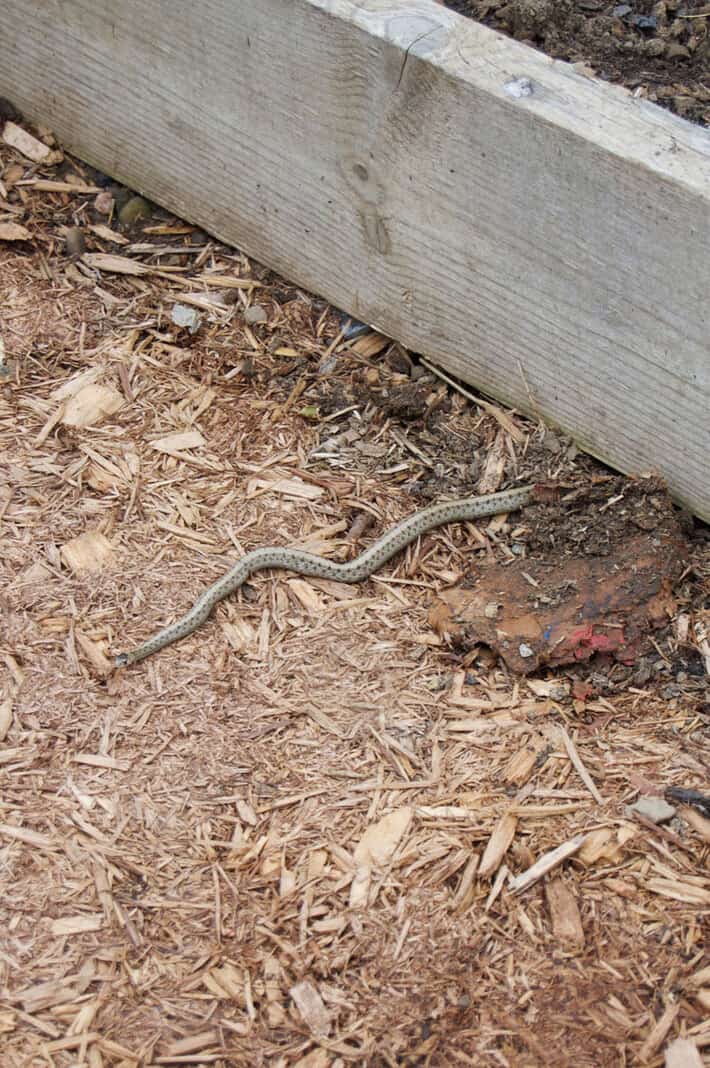
I spend a lot of time talking to my friend Brown Snake. He's pretty chill although a bit of a gossip. This is one of four boxed in raised beds in my garden. I made these ones boxed in because I was making mesh and wood "tents" to go over them to protect against voles and birds.
Tip #15 - To attract snakes to your garden leave piles of wood around. You can see this one coming out from underneath the raised bed. They love to hide in the cracks of stacked wood and sun themselves on top. Snakes will scare mice, voles and other rodents plus they eat bugs. Also if there's anyone you don't want visiting you in your garden, having a plot full of snakes is the most indiscrete and polite way of making sure they never show up.
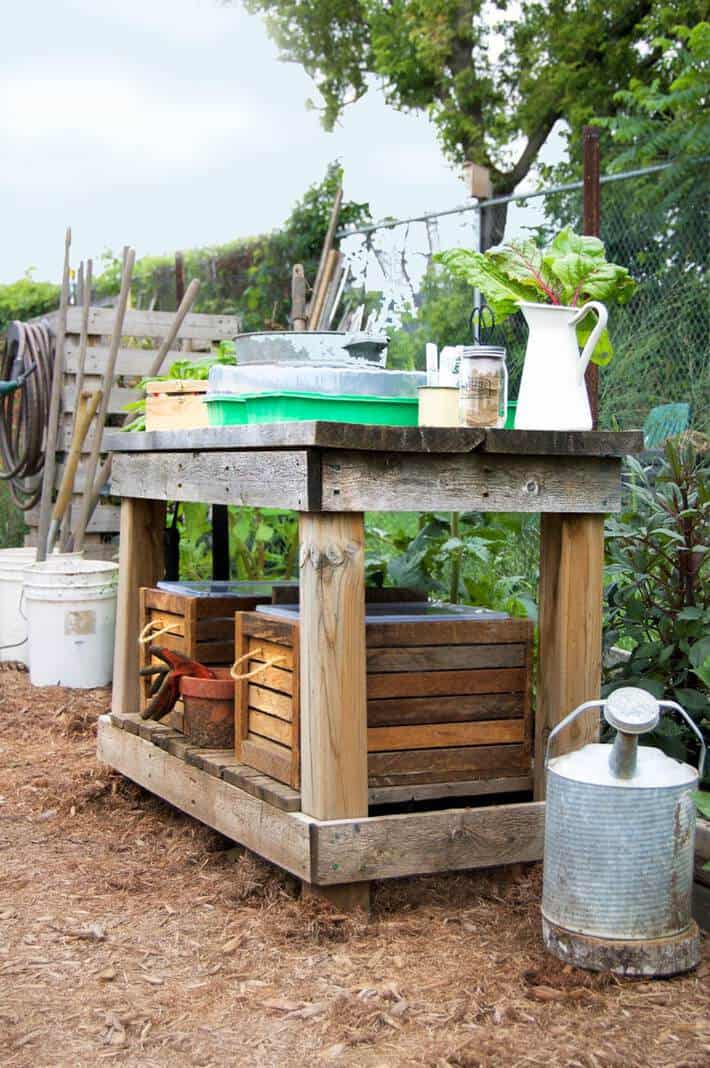
You need somewhere to put stuff. Gardening requires stuff and if your garden isn't steps away from your shed then you realllyyyy need somewhere to put stuff. I made this garden table out of scraps of wood and donated lumber. One one side it has a hook for hanging my jacket or purse. The shelf on the bottom keeps my supplies relatively dry (the wood crates hold tupperware boxes with tools, extra gloves, bags, screws etc.), and on the top I can dump down anything I'm carrying.
Tip #16 - Make or buy a table to keep in the garden for working on.
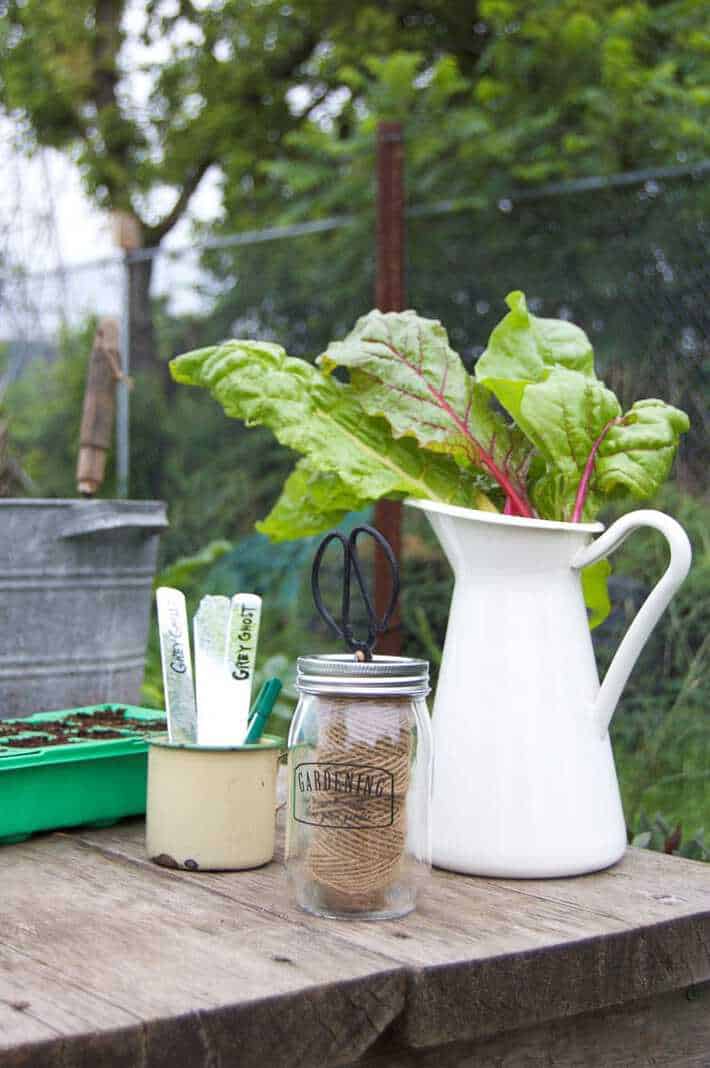
In case I become apoplectic at the garden I have a nice jar with twine in it to remind me of what the hell I'm doing there. I'm Gardening. I also use my table for starting new seeds. I just plant them in cells and once they get going a bit I transplant them into an empty space in a plot.
Tip #17 - Keep the plantings coming. You can keep planting a lot of seeds throughout the season to make sure you have a continues crop. Carrots, lettuce, onions, spinach, radishes, zucchini, cucumbers are all things I'm reseeding and growing for succession planting.
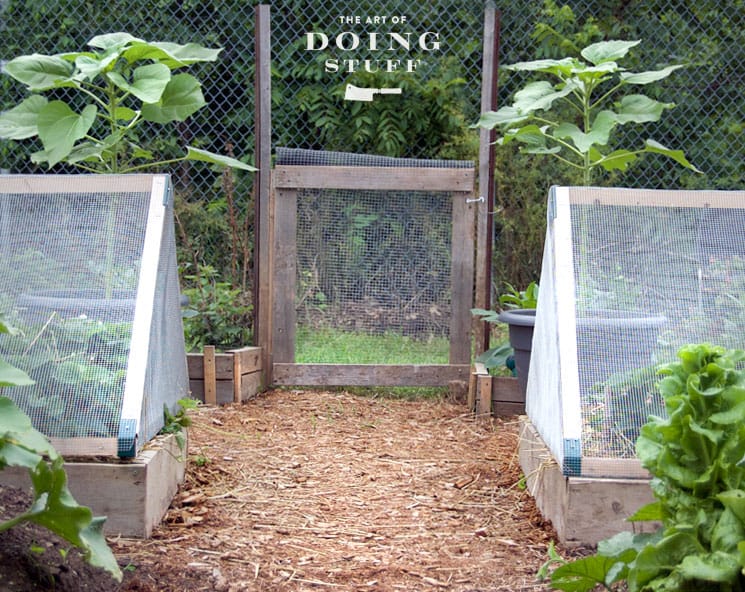
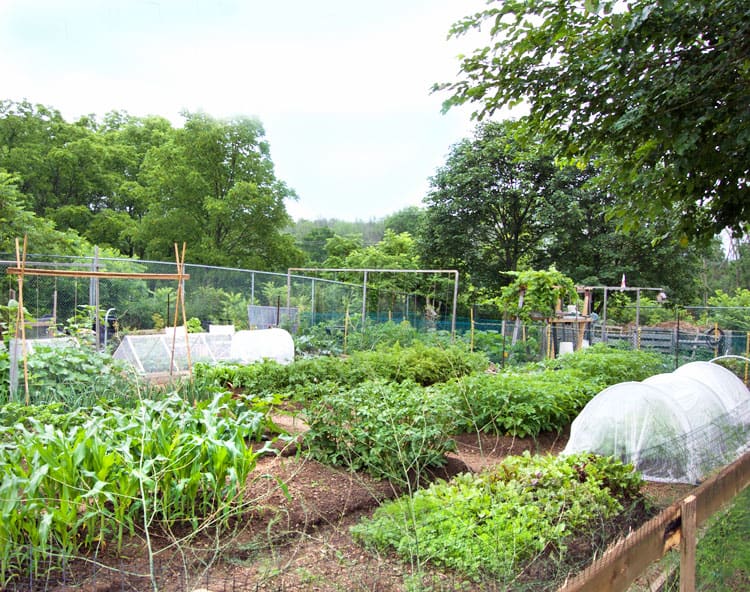
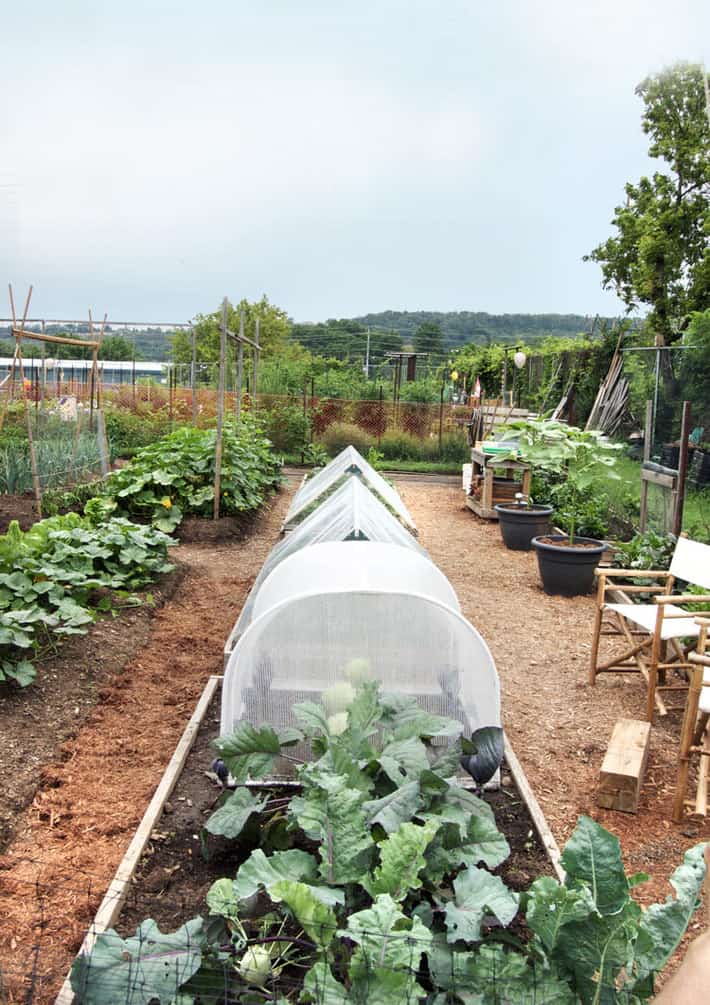
You've probably noticed these triangular tents in some of the previous photos. This is my biggest pest protection project to date. Well these and the slingshot. I got the brackets to make these row covers from Lee Valley a few years ago on clearance and they haven't carried them since. In an upcoming post I'm going to show you how to make a similar cover for your garden beds without using them.
I have my tents made with fine hardware cloth to keep out voles and birds, but you could also make them with row cover to keep out cabbage moth and other insects.
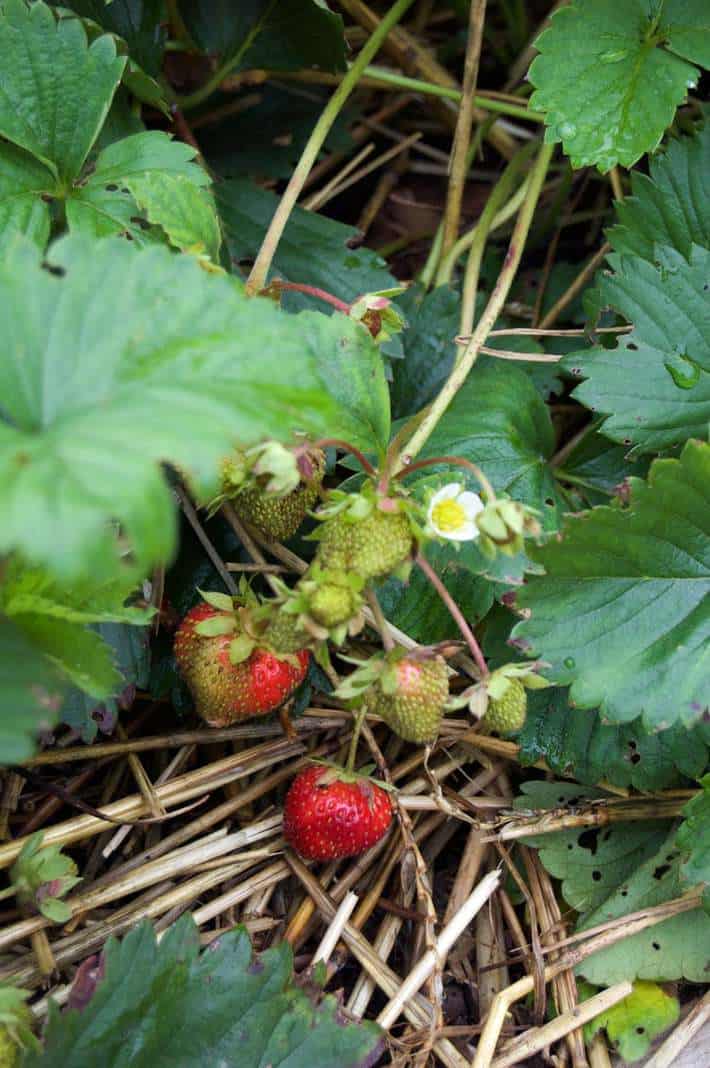
This is the second flush of my Day Neutral Strawberries, Charlotte. The variety was developed in France. It's smaller than a regular strawberry and sweeter too. Plus because it's "day neutral" it'll keep growing all summer long and into the fall. As long as the temperature is about freezing it'll grow. It doesn't rely on the length of day. Hence the term "day neutral".
Tip #18 - Keep 'em clean. There's a reason they're called "straw" berries. Put a layer of straw underneath your strawberry plants to help keep dirt dwelling insects and moisture off of the berries. Your berries will rot less quickly and never have any dirt or guck on them. You'll be able to pick them clean off of the plant and pop them right in your mouth.
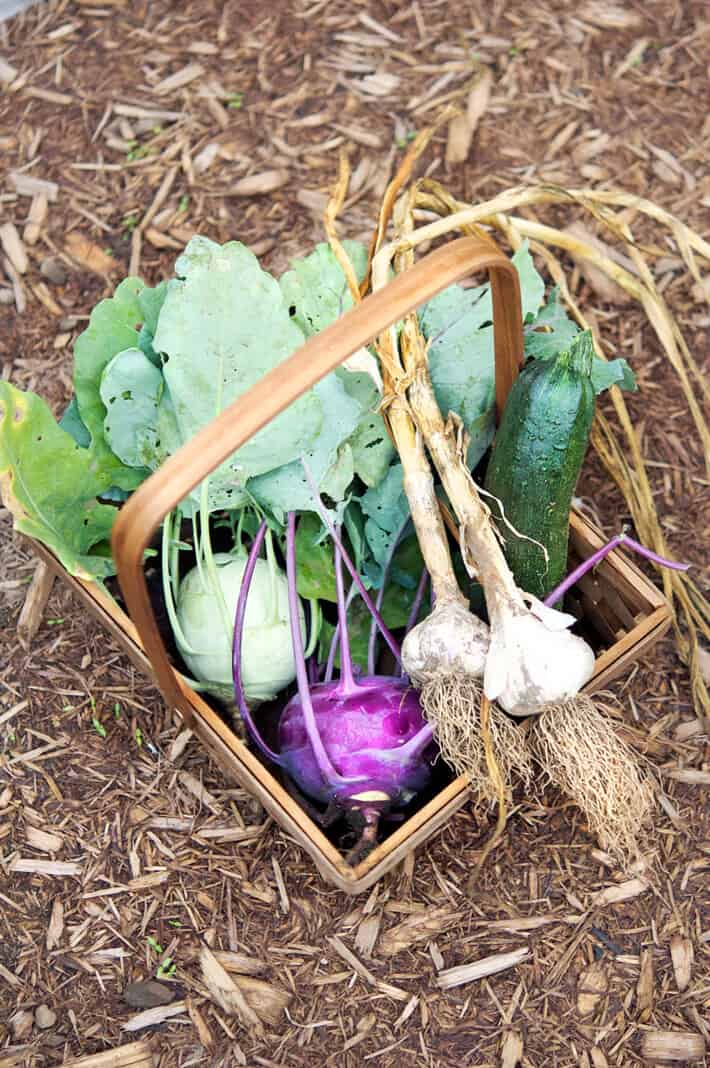
No tip here. Just a pretty picture to entice you into growing your own vegetables if you don't already. Green and purple kohlrabi, fresh pulled garlic and the ubiquitous zucchini.
Nothing is perfect for everyone. I know for a fact there are even people out there who don't like potatoes. I know that's frightening but that's just the way it is. So if you find the standard 4' wide beds too wide to reach across comfortably just don't make your beds that wide. I found 4' to be hard to work in the centre of so I changed my beds to 3.5" wide. If you're a ginormously tall person go wider. Also pay attention to how wide your paths are. Their size also depends on your size.
Tip #19 - Garden beds are typically 4' wide but if that's too wide for you and your short little freak show arms, then do them 3'6". When designing your garden make sure you have at least one path that's wide enough for a wheelbarrow if you plan to use one and make sure paths between the beds are big enough to walk and kneel in. You don't need much more than that but you do need room to walk, turn around and work. I keep paths at the width of my rake, 18".
If you really love gardening then take the time to make your garden nice and grow what you like. Or what your friends and family like. Make it a place that's fun to be as opposed to a place you resent being it. It may take a few months of gardeners rage and resentment before you get to the "fun" place but as long as you eventually get there you'll be able to work through the rage.
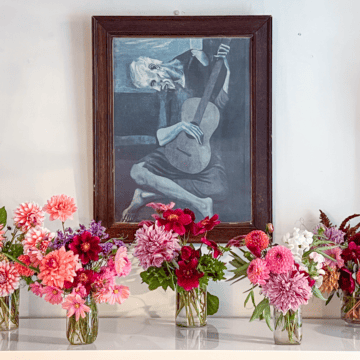
Tip #20 - Don't forget the pretty. Europeans have been understood the potential beauty of vegetable gardens for centuries. Potager type gardens evolve outside the kitchen doors of homes in England, France and Italy. There's a beauty in growing your own food and your garden can reflect that. Keep it simple, keep it structured and keep it cared for. Also ... keep the back of it full of flowers. In a couple of weeks the entire back of my garden will be filled with lime green zinnias, red tails Amaranth and about 9 varieties of dahlias. All ready and willing to be cut and brought home.
Knock knock.
Who's there?
Just some old ho.
Perfect. I have a bed right here for you.

Thanks for the tour! Can't believe that you managed to redesign your entire garden, move your plants, start seeds, re-fence/string/trellis AND make it look beautiful! So inspiring!
Well I only finished a week or so ago so don't be too impressed, lol. I honestly didn't think it was ever going to get done. ~ karen!
AH-MAZING. I'm in awe. This is my first year with a garden (a tiny 4'x8' raised bed) and I can't even imagine how you keep up with your massive plot. Although, the covers would save me a lot of the time I spend flicking Japanese beetles off of everything. They are *rampant* in my area. Or maybe just in my garden....
Your garden is an inspiration! Thanks so much for the photos, and the tips. I will be saving this post to peruse again and again. Just yesterday I was at a family gathering and some were commenting on the difficulties of getting carrots to grow, even with adding sand to the soil. I will pass on the wooden covers tip! Beautiful garden!
More than photos of exotic travel, photos of lush, productive, well-tended gardens make my heart yearn. I admire your work and love of gardening and thank you for sharing your knowledge and experiences.
You're very welcome Alice, and thanks! ~ karen
Beautiful tour! Thank you :)
You gave your friends so much to remind and inspire us to keep gardening smart. It is so nice to see in detail how you created an orderly and productive garden. I'm going to print this out so I can remember all this great guidelines.
Thanks Nancy! (I probably should have done a printable sheet to go along with this post!) ~ karen!
Karen! I know what you need for your gloves and small tool storage! A mailbox on a post in the middle of the garden! I read it in a little booklet I bought online (The Planet Whizbang website - Google will help). It's so great - waterproof, tall so you can access it no matter what's growing around it, cute... I love it.
Here she is!
(Those are my knee pads wrapped around it like earmuffs.)
Ha! That *is* great! ~ karen
Cute! ~ karen
I tried the mailbox idea but the birds had other ideas. They loosened the bolts holding the door closed and built a nest inside. There was no way I could toss their nest and for years, they raised their little ones while I enjoyed all their music.
What a great idea. Now I now what I'll do with that extra mailbox sitting in storage.
Wow! Fabulous garden! Do you have a basement to store veggies for the winter? I can see storing the garlic, squash, etc., but are you able somehow to store the greens or do you blanch and freeze? Can we get another post on how you prep the garden for the winter so the following year is even better?
Our citrus farmers here use those row covers to cover their citrus trees in the spring. That is how you get those tangerines or "cuties" as they are called. No bees to pollinate the flowers so therefore no seeds. Wonder if the same could be done for corn so there would not be any cross pollination.....hmmmm, might have to try something like that, if I had the space.
Again, congrats on your beautiful garden. I thought at first in one of those pictures, the garden next to yours had a bar-b-q in it for instant roasting and eating. I think it is a tall compost bin but the idea is intriguing! Instant veggie pizza or instant roasted corn!
I've been petitioning for a BBQ up at the garden. ;) I store the food in many ways, mostly in my mudroom which is the ideal temperature. I also can and freeze a lot of stuff. I freeze a few of the greens but not too many. ~ karen!
Beautiful! That's the garden I always think I'm going to have, and then I don't. If Betty would come and do the plowing for me, I could probably manage it.
Thanks for the potato in straw debunking! I thought I was just some special kind of failure at it, but if it didn't work for you, I'm okay with saying it's bogus and just moving on.
Pumpkin leaves sautéed with tomatoes and onions? I never would have thought of using them like that, but this week I'll be giving it a try. People who have figured out how to use more parts of their plants than I have always have my admiration and gratitude for thinking up wonderful things. I'll have a little toast to the people of Zimbabwe (and you) when I serve this dish.
I'll admit up front I only planted potatoes in straw once and remember being tickled to find so many tubers on my bumbling first try, so I find it curious to read others have not had similar successes. (USDA Zone 7, semi-arid Northeast Oregon) I plan to try potatoes again this year (2018) - seed is already ordered - so maybe I'll grow half of each cultivar the conventional way and the other half by straw mulching. There is a downside to using straw ... I learned 'up close and personal' that yellow jackets like to build nests in thick mulch. All that buzzing noise failed to get my attention when I started harvesting. Worse yet, I was bare-footed. TIP: Wear your best pair of running shoes.
Hi Jo. Honestly, you'll have way better luck with soil. I've been growing potatoes for years and have tried every trick in the book. The best way to grow them is in a few inches of light soil that's easy to dig up. :) ~ karen!
Wow! You are so talented. Where did you plant the asparagus??
I didn't even get to talking about the asparagus! The asparagus is around the border bed, across the front and a bit down the sides. ~ karen!
What a beautiful garden! All your hardwork and time this Spring have paid off!
I enjoyed how your tips were sprinkled amongst the photos.
Thanks Deborah, glad you liked it! ~ karen
Omg, we are gardening twins! I wonder if we watch the same youtube videos. Btw, I did no dig potatoes this year and they are great. Trimmed the weeds right down, cardboard, 2 inches of mushroom compost, potatoes, more mushroom compost, and my homemade compost. Potatoes come up and then top with straw (Ruth Stout).
Am trying to lift my jaw from the floor! I'm in awe of your brilliant garden. How do you find the time to do it AND post so regularly and have a life? How did you acquire your expertise? I want to be like you when I grow up. You are my hero. Congratulations & thanks for the amazing info & FAB blog! Love It ❤️
Thanks Michelle. :) Years of gardening is where the expertise comes from, plus gardening in a community of other gardeners helps immensely. I get so much done by only showering and eating once a month. ~ karen!
Looks amazing.
My vegetable garden is also no dig- I've been working my way through Charles Dowding videos on You Tube.
My carrot germination rate this year was rubbish, so thanks for the tip about the plywood. I'll definitely be trying that.
Yours, too?!? Grrrr, mine are pathetic! I planted TWICE and only 10 stupid carrots have sprouted. Jerks. (Note to self: get plywood STAT)
Brava!
*stands and applauds*
LOL, thanks Monica. You may be seated. ~ karen!
That looks absolutely gorgeous. I could spend an hour or two sitting on the chair watching you work! :)
I am having to fend off birds at the moment... all wanting to eat my seedlings. But I would rather have birds and store bought veggies than no birds!
Such a beautiful space, and I envy the great food you will be harvesting. Such a huge commitment of time and energy. (I think I might be getting old.) It sounds as though you have it all under control at last!
I am so glad you wrote down all these tips because next year I am going to use them - my kale is full of holes so I especially love the tip about the long row covers - the insects and wild animals are going to hate me.
What a lot of work - you are so lucky Betty does it all for you while you sit on those nice chairs and think of funny things to say. Let her know she's done a really gorgeous job!
I lost my mother last April (a year ago) at 94 years old. She gardened hard until she was 89 and got a little tipsy. She always loved gardening and would have been so interested in your blogs. She would have devoured this blog while salivating. She would have had the entire family out, helping her to put new standards into her gardening...all because Karen said so!
Aw. Thanks Tina. I'm so sorry about your mother. I'm happy to hear she was gardening until almost 90. :) ~ karen!
Wow, that is one big ass garden. Besides Betty, Pink tool belt and, fish pedicure who else are you feeding? Your garden is beautiful and a vivid reminder of how much work a garden is but, oh so rewarding.
I give a lot of food away to ... well almost everyone from food banks to friends. :) Plus the majority of what I grow is stuff for me to store and use all winter like squash, potatoes, beets and carrots. ~ karen!