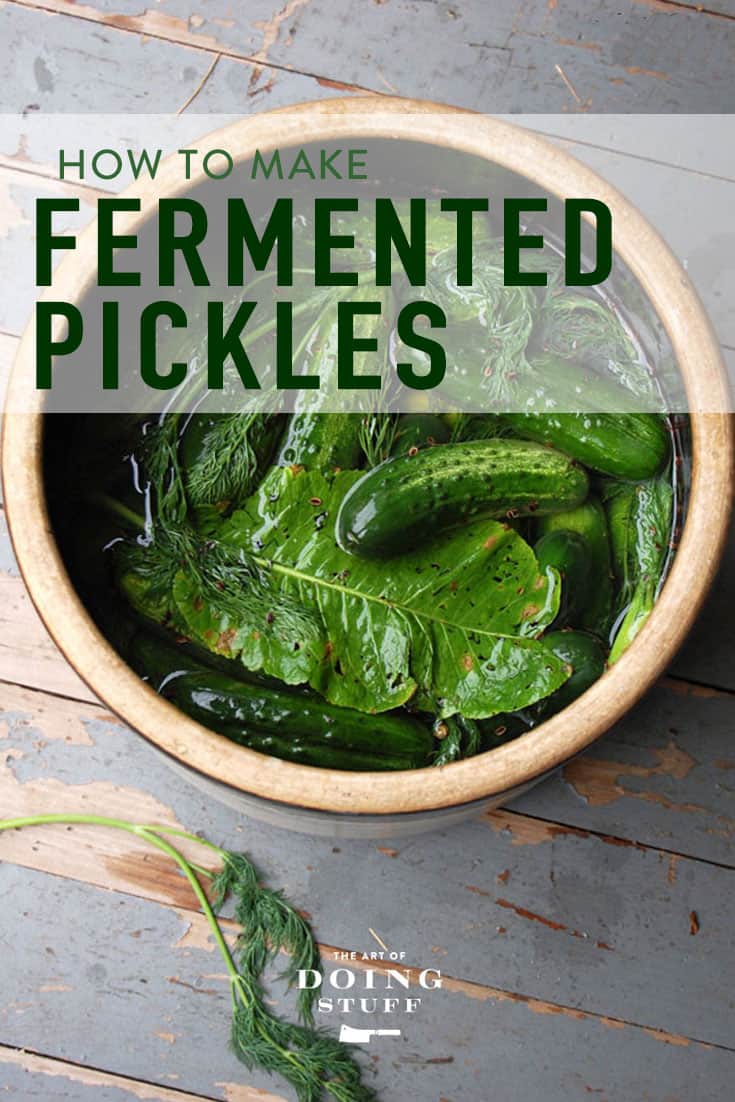
I need you to put your Laura Ingalls bonnet on now because you're going to learn how to make old-fashioned fermented dill pickles in a crock.
Not the vinegary kind. The kind that ferments slowly on your counter. The kind that develops flavour, character, and pickle superiority.

Table of Contents
What Is a Kosher Dill?
It's not about religious dietary rules-it's about Jewish deli-style: garlicky, sour, and fermented naturally without vinegar.
- Vinegar pickles = fast, shelf-stable, no probiotics
- Fermented pickles = slow, naturally sour, full of gut-friendly bacteria
Kosher dills are what dill pickles want to be when they grow up.
My First Pickling Attempt? A Salty Mess.
I tried fermenting pickles when I first moved into my house about 25 years ago and I have never been so excited to rot something.
(O.K., fermenting isn't rotting. But it sounds more daring. Less hippie, more mad scientist.)
Whatever salt-to-water ratio I used must have been pulled from a salt lick, because what I ended up with were soft, inedible salt bombs.
I now know that you can fix salty pickles, but I didn't know that then.
If you've made pickles that are too salty, here's the fix that works in minutes.
The Book That Saved My Pickles

Eventually I switched to a recipe from Sandor Katz's Wild Fermentation. Since the book helped me create my own sourdough starter, I figured it could handle pickles. And with a name like Katz, he clearly understands both fermentation and a good pastrami sandwich.
And I was right-these pickles are the real deal. If you're familiar with Strubs pickles ... these are like those.
What You Need to Make Crock Fermented Dill Pickles

- Pickling cucumbers (small and firm)
- Salt (non-iodized: kosher or pickling)
- Fresh dill (or dill seed/dill heads)
- Optional: garlic, mustard seed, peppercorns, horseradish/grape/oak leaves (for crunch)
- A fermentation crock or large glass jar
- Water (unchlorinated is best)
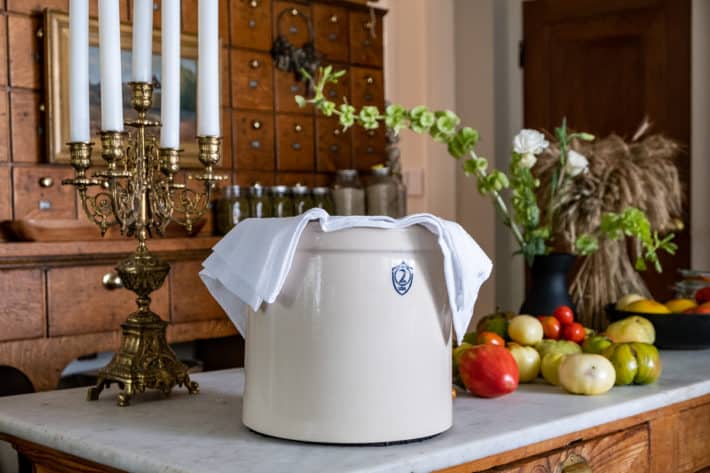
I use a classic 2 gallon crock with the weights to keep the pickles down.
Step-by-Step Fermented Dill Pickle Recipe
This is a traditional half-sour recipe using a 3.95% brine.

I used to make a saltier brine because it helped the pickles store longer. But I prefer this lower salt ratio-it just tastes better. And since I now process my fermented pickles, I don't need the salt for preservation anymore-just for flavour.
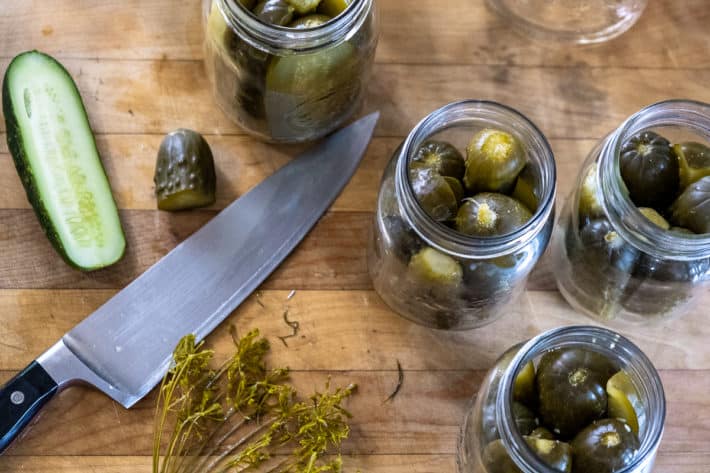
1. Soak Your Cucumbers
Soak them in ice water for 2-4 hours before fermenting. It helps with crunch.
2. Cut Off the Blossom Ends

The blossom end (narrower tip) has an enzyme that causes softening. Get rid of it.
3. Make the Brine
Use a 3.95% brine:
🧂 5 tablespoons of pickling salt per 8 cups (2 quarts) of water
Make enough to just cover 8 lbs of cucumbers in a 2 gallon crock.
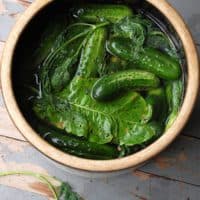
4. Pack the Crock
Layer in dill, garlic, and cucumbers. Shove it all in there. Add optional leaves or spices.
Would you like to save this stuff?
5. Pour in Brine & Weigh Down
Cover everything with the brine.
Use pickle weights or a plate + clean rock to keep cucumbers submerged.
6. Cover & Ferment

Cover the crock with a lid or towel so flies don't get in. Let ferment at 65-75°F.
After 3-4 weeks, your pickles will be fully fermented. Start tasting around Day 10 if you like.
7. Store
Move to the fridge when they taste good. They'll last months chilled.
How to Keep Your Pickles Crunchy
- Soak in ice water first
- Cut off the blossom end The blossom end (it will be the more narrow end) contains an enzyme that causes pickles to soften when they ferment.
- Add tannin-rich leaves (grape, oak, horseradish)
- Use Pickle Crisp (calcium chloride) to keep crunch
- Skip heat processing OR use low-temp pasteurization (see below)
Optional: Low-Temperature Pasteurization for Shelf Stability
If you want to process them but keep some crunch:
Instructions
🫙 - Pack fully fermented pickles into clean, sterilized jars
💦 - Bring your brine to a boil, then remove from heat
🔥 - Fill a canning pot with water and heat to 180-185°F
Use a thermometer or sous vide stick to maintain temperature
🫗 - Pour hot brine into jars, leaving ½-inch headspace
🧼 - Wipe rims, apply lids and rings
🌡️ - Submerge sealed jars in 180-185°F water
⏲️ - Process for 30 minutes, keeping temperature steady
🧊 - Remove jars and let cool at room temperature
🧺 - Store in pantry for years
Are Pickling Cucumbers Really Necessary?
You bet they are. Pickling cucumbers are shorter, firmer, and hold up during fermentation.
Regular cucumbers will turn to mush. I speak from experience.
What to Add (or Not Add)
At minimum, you need:
✔️ Cucumbers
✔️ Salt
✔️ Dill
✔️ Water
Garlic is optional. So are peppercorns, mustard seeds, and bedtime stories. But don't go overboard-fermented dill pickles are about simplicity.
Are You Sure They’re Done?
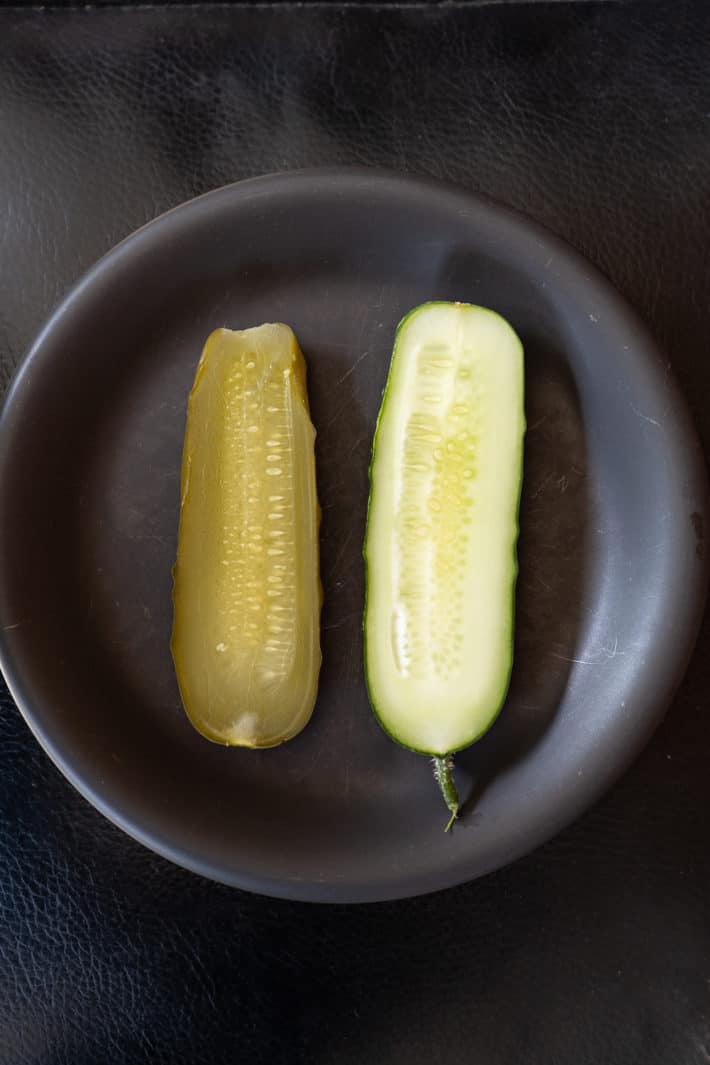
They're ready when:
- They've turned translucent
- They taste sour and delicious
- You start hiding them from people
Shelf Life
What determines the shelf life of your pickle is how much salt it contains. A full-sour pickle has a brine that is 10% salt. You could leave those for years and they'd still be preserved perfectly because of the amount of salt. They'd also taste like the Dead Sea.
For pickles that are half-sours, like these, if you want to keep them around for months store them in the fridge or process them.
Kosher Dill Pickles
Ingredients
- 8 pounds cucumbers small to medium size
- 5 tablespoons kosher or pickling salt
- 9 dill heads fresh
- 1 handful fresh grape cherry, oak, and/or
- horseradish leaves if available
- 1 pinch black peppercorns
- 8 cups water
- 1 head garlic cloves skinned and separated
Instructions
- Bring salt and water to a boil, stirring to dissolve the salt. Let cool.
- Wash your cucumbers and cut off the "blossom" end. You just need to remove the blossom part.*
- Layer your cucumbers, dill and horseradish (or grape leaves) in the crock and cover with cooled salt water.
- Place a plate with a rock (or something else heavy) on top of the pickles to make sure they're completely submerged.
- Test pickles after a couple of weeks.
- Cucumbers will be translucent throughout when they're done.
- Place pickles in hot pint jars with enough brine to cover them and store in the fridge for several months.
Low Heat Processing (once pickles are fermented)
- Fill a canning pot with water and warm it to between 180 F - 185 F.
- Remove pickles from the brine and stuff them tightly into pint jars.
- Pour the fermented brine into a pot and heat until it comes to a boil. Boil for 5 minutes.
- Pour hot brine into the jars of pickles to ½" from the rim.
- Wipe the rim of the jars to make sure they're perfectly clean and put on a sealer and rim. Finger tighten only.
- Place your jars of pickles into the warm water bath and process for 30 minutes making sure the water doesn't fall below 180 F or go above 185 F.
Nutrition
Mazel Tov! You're ready to make deli-style pickles.


Annie
Hi - I followed the recipe for canning with the cup of salt and added vinegar. Pickles are fermented through but they are super salty. Is there any way to remedy? I used horseradish leaves and the crisp is amazing!
Karen
Hi Annie. Kosher dills are notoriously salty. The one thing you can do is to soak the pickles you want to eat in water. The longer you leave them in water the more salt will be released. It works! ~ karen