There are a ton of guides showing you how to start seeds. But ... then what? What comes after your brand new baby vegetable plant has sprouted?
So you started your seeds and they SPROUTED. And now you aren't sure what the hell to do.
If you haven't done it yet, take a look at how to start vegetables from seed. All the instructions you need for starting seeds are in there.
But then what?
Table of Contents
What Do You Do After A Seed Has Sprouted?
A cocktail with an umbrella are the industry standard. So yes, the first thing you do is get one of those and then cheers to you.
Once your seed has sprouted and is looking lively you need to start thinking about:
- Potting up your plants
- Getting them light
- Giving them nutrients
Today you're going to learn how to pot up your seedlings and give them their first dose of fertilizer.
What's potting up?
I'm glad you asked. It's literally moving your seedling UP to a bigger pot (potting up). Not only are you moving it to a bigger pot so it has more room to grow, you're also going to start using actual soil that has nutrients.
Remember - when you start seeds it is with a soilless mix that contains no real nutrients for your hungry toddler plant.
The seed contains all the nutrients the plant needs to sprout and grow its first set of true leaves.
Why pot up?
When you start seeds you normally do it in a seed starting tray. Each cell in the tray holds a very tiny amount of growing medium with just enough moisture to get the plant started.
Once your seed sprouts and starts growing you need to make sure it has enough room and soil to become a big healthy plant.
Potting up gives the plant more room to grow bigger roots which in turn can take up more nutrients.
Potting up also means you'll switch to nutrient rich soil in the pot (instead of soilless mix).
More soil for each plant means you won't have to water as much as well.
When to pot up
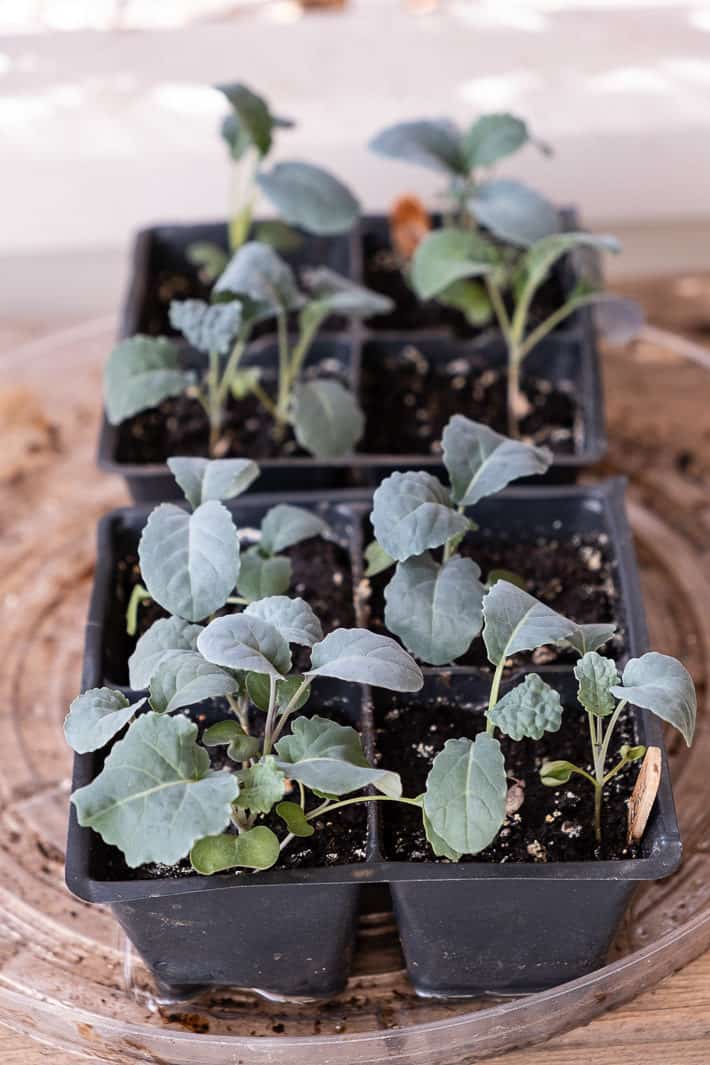
- With brand new baby seedlings from a seed starting tray, you can pot up once they have grown their first true set of leaves.
- With mature seedlings you will pot up when the roots start to snake out of the bottom of the pot OR if the plant looks too big for the pot and doesn't look happy.
DON'T BE FOOLED BY SIZE. Not even going to make the easy joke here.
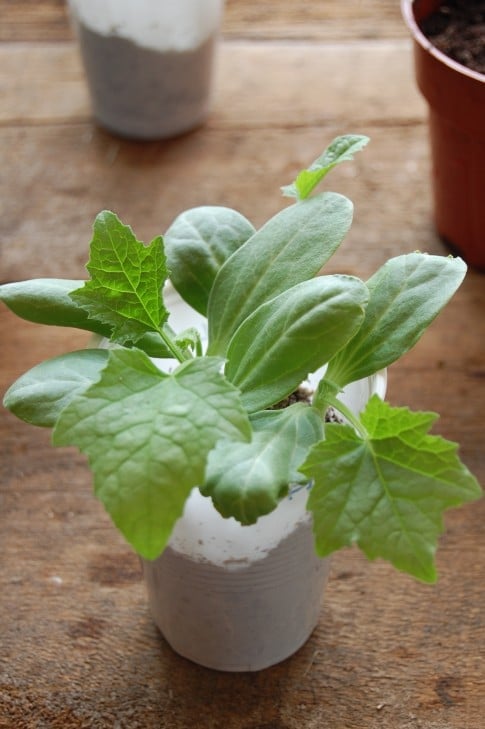
Some plants are tiny when they grow their first set of leaves, like the pepper seedling below.
Others, like the luffa to the right of it, are much bigger at the same stage of growth.
Still not making a joke.


How to Repot (pot up) Your Seedlings
This method is the same whether your seedling is going from a seed starting tray to a 4" pot or from a 4" pot to a 6".

Gather up some pots. If you're like me, they might be dirty.
1. Wash Pots with Soap and Hot Water
That old soil is potentially teeming with disease, fungi and pathogens just waiting to murder your seedling.

If you've ever had a problem with your perfectly healthy seedlings rotting at the base and keeling over seemingly overnight - you could have damping off.
Damping off is a condition that can obliterate your seedings and it spreads through infected soil and wet growing conditions. (it's why you should water your plants from underneath instead of on top)
2. Spray or Soak in Bleach

Soak your pots in a sink with a mixture of 90% water and 10% bleach for 30 minutes. Go watch Jeopardy or something.
If your pots are generally clean, you can also add 1 tsp. of bleach to a standard spray bottle of water, spray the pots and let them air dry before using.
3. Fill Pots with Soil
Fill all your pots with new soil. Reusing old soil can introduce fungus, disease and critters to those pots you just cleaned.
YOU CAN STERILIZE SOIL by adding ½ cup of hydrogen peroxide to a gallon of water. Put the mixture in a spray bottle.
Then pour out 1cm of soil onto a baking sheet, a sheet of plastic or a large cardboard box. Spray the top of the soil with your hydrogen peroxide mixture.
Keep adding 1 cm layers of soil and repeat the spraying. Doing it in layers like this will help ensure all the soil has been touched by the peroxide.

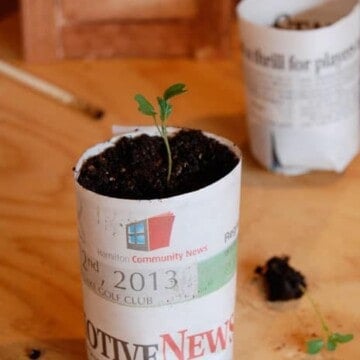
How to Separate Seedlings
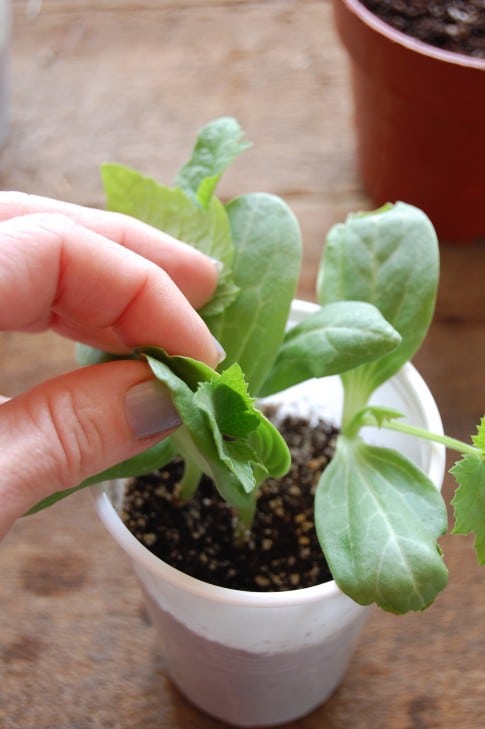
1. Grasp the leaves.
Always lift your seedlings by their leaves - NOT the stem. If you happen to break a leaf off, the plant can grow a new one. If you break the stem you're down the road kicking stones.
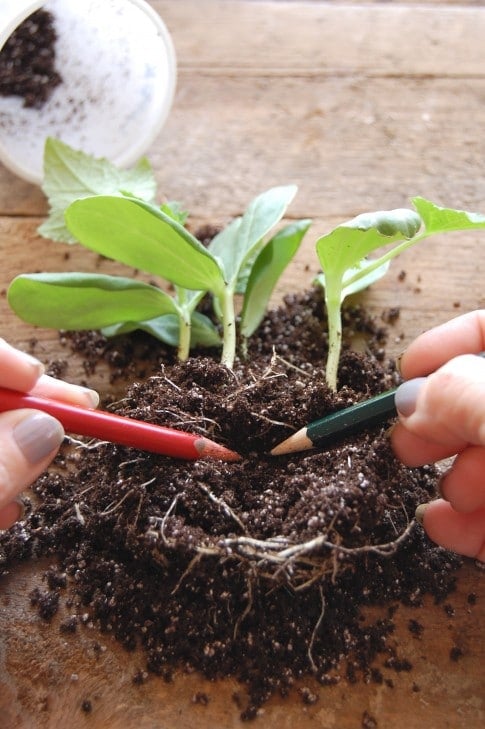
2. Grab a dibber or a pencil
Gardening supply stores sell things called Dibbers. They're just little pointy tools that make certain tasks easier. In this case, lifting up and separating seedlings.
If you grew multiple seedlings in each cell or pot you can carefully separate them and plant them individually.
Even though real dibbers are very cute, I just use a pencil. It does the same thing.
3. Stick your dibber into the soil, getting it under the stem and roots of the plant and gently pry the plant up while lifting the leaves.
4. Gently detangle the roots if you need to.
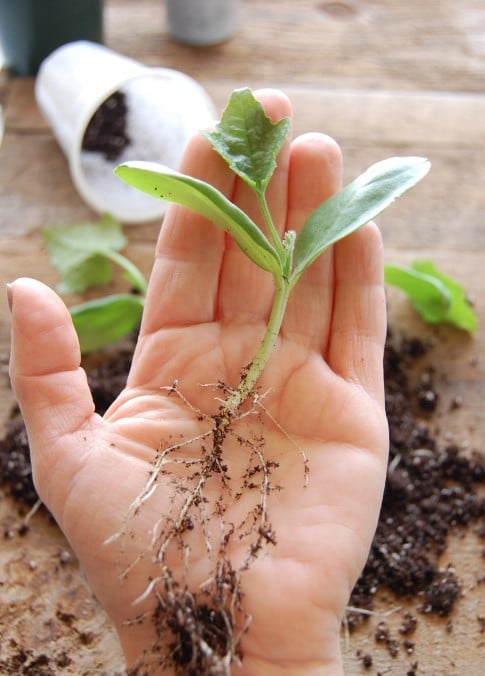
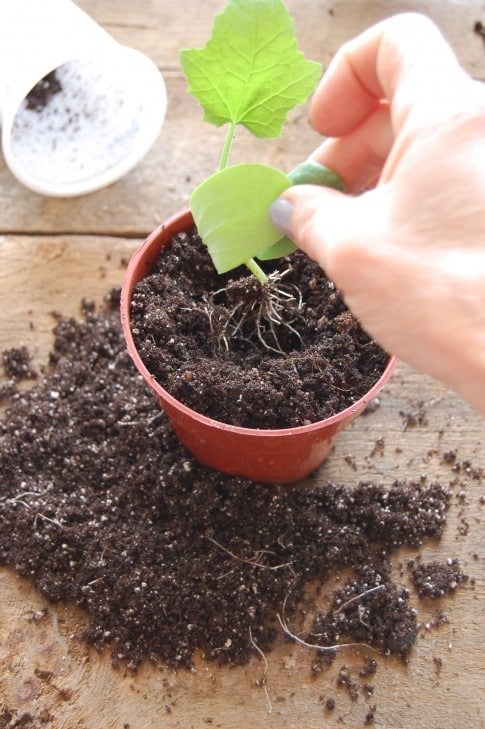
5. Create a hole in the soil with your finger or dibber that's about the same length as the roots and place the plant in the hole.
Make sure the roots are mainly facing down. Also make sure that it's planted to the same soil level it was before or slightly deeper.
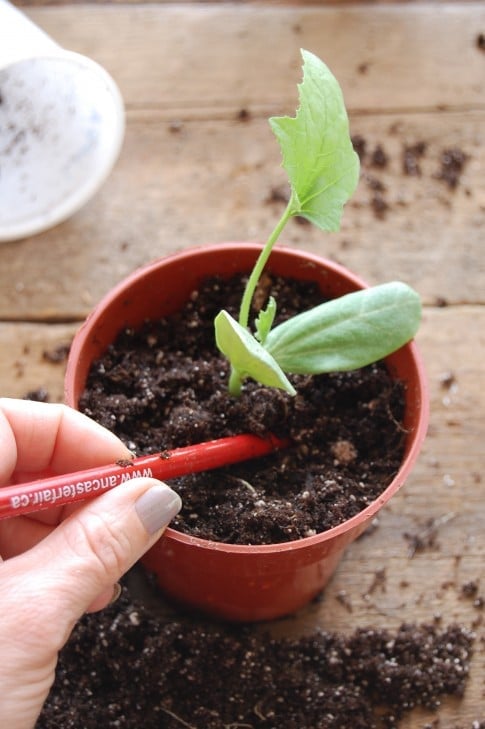
If you need to use your dibber to push the roots down into the soil.
7. Press the soil around the rootball (or single stem of root for very young just sprouted seedlings!). Use your finger or the dibber again to push the soil around the roots so they're in contact with the soil.
8. And you're done.

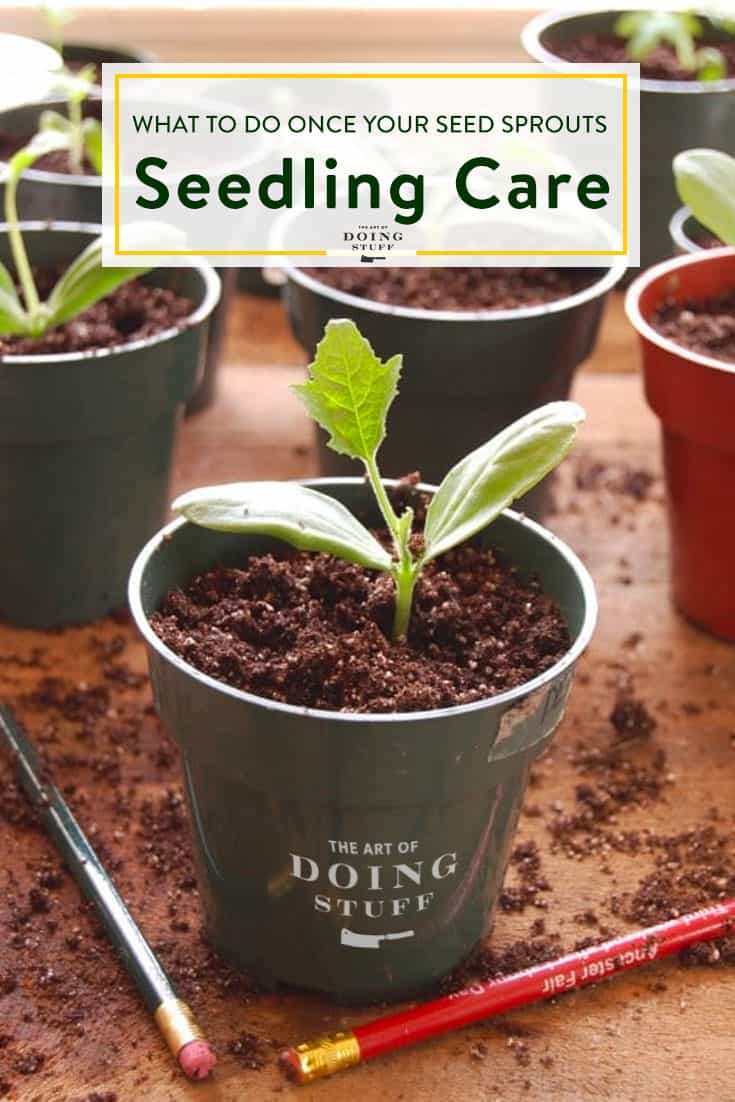
Most seedlings only need to be potted up once or twice before they go outdoors.
NOTE!
The one disadvantage to repotting you seedlings is the space they take up.
Remember when planning your little grow operation that you don't need a lot of space for 50 two leafed seedlings. But you DO need a lot of space for 50 potted up tomato plants.
It's gonna be a lot of work. But you're a farmer now and farmers work hard.

NUTRIENTS
Your plants need 3 things. Water, light and nutrients.
- My favourite method for watering is by using Capillary Mats.
- I use these LED shop lights with a colour temperature of 6,500. ALL my information and experience with grow lights is in this post. Read it so that you know the difference between shop lights & grow lights.
- The easiest way to make sure you have the right nutrients is to buy or make a good potting soil.
Imagine the magic of it all! You put a tiny seed in a hospitable environment, fertilized it, took care of it and several months later a beautiful bundle of joy like this appeared. (you really should click on that link just for my first photo)
Happy Gardening. As always if you have a question just email me.
Question: I’ve started petunias from seed. Now there are tons of teeny tiny plants. I had to add all the seed because they were so small to grasp one by one. How do I manage the flower seeds? Thank you. Your blog is so helpful! I live in one 7B
Hi Sher! It's O.K., you just have to follow the steps in the post. If you have way more petunias growing than you need you need to be ruthless. Decide how many you want to keep and gently separate that many from the soil they're planted in. You might have to ease all of the soil out of the pot/plug and then separate them that way. If you have WAY too many sprouting up you can take some cuticle scissors and just cut away a bunch of them at soil level. ~ karen!
just wanted to say that I really enjoy all the wonderful info you provide and your sense of humor
Well thanks Ruth! :) Learning and laughing is always my goal. ~ karen!
A bloke may work from sun to sun, but a gardener's work is never done. I admire your dedication to this craft of growing stuff. Admittedly it's admiration from afar, but admiration none the less. Sincere kudos kiddo.
It's an addiction. I can't even help myself so no kudos are necessary. If you want to kudo me, kudo me for actually putting the garbage out last night even though I REALLY didn't want to do it. ~ karen!
Hi ~karen!
I am a first year gardener living in zone 10a (San Diego) who has fallen, hook, line and sinker into the gardening cult. I started this season at the end of March working with a raised bed of about ~65 sqft.
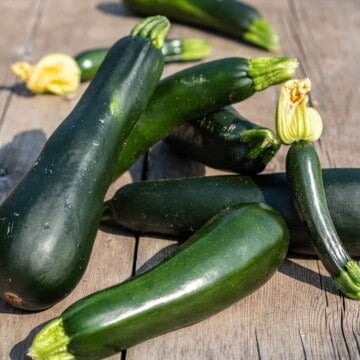
Unfortunately, I hadn't yet discovered your comedy blog, er, gardening, chicken-raising, how-to site so I missed out on the whole dibber/pencil/chopstick tips about separating seedlings. Those cute little seedlings I picked up at the nursery with 2-3 in each little cup are now large, healthy-looking squash plants. However, I assumed (yes, I know that makes me an *ss) that since the 3 seedlings came together, they are supposed to be planted together. As you so delicately showed above, that's not the case. Say it ain't so, Joe!
So now I have what I thought was going to be 2 zucchini and 2 Squash plants, going nuts. There are really 10 total plants, all in a 2.5x2.5 area! So now my dilemma is what step to take next for the groupings of 2-3 squash plants.
1) Dig up the whole clump and use a dibber/pencil/chopstick to try and separate the three plants and then transplant them into 2 other pots or another area of the garden?
2) Dig up the whole clump and cut away one or two of the plants and throw them on the compost pile and replant the lone survivor? It hurts just thinking about tossing healthy plants!
3) Cut back two of the three amigos with scissors at the soil line so there is just one amigo left?
Any wisdom to impart? Or even an educated guess would be appreciated!
Kelli
Hi kelli! Based on the amount of space you're working in I think you'd probably be best to cut away the extras at soil level and leave the remaining to grow. :) ~ karen!