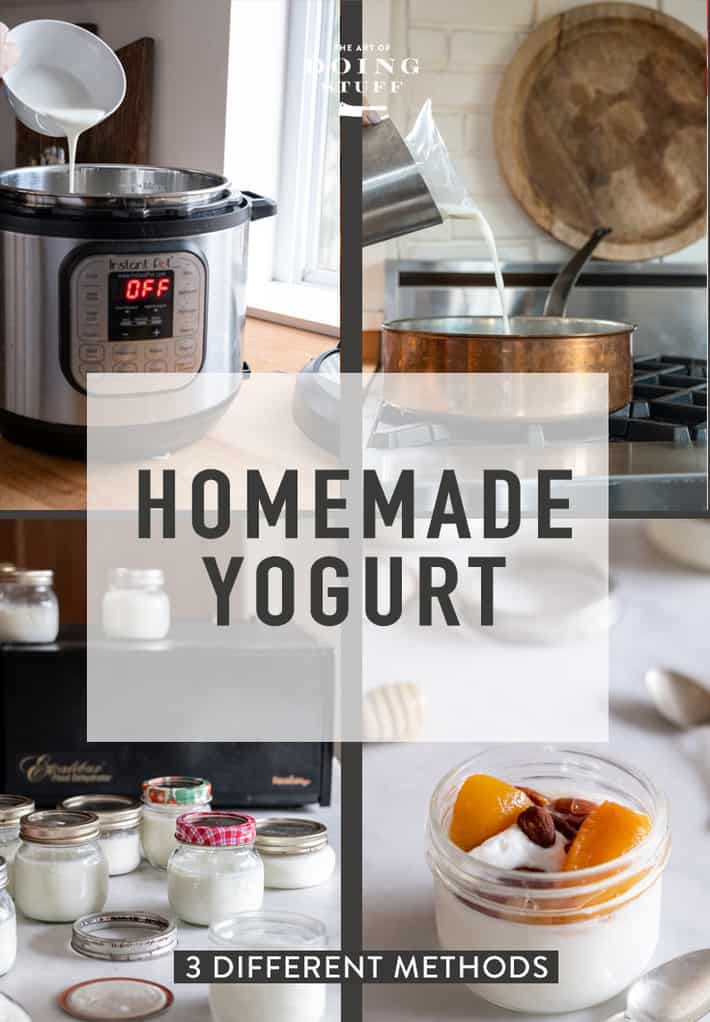
How to make yogurt every which way. Instructions for Instant Pot, stovetop & making yogurt in a dehydrator. And NOPE. This doesn't mean I now like my Instant Pot. Plus a new trick for thickening it that I learned in the past month.

Don't want to read my witty entertaining babbling? Skip right to the recipe.
I started making my own yogurt because of my imaginary world. This is the world many of us let our minds wander to when we should be thinking about insurance rates, mutual funds or other gross things.
In my imaginary world I'm usually at the cottage (that I don't own) and everyone is gathered around when we all realize, much to our horror, that we don't have any butter, or bread or ... in this case ... yogurt. "Everybody calm the hell down.", I say, my arms outstretched, palms facing the ground, in the internationally known gesture of "calm the hell down". "We have whipping cream, flour, yeast and milk. We've got this."
Butter as you know is made by shaking whipping cream.
Bread is made with flour, water, salt and yeast.
And Yogurt ... is made with milk. (And a little bit of yogurt. But that ruins imaginary world where I miraculously produce yogurt with just milk. So.)
Therefore years ago I started making my own so if I ever own a cottage and am ever stranded there with a group of starved people that I need to impress, I will be able to impress them.

Table of Contents
Yogurt Facts that'll make your head spin
(not really, it's remarkably dull actually)
- You can use whole, 2%, 1% or skim milk. The higher the fat percentage the more calories.
- Do not use ultra pasteurized milk.
- To "activate" your yogurt, you need 2 Tablespoons of plain yogurt with active cultures. Just look for the words probiotic or active cultures. Some people have had success using sour cream in a pinch as an activator/starter.
So the Instant Pot. The gadget I love to hate. There are two things it can do well. Make a small batch of chili and make yogurt. It's more complicated than just doing it on the stove. But it does work and has some pros to it.
However, I know a lot of you love your Instant Pots so I thought I'd better show you how to make it in the Instant Pot because 1) the instructions that come with the Instant Pot for almost everything are useless and 2) even online instructions for making yogurt in it don't cover the little things.
If you INSIST on buying an Instant Pot, even if you're only cooking for one, make sure you get one that's at least 6 quarts.
The process is the same no matter what you're using to make it.
The Basic Process
- Heat milk (to 180°F)
- Cool milk (to 115°F)
- Add starter culture (yogurt)
- Keep at 115°F (for 8 hours)
Here's how to accomplish that with an Instant Pot.
Instant Pot Method

THE HEATING PHASE
- Pour 2 litres (½ gallon) of milk into the inner pot. I use 1% but you can use any kind.
- Lock the lid on.
- Turn the vent to "sealing". (although I've forgotten this step before and my yogurt still turned out fine.)
- Press "Yogurt" button then,
- Press "Adjust" button. The light will switch to "more" and the word "boil" will show up.
- Wait. The Instant Pot does its thing for 35-40 minutes, heating the milk to 180° F.
- "Yogt" will show up on the display when it's done.
- Remove the lid. CHECK THE TEMPERATURE. After this part is done my yogurt is NEVER at 180° F. It gets to 175. So I put the lid on and restart the process of hitting "Yogurt" then "Adjust" to boil again until it registers as being 180° F.
- NEW TRICK below ⇓ (I learned this from Team Yogurt)
- Keep the yogurt at 180° F for 5 minutes. To do this, Press "Yogurt" then "Adjust" again. This will keep the unit warm enough to keep the yogurt at 180° F. Leave it like this for 5 minutes. Don't put the lid back on. (doing this helps to make it thicker)
- Press "Cancel" at the end of 5 minutes.

THE COOLING PHASE
-
Unplug the Instant Pot. Remove the inner pot and either let it rest on the counter until the temperature drops down to 115° F, OR put the pot in a cold water bath in your sink. This speeds up the cooling time a LOT. (instead of taking half an hour it will only take a few minutes, so keep an eye on it)
THE INOCULATION PHASE
- Put 2 tablespoons of yogurt (with active cultures) into a bowl and then temper it with a ladle of the hot milk and stir. This just makes it easier to disperse the yogurt through the entire pot.
- Pour bowl of yogurt/milk mixture into the inner pot of the Instant Pot and stir.
- Set the inner pot back into the unit.
THE INCUBATION PHASE
- Push the Yogurt button. Add or subtract with the (+) key until you reach a minimum of 8 hours. You can also let it go for 11 hours for tangier yogurt. You can even let it go longer than 11 hours for tangier yogurt. I often incubate my yogurt for 12 hours or more.
- At the end of your cycle "Yogt" will appear on the display and it's done.
- Pour off the whey from the top (or scoop it out with a spoon) and put the yogurt in mason jars or other glass containers.
** For extra thick Greek yogurt, strain the yogurt as shown in the straining method below.

Making it on the stovetop is simpler and has FAR fewer steps.
Stovetop Method
- Heat 2 litres (½ gallon) of milk in a pot on the stove until it reaches 180° F.
- Turn the heat off, put the lid on and let it sit for 5 minutes.
- Cool the milk to 115°F on the counter or in a cool water bath in the sink.
- Mix together some hot milk with 2 Tablespoons of yogurt to thin the yogurt then add the mixture to the rest of the hot milk. Stir.
- Pour into a good thermos (one that will retain the heat) and wait 8-11 hours. (or follow Dehydrator instructions)
**If you don't have a thermos then pour the hot milk into mason jars and store them in a good quality cooler wrapped in towels for 8-11 hours.


Yup. That's it. In my opinion this is much easier and faster than fiddling with the erratic behaviour of an Instant Pot.
The drawback is if you forget your milk on the stove while heating it, it can boil over.
Dehydrator Method
To make yogurt in a dehydrator, you're not really using the dehydrator for anything other than holding the yogurt at temperature.
Follow the stove top method up until the part where you hold the yogurt at 115°F for 8-11 hours. Instead of putting it in a cooler or thermos you can hold it at temperature perfectly with your dehydrator.
- Follow steps 1-4 for stovetop yogurt.
- Turn the dehydrator on and set it to 115°F
- Pour hot milk into glass mason jars. Screw on lids.
- Remove trays from dehydrator and place the jars inside.
- Set the dehydrator timer (if it has one) for 8-11 hours.
Straining to Thicken
- Dump your incubated yogurt into a sieve lined with cheese cloth or a flour sack tea towel set over a bowl or pot.
- Let drain for up to an hour or until it has reached the consistency you like.
- After 1 hour around 4 cups of whey will have drained away, leaving you with 4 cups of Greek yogurt.
When the process has finished its 8 hours of incubating it will have a lot of whey in it. That's the liquid stuff you see on top of yogurt or sour cream that you buy at the store sometimes.
Straining willt get rid of most of the whey resulting in a thicker, higher calorie yogurt. If you like it thinner you don't need to strain; just pour off the bit of whey on top and you're good.
YIELD: NOT STRAINING VS STRAINING
- Unstrained yogurt will get you the same amount of yogurt as milk used. 8 cups of milk will result in 8 cups of yogurt!
- Strained yogurt will get you thicker yogurt, but less yield. 8 cups of milk will result in 4 cups of greek yogurt.*
*the exact yield depends on how long you strain it and how much whey you remove.

Unstrained has a similar consistency to a very soft jello.
Straining is how you get that thick, Greek style yogurt.

Strained is so thick it will sit high on the spoon and even stick to it when you turn the spoon over.

I love a big spoonful of plain, tart Greek yogurt, but there are times I want to have something a little more dessert or breakfast like. THOSE are the times for toppings.

Topping Ideas
- Jam (Strawberry, raspberry, apricot etc. etc.)
- Nuts
- Granola
- Canned fruit
- Chia seeds
- Bananas
- Coconut Flakes
- Chocolate Chips
- Cocoa powder
- Honey
- Maple Syrup
- Cinnamon
- Nutmeg
- Poppyseeds
- Orange slices
- Mashed sweet potato
- Lemon zest
- Brown sugar
- Apple sauce
- Cookie crumbs

How to make Yogurt.
Ingredients
- 2 litres milk (whole, 2%, 1% or skim)
- 2 tablespoon active yogurt plain
Instructions
Instant Pot Yogurt
- Pour 2 litres (½ gallon) of milk into the inner pot. I use 1% but you can use any kind.
- Lock the lid on.
- Turn the vent to "sealing". (although I've forgotten this step before and my yogurt still turned out fine.)
- Press "Yogurt" button then,
- Press "Adjust" button. The light will switch to "more" and the word "boil" will show up.
- Wait. The Instant Pot does its thing for 35-40 minutes, heating the milk to 180° F.
- "Yogt" will show up on the display when it's done.
- Remove the lid. CHECK THE TEMPERATURE. After this part is done my yogurt is NEVER at 180° F. It gets to 175. So I put the lid on and restart the process of hitting "Yogurt" then "Adjust" to boil again until the yogurt registers as being 180° F.
- Keep the yogurt at 180° F for 5 minutes. To do this, Press "Yogurt" then "Adjust" again. This will keep the unit warm enough to keep the yogurt at 180° F. Leave it like this for 5 minutes. Don't put the lid back on.
- Press "Cancel" at the end of 5 minutes.
- Unplug the Instant Pot. Remove the inner pot and either let it rest on the counter until the temperature drops down to 115° F, OR put the pot in a cold water bath in your sink. This speeds up the cooling time a LOT. (instead of taking half an hour it will only take a few minutes, so keep an eye on it)
- Put 2 tablespoons of yogurt (with active cultures) into a bowl and then temper it with a ladle of the hot milk and stir. This just makes it easier to disperse the yogurt through the entire pot.
- Pour bowl of yogurt/milk mixture into the inner pot of the Instant Pot and stir.
- Set the inner pot back into the unit.
- Push the Yogurt button. Add or subtract with the (+) key until you reach a minimum of 8 hours. You can also let it go for 11 hours for tangier yogurt. At the end of your cycle "Yogt" will appear on the display and it's done.
- Pour off the whey from the top (or scoop it out with a spoon) and put the yogurt in mason jars or other glass containers.
Stovetop Yogurt
- Heat your milk in a saucepan over medium heat to 180 F (almost boiling, this happens quickly).
- Remove pan from heat and allow milk to cool to 115 F. This will take around 30 minutes on the counter or a few minutes in a cool water bath in your sink.
- Once the milk is at 115 degrees add some hot milk to a bowl with 2 tablespoons of yogurt in it and incorporate. Add this mixture to your pot of hot milk.
- Now your job is to keep this concoction at 115 degrees for the next 8 hours. There are a few ways to do this.
- Pour your milk mixture into a mason jar (or similar) with lid and place the entire jar into a small cooler filled with warm water. Leave for 8 - 11 hours. OR ...
- Pour your milk mixture into a good thermos, wrap it in a towel and leave it for 8 hours.
- Your yogurt is now done. Store it in glass jars and refrigerate. (If you want you can strain it to make it thicker.) Straining instructions in notes.
Dehydrator Yogurt
- Follow steps 1-3 for stovetop yogurt.
- Turn on the dehydrator and set to 115°F.
- Pour yogurt into serving sized mason jars for convenience (or use full sized mason jars).
- Set the jars into the dehydrator and allow to incubate for 8-11 hours.
Notes
- The longer you let the yogurt incubate the more tart it will be.
- 2 litres of milk will make 8 cups of yogurt.
- For extra thick Greek yogurt, strain the yogurt after it has set by pouring it into a cheesecloth lined sieve over a bowl. In about an hour 4 cups of whey will have drained out leaving you with an incredibly thick remaining 4 cups of yogurt.
- If your oven goes as low as 115°F then you can set the jars of yogurt in the oven for 8-11 hours as well to incubate it.
Nutrition
How healthy is homemade yogurt?
Really good natural yogurt is way more accessible now than it ever was. There was a time that the only yogurt you could buy was yogurt with premixed fruit and about a pound of sugar per serving.
Homemade has no sugar and no additives. Adding these two things will decrease the health benefits of this lively culture.
Homemade concoctions can be sweetened with honey, maple syrup or agave and you can add fresh fruit like peaches or strawberries as well.
By making your own you're controlling what milk it is you use to create it. Even some of the best brands of yogurt don't use the best milk and often come from cows that have been fed grain (GMO corn or soy). That means when you get that store bought healthy seeming yogurt you're actually consuming GMOs through the milk of the cow. If that's the sort of thing that worries you then homemade really is your best choice.
THOUGHTS ON WHICH IS THE BEST WAY
If I were in some sort of battle that required I choose only ONE method to make yogurt for the rest of my life what would it be?
A combination of the stovetop method for the initial heating and cooling and then finishing it in a dehydrator.


I enjoyed reading your hilarious bit on yoghurt making and your beef cut knowledge! Thank you for sharing! After reading your piece, I am threatening my family that the next yoghurt consumed in our household should be from our very own kitchen! Cheers!.
I just want to say that I love your blog! I also have a question, I tried making yogurt in a crock pot and unfortunaly it did not come out well at all. I was basically left with watery milk with a ton of clumps on the bottom. It tasted okay-ish, not rancid or anything it just wasn't yogurt. I will have to give your method a try, maybe my crockpot was too warm and it killed the bacteria. Yum, bacteria!
Possible! Also remember to really stir your yogourt in well. Stir, stir, stir. Use a whisk if you have to. Good luck! ~ karen
So, I made yogurt yesterday for the first time in a long time. I followed a combo of instructions and when the cooler wasn't keeping my batch warm enough I threw it in the oven on warm and let it sit overnight. Stove still on. So, Ive got what looks like...lots of whey and...gooby cheese? What to do now? Strain the whey out and go for Greek?
You may have made cheese instead of yogurt by putting it all in the oven. :( If that's the case you need to start again. Chances are the cooler will keep it warm enough. If you're worried, wrap the whole thing in a towel. Next time just wait it out and see what the result are. ~ karen!
I have also used a similar heating pad method - for lack of my crockpot. It works well at gatherings (July 4th) where you want to keep a pan warm, of lasagna in my case. Works for rolls too!
Woke up to my first ever batch of homemade yogurt and I can hardly contain my excitement!!! It is fantastic! I used organic full cream milk and the starter from the organic yogurt we usually buy. I will not go back to store-bought - it is far too easy (and a lot cheaper) to make yourself. And the joy...thanks, Karen!
You're welcome Bettina! Isn't it fun? ~ karen!
I do same process but double the milk for 2T starter. I keep the inoculated milk in the pot and set it on a heating pad at medium for 7 hours. (I wasn't using that heating pad anyway - it was nice to find a new life for it.) Then into the fridge overnight to finish setting. Whisk and strain and voila!
Good thinking with the heating pad Dee. I use mine to start seeds! I'm not sure I know of anyone who uses their heating pad as a heating pad. :) ~ karen
I was thinking about actually doing this recipe guide, but with all the steps...I guess I just wasn't up for it at the time so I just went and bought some yogurt.
Hi Karen!
I was given a store bought yogurt maker for Christmas and of course it's basically the same method you use - except I have to find a place to store the thing. In the included literature, it's mentioned that pulling a starter from your previous batch is only recommended 3-4 times as it will eventually dilute and produce very runny yogurt. I find this counter intuitive, but thought I'd see if you (or anyone else here has) experienced this supposed phenomenon?
;) Your biggest fan in Atlanta,
Adrienne
Hi Adrienne! I have not found that. Which doesn't mean it's impossible ... it just hasn't happened to me. Good luck with our new(ish) machine! ~ karen
You are not making yogurt from scratch, you are expanding a commercial culture.
Dee - I can't be bothered to type this response out again, so I'll just cut and paste it ... "In order for someone, anyone, even yogourt manufacturers to make yogourt they need a starter. Bacteria. You can either buy the bacteria in powder form which is difficult for most people to find. OR you can use a tiny bit of yogourt or sour cream as your starter. There are no other options. That is indeed how you make yogourt. And this method is exactly how commercial yogourt makers make yogourt." So no. I'm not scientifically making bacteria. But I don't start by creating cow DNA to make a hamburger from scratch either. ~ karen
I'm a little confused. If you are using yogurt to "make" yogurt, aren't you are just buying yogurt and stretching out the amount of yogurt that you already have? You're not really MAKING anything that wasn't already there.
Ojibajo - Yes actually you are making something that isn't there. In order for someone, anyone, even yogourt manufacturers to make yogourt they need a starter. Bacteria. You can either buy the bacteria in powder form which is difficult for most people to find. OR you can use a tiny bit of yogourt or sour cream as your starter. There are no other options. That is indeed how you make yogourt. ~ karen
I have an Easyo yoghurt maker (plastic jar with insulated container you fill with hot water then put the jar in.) Could I use that to make your yoghurt recipe?
Hi Shirley - Absolutely! The yogourt makers just take the guess work out of it. They usually recommend you use store purchased "starter", but you don't need that. All you need is a tablespoon of yogourt to get things going (and growing). :) Good luck! ~ karen
I've been making yogurt for years. I can often go more than 12 months using the tablespoon of starter from the last batch (only interruptions come from vacations longer than 3 weeks). My scheme is to put my yogurt cups (in a dutch oven or other heavy pan for temperature stability) into my oven with the oven light on (except in the summer when no extra warmth is needed ((Seattle))). I leave it in the cozy oven overnight. Very simple to do. Also, I've never sterilized jars or lids and never had a failure either.
I have spent the past 20 minutes in your blog so far...and I'll be back as soon as my stomach muscles quit hurting from laughing. I haven't had that much fun, with no energy expended, in a very long time. I'm anxious to get back to the blog, but, life calls and I must answer. Thanks for all the great info and the laughs!!!
Welcome to my site Starlett! You've got a lot of catching up to do. I expect you to have read every post I've written by the time I post my next one which is ... in about 4 hours. ~ karen!
wow karen! thank you for your timely response! i am going to give it another try but this time i will put a heating pad on low heat in cooler or do what you did and put hottest water out of tap into cooler around yogurt. the recipe i looked at said just wrap a towel around it and set it in cooler. i will also use your amounts of yogurt to milk. thank so much for the advice. sorry for the all lower case letters i am feeding baby. jean-in texas
LOL. I didn't even notice the lower case. :) ~ karen!
KAREN!! I have been meaning to send you an update about my yogurt making endeavors! The yogurt making is going well. Your tips worked perfectly and I am now a 'professional' yogurt maker. I was wondering if you ever added vanilla and sugar to your yogurt to make, well, a vanilla yogurt? Right now all I do is add maple syrup for flavor. If you do/have use(d) vanilla and sugar in the past I would love to know your measurements. Otherwise, let the experiments begin.
jean-in texas
Hi Jean - Great! I've added all sorts of things to my yogourt after I've made it. I usually add raw sugar or honey and berries. Sometimes I make my own fruit on the bottom yogourt by dropping a spoonful of Strawberry jam into the bottom of a cup and putting the yogourt on top. ~ karen!
thank you. wink.
Karen! I tried a recipe for homemade yogurt from 101 Ways Homemade. I made her choco yogurt recipe. However, my yogurt never firmed up. I turned to your post that I remembered reading a while ago. My husband says try again-I will-but I didn't learn anything yet so I may make the same mistake again...as in I have no idea what I did wrong because I followed instructions carefully. Please instruct me on what the "Art of Doing Things Master" would do in this case. Oh-to jump start the trouble shooting-I used Homogenized milk, Greek Yogurt with live active cultures, heated the milk to 180, let cool to 110. The amount of milk was 4 cups the amount of "yogurt starter" was 1/2 cup. What should I do differently next time? Sincerely, jean-down here in Texas
Hi Jean - It sounds like you did it mostly right. For 4 cups of milk you only need a Tablespoon or two of yogourt though. Once you let the milk cool and mixed in your starter, did you keep it at 110 - 115 for the next 8 hours or so? If you let the temperature drop below that the yogourt won't firm up. Also, after 8 or so hours the yogourt won't firm up completely. It'll still be slightly runny. To make it thicker like a Greek yogourt you have to strain it for a couple of hours. Just dump it into a cotton cloth or a few layers of cheesecloth, wrap it up and let it hang over a bowl in the fridge. The whey will strain out of it into the bowl and what remains in the cloth will be thicker greek style yogourt. Good luck! ~ karen
Thank you so much, your post is funny and enjoyablt to read. I will be heading to the grocery store tomorrow to get some milk and yogurt. I have one question? Have you ever heard of adding powdered milk to your yogurt to make it thicker? By the looks of your yogurt it is nice and creamy so you may have never had to do anything like that but I was just wondering :) Thanks again, Sincerely Tiffany
Hi Tiffany - I have tried adding powdered milk. I don't find it really thickens it all that much and definitely not as much as straining it. With straining, you lose some volume but gain flavour and richness. ~ karen!
I will strain it then, thanks again for the help :)
Yes! I feel so creative. You should make butter. It's just as easy!
LOL ... https://www.theartofdoingstuff.com/how-to-make-homemade-butter-in-10-minutes/ :) ~ k
HOW, in the name of all that's holy, did I miss that?? And here I thought for once I was ahead of you lol I use a mix master or Kitchen Aid though, none of those 'shake vigorously' shenanigans.
Made it last night and had it for breakfast this morning with some hemp hearts and papaya. SO good. Just in time too because today is the start of my 14 day sugar cleanse. It makes me happy to know I can have sugar free yogurt anytime with all that important probiotic stuff.
It's weirdly fun to make isn't it?! ~ karen
Do you know if you can make this with non-dairy milks (i.e soy milk, flax milk, coconut milk, etc)? I'm vegan and it is so hard (and expensive) to find a good non-dairy yogurt. Right now I use Silk yogurt to make my smoothies when I g
Mara - You can, but the method is a bit different. Google coconut milk yogourt. ~ karen!
Wow! Whenever I heard about making yogurt it seemed really complicated, but you inspired me to try it and it's so simple. My 16 yr old son loves it and now he asks me to make more. He loves to put it in the blender with fruit and make smoothies! Thanks for healthy-ing up my teenager!