Even for those of us who consider ourselves to be pretty handy within the home improvement world, the thought of pouring self leveling concrete IN OUR HOUSE is moderately terrifying. O.K., completely terrifying. Don't worry. You can do this.
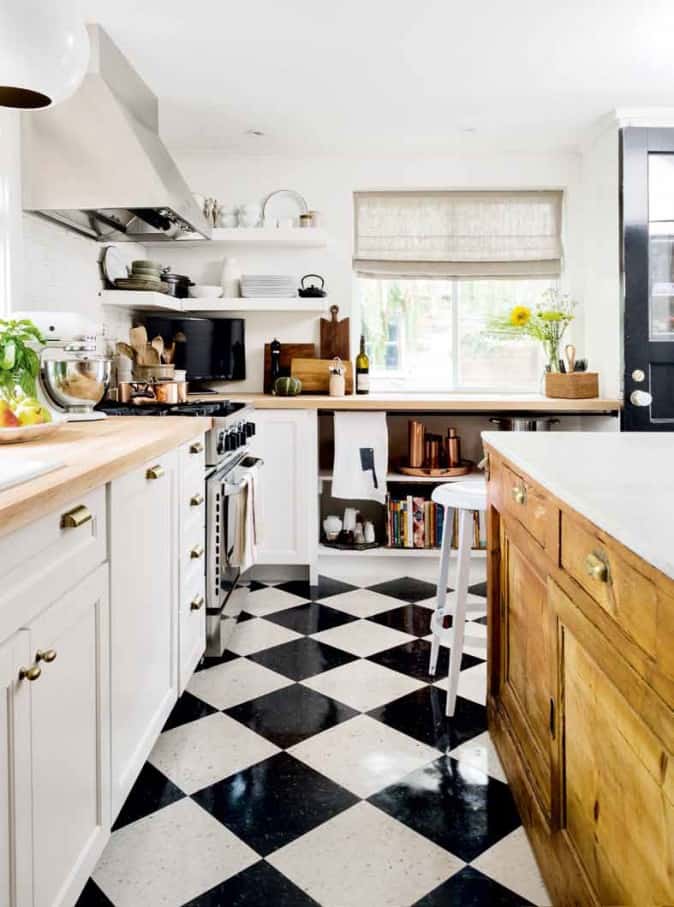
The VCT floor I laid, on top of the cement I poured, over the self installed heated floors.
First things first. I ate a whole can of Pringles today. They were Salt & Vinegar and now my tongue feels like I ate a ball of sandpaper. That might not seem pertinent to the task at hand - and it isn't.
When I redid my kitchen a decade ago I really wanted to address my cold floors. So I ripped out all of my ceramic tile and laid down heated floor mats. That wasn't scary at all. Pouring buckets of self leveling concrete over them WAS.
The cement floor would encase the heating elements, allow them to radiate heat still, plus provide a level smooth surface for tiles. That was my reason for pouring cement all over my floors and working myself into a panic.
Whatever your reason, you don't need to be afraid. I say that because I was afraid. Really afraid. Letter from the tax department afraid. You don't need to be.
Table of Contents
Using Self leveling concrete
Self levelling concrete is cement based like traditional concrete, but it flows much easier and sets up more quickly due to polymers added to it. It's used to create a smooth, level surface for laying carpet, ceramic tiles or other floor coverings on.
For use almost exclusively on interior flooring.
Self leveling cement (concrete) can be poured up to a 1 inch thickness.
Materials
- Self leveling concrete*
- Leveling primer**
- a cement mixing paddle
- a strong drill (rent an industrial one)
- 5 gallon bucket
- trowel
- filler (like Durabond 90)
* It may also be called self leveling concrete, leveling compound, self leveling floor resurfacer or self leveling underlayment. Make sure you get REGULAR instead of QUICK DRYING. Regular will give you more time to work and spread out the material before it starts to set.
** Primer is needed when you're pouring concrete onto a porous surface like an existing concrete floor. It isn't needed when pouring onto old tile.
Method
PREP WORK
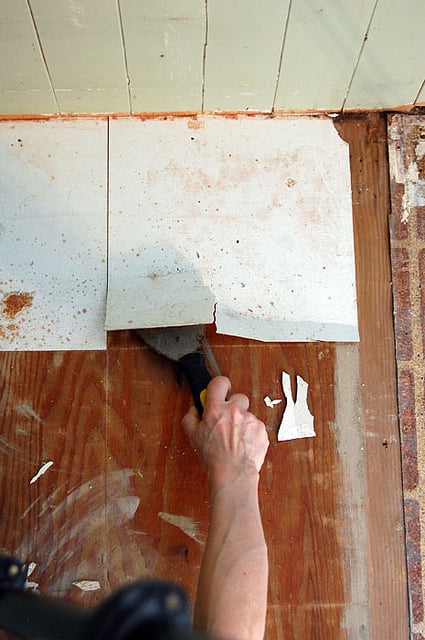
- Scrape up any loose debris or old tiles from the floor.
- Fill any cracks or holes with Durabond 90 and create a dam to prevent the runny concrete from seeping anywhere you don't want it to go.
- Vacuum so you have a clean surface.
- Gather your materials.

The brand of resurfacer doesn't matter so much as the type. There are 2 types. Quick drying and regular. You want regular.
POURING
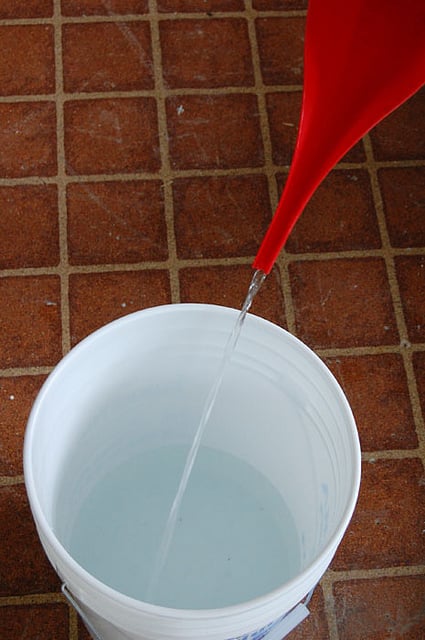
- Add the required amount of water to the bucket FIRST. (the bag will tell you how much water to compound mix to use)
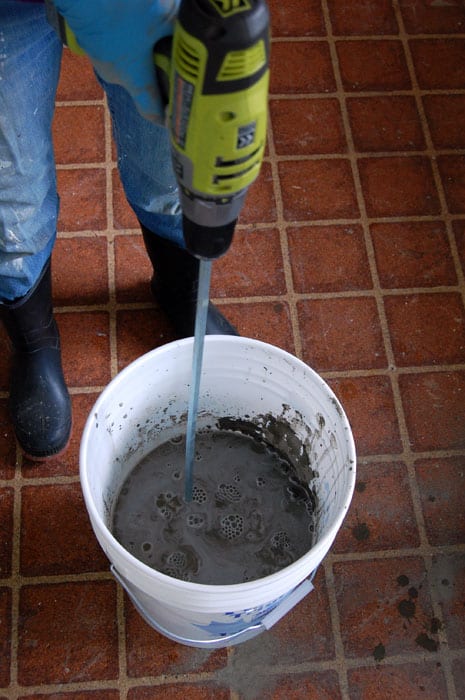
- Add ¼ - ⅓ of the powdered compound. Mix with water using the drill. Continue mixing in the remainder of the bag bit by bit until it's all incorporated. Mix for prescribed amount of time as detailed on the bag.
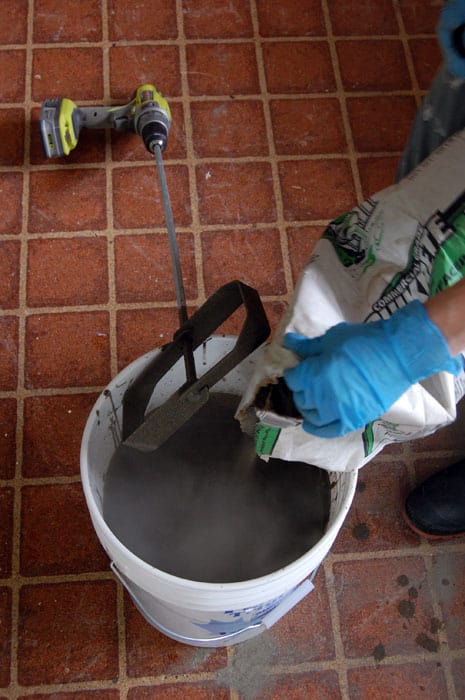
For one bucket of concrete a strong cordless drill will do the job, but if you have any more than 1 bucket to do you're in trouble. The battery will die after 1 or 2 buckets. Then you'll go for your corded drill, which will burn out and will get thrown in the garbage.
Save your anger, your sanity and your relationship and RENT AN INDUSTRIAL DRILL. After the first day I rented a strong drill for $20 for half a day.
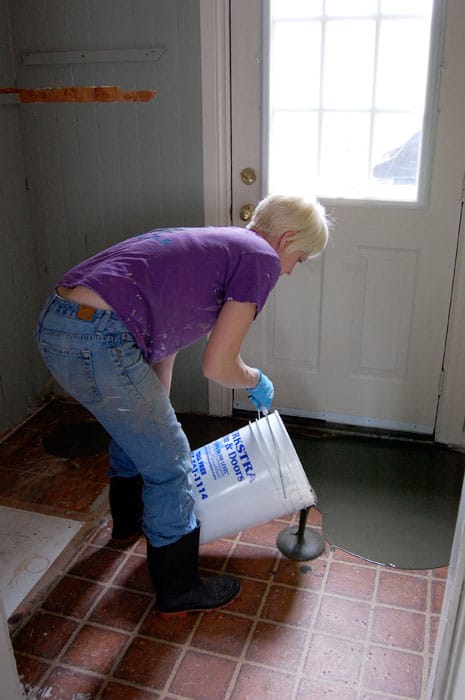
- Pour your leveling compound where you want it.
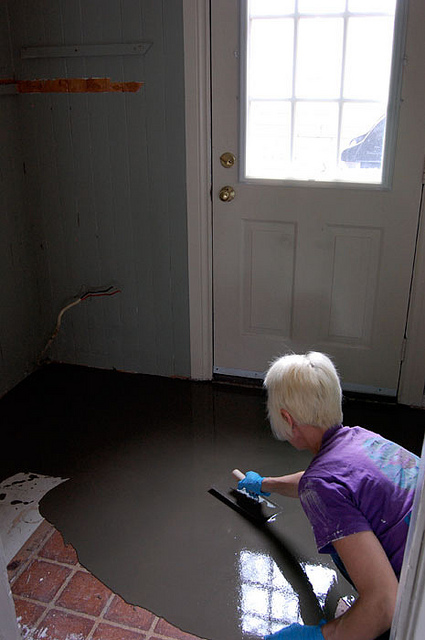
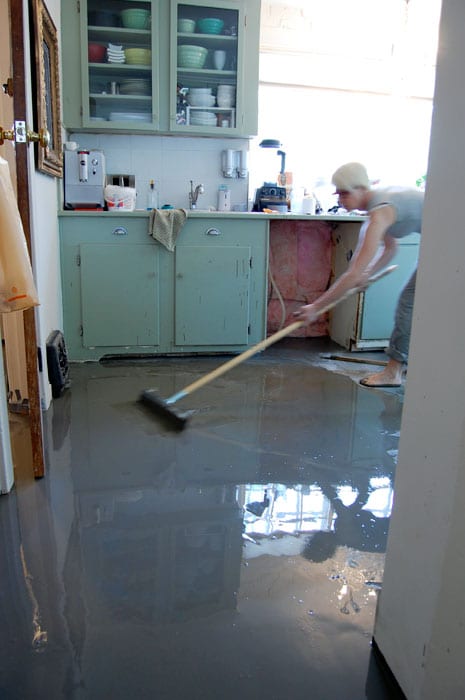
- Trowel it. Using a trowel push and pull the mixture where it needs to go. Push it into corners and pull it towards you. Excuse my hair. It appears I was having a Paul Weller moment.
- Clean up your drips.
- Wait 24 hours to walk on it.
- Wait 3 days to place furniture back.
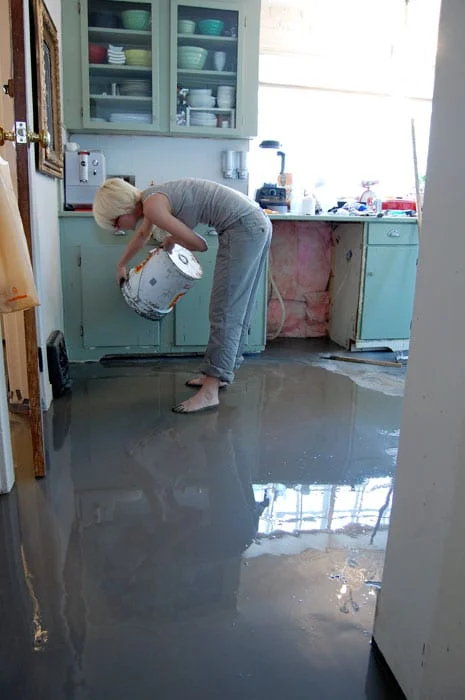
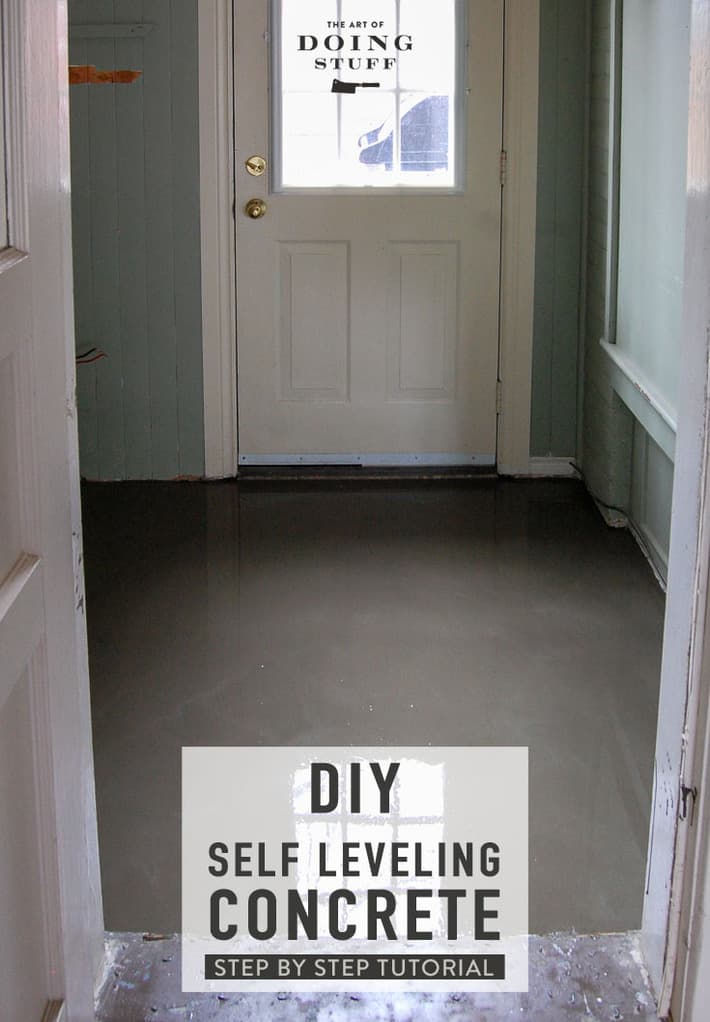
The mudroom went perfectly well. It couldn't have gone better so I continued onto the kitchen where things were a bit tricker.
Tips for Larger Rooms
A bigger room means you have to pour the buckets of concrete, run back to the mixer and mix up another batch (which needs to be mixed a longgg time), run through the house with a 50 pound bucket of cement and pour it where you left off. And repeat.
- Larger rooms are easier to do if there are 2 people working. One mixing the cement and one pouring it.
- Use a stiff squeegee on a long broom handle for pushing and pulling the compound into place.
NOTE: Wet concrete is caustic and can burn.
YOU HAVE TO WASH YOUR FEET IMMEDIATELY AFTER YOU WALK THROUGH IT. Do so after every time you walk through it. Also don't walk through wet cement if you have open cuts.
- If you find bits of unmixed lumps of cement. Just mush them with your fingertips.

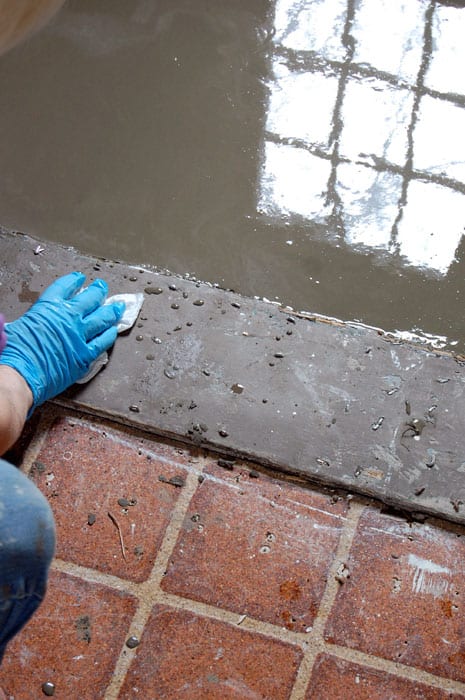
- You may need to do a second coat if the first coat didn't cover. You could still see the heated floor mats I installed after the first coat, so I did a second.
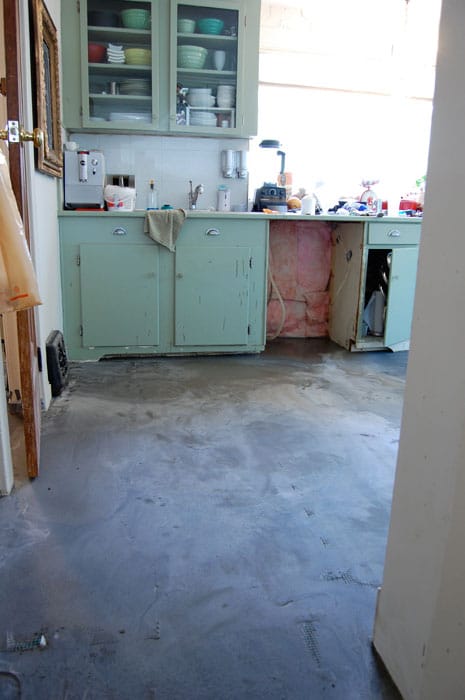
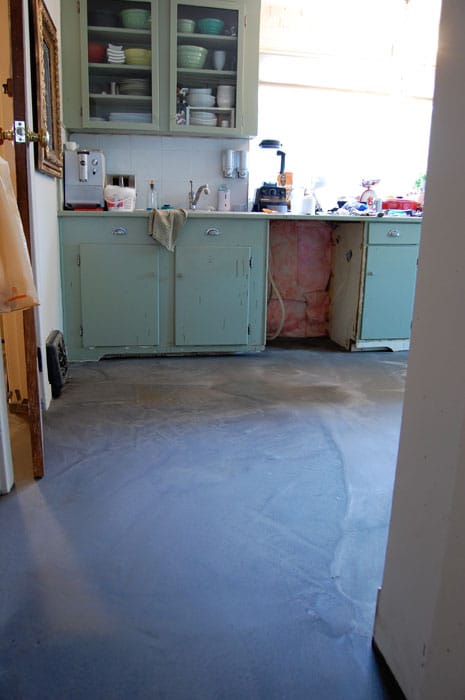
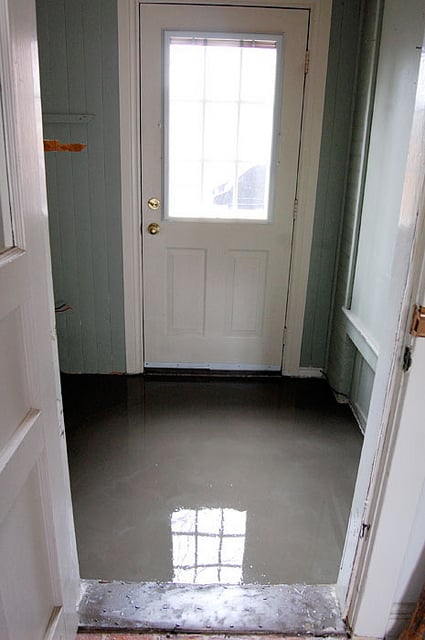
It may look uneven, but it's just an optical illusion. The photo on the right is a levelled floor that is perfectly smooth.
- After leveling if you have any issue with dips and bumps you can correct them with a bit of Durabond 90. (fill, let dry, then sand)

Would you ever want to pour self leveling concrete?
To level an uneven concrete floor.
If you have a wonky basement floor that's uneven you can use self leveling concrete to smooth everything out and get it nice and flat. It's even handy if your concrete floors are just filthy. A thin layer of this will give you nice, clean concrete floors.
To prep a floor for laying down tile or to encase radiant floor heating.
The reason I poured it in my kitchen, bathroom and mudroom was so I could put down radiant floor heating. There's no basement or crawlspace at the back of my house which makes the floors pretty darn cold in the middle of a Canadian winter.
How much does a 50 lb bag of self leveler cover?
How much the cement will cover depends on how thick you will need it to be. This mudroom is around 30 square feet and one 50 pound bag of cement just barely covered it at about ¼" thickness.
Quick drying self leveling cement
Starts to set up in 5 minutes. This is only used when you have a small area to do and are an experienced concrete finisher.
Regular drying self leveling cement
It starts to set up within 15 minutes. This gives the amateur user much more working time. Those extra 10 minutes make a huge difference when you aren't exactly sure of what the hell you're doing.

The Self Leveling Cement *Quick Guide*
A quick guide to pouring self leveling cement. Refer to post for in depth instructions.
Materials
- Regular Self leveling cement*
- Leveling Primer**
- a cement mixing paddle
- a 5 gallon bucket
- a trowel
- filler (Durabond 90).
Tools
- Strong drill (I rented an industrial one)
Instructions
Scrape up any loose debris or tiles from the floor.
Build dams to stop the cement from going anywhere you don't want it to go.*
Fill any holes and/or cracks in the floor that the liquid cement could run down. I use Durabond 90.
Vacuum to get the surface perfectly clean.
Add water to your bucket (amount will be stated on your bag of cement)
Add ⅓ of the bag of cement into the water.
Mix with the drill and cement paddle, continually adding the rest of the bag of cement until everything is incorporated and then mix for the length of time given on the bag.
Here we go. Pour the self leveling cement into the desired area. Push and pull it into place with a trowel. It does self level but needs some help getting around.
And now you wait for it to cure. You can walk on it within 24 hours and place heavy objects back in 3 days.
Notes
*It may also be called self leveling concrete, self leveling floor resurfacer or self leveling underlayment. Either way make sure you get REGULAR self levelling cement. Quick Dry lets you walk on it within 6 hours, but you have a much shorter working time, and for an amateur it's better to have as much working time with the product as possible.
**Primer is needed when you're pouring concrete onto a porous surface like another concrete floor. It isn't needed when pouring onto old tile.
**It's very liquidy so make sure you don't skip this step or you'll have cement running under your dishwasher or down your stairs or into other rooms! I used thin wood, heavy cardboard and duct tape to make dams.
Self levellers can be poured to an inch deep.
If for some reason your cement isn't level, didn't turn out right or wasn't poured quite deep enough, you can re-pour more cement as long as you do it before the initial cement cures. Don't exceed the total recommended depth of 1".
OTHER TUTORIALS REFERENCED IN THIS POST
p.s. I'm out of chips.
→Follow me on Instagram where I often make a fool of myself←


Way to go Karen!!! Great tip on the "rent a drill" I would never have thought of that one. Also, except for the durabond patches in the last picture the concrete looks kinda cool and I would have been tempted just to stop there and put on a sealer.
OMG OMG OMG
that's all I have to say
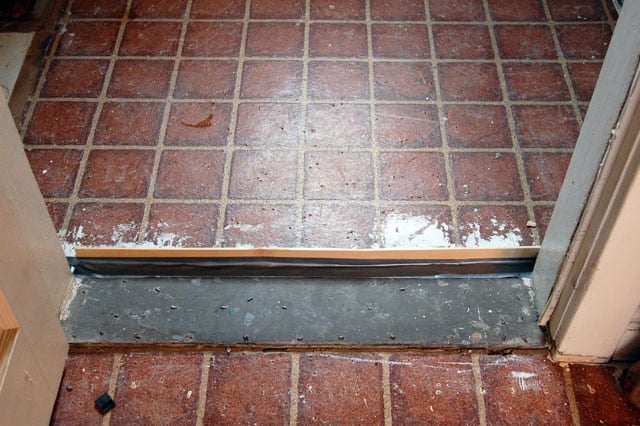
Impressive! I will never tackle something like this myself but I really enjoy learning about it. It makes me more knowledgable for when I talk to contractors I hire to do this stuff :-) I'm curious as to what the reddish flooring is that you are putting the cement over in the mudroom? Did it contain asbestos...is that why it was left intact?
Hi Meagan - It's just old vinyl sheet flooring. It's glued down to plywood underneath and there just wasn't any reason to go to the effort of removing it. ~ karen!
Karen,
I poured over asbestos tile and the leveler cracked. I used Henrys Pro. I dont like the way it worked. Is Quickrete any better for the asbestos tiles. I know what you mean about being afraid! Yikes I looked at the floor and looked at every youtube for weeks but took the plunge. It looked great until the next day when I saw the bubbles and cracks. I am looking for a new product to try it again.
MA
Hi mary Allison. Well firstly I'm definitely not a self levelling concrete expert. I'm someone who did it once and it worked. :) Having said that if you had curing problems I'd say my guess would be the room either had a drastic change up and down in temperature while it was drying, or more likely is the room was too room. The same thing happens when paint dries too quickly because of heat. So it's possible it's not the product, but the conditions that it dried under instead. Do you think this could be possible? ~ karen!
Asbestos has to be seal or nothing will stick thats what the primer will help with then use mapie nova plan plus you shouldnt have any issues but yesthe primer is very important its primer l make sure itis completly transparent berfore you do on anything
Asbestos, huh? Interesting. I actually wondered about that sticking thing. If you're filling in an area that you intend to cover with another flooring...what does it really matter if it sticks or not?
Damn...gravatar didn't work. So bummed. Took FOREVER to find that post *lol*
What do you mean? You have a Gravatar showing up! ~ karen
YES! I WIN!
One day I'll avatar one in the shades from the nice peeps at Lookmatic. LOVIN the shades.
Oh wow, I'm so impressed! Is there nothing you can't do?? I don't think I know anybody else who can eat an entire can of Pringles!!! Way to go!
Wow! Just..... wow. *awestruck*
You are brave! Thanks for sharing, Karen!
An incredibly daunting project completed with aplomb. Makes me feel shitty I've put off hanging the curtains for so long...
You're so brave !!!
Holy smokes. Job well done. Did you have enough time to get the cement washed off your feet before it dried? I have visions of you not being able to tilt because you've been self levelled. ;)
Karen,
Is that cement actually thick enough so that it will not crack if the floor deflects when something heavy goes over it. Or you jump up and down when the muffins turn out perfectly. Just curious. But you did a great job. Looks amazing. Did it ruin the nail polish on your toes??
Terry - The self levelling cement is made to be poured from a consistency of 1/8th an inch to over an inch. It's not the same as concrete, it's a different mix. So yes .. it'll be fine when I jump up and down. But it would never be for muffins. I might jump up and down for the perfect pizza. ~ karen!
I have SO done that Pringles thing with salt and vinegar chips! I've never done the concrete thing and hope I never have to, but I'm sure I'll do the Pringles thing again...for some reason I can't stop until it's too late! Love your posts!!!
Thanks Kim! Yeah .. those S&V Pringles are the devil. ~ karen!
I'm hoping I can get away without this step before I put down my tiles. But if I do, I'm doing it barefoot!
You make it look so easy! I feel ready to tackle anything now.
I mean yesterday I even weeded a whole massive patch in the garden. I don't weed. In fact I don't garden and people like you Karen make me actually kind of want to do this stuff!
Loving the progress, great work :-)
LOL. Thanks for letting me know Sebrah. That's the point of this whole site. :) But you don't have to do everything I do. Just do what you like. :) Mind you ... nobody likes weeding and that needs to get done so ... do what you like .. .plus the few things that *have* to be done. ~ karen!
I like weeding. Love it, actually.
Impressive work, Karen!
Weeding is my happy place!
You forgot one thing. Do not let your husband ( or fella) help. Had to level two bathrooms last week due to moving a few walls around. We mixed 2 bags and poured. No problem, but needed another bag for the first bathroom. Since I was mixing, I kept telling him to stop adding more water, but, of course, he did. When we poured that third bag, the consistency was thinner and it dammed up against the first pour. Then, he tried to smooth it around but because it was thinner, it just kept getting worse. Butterscotch ripple without the butterscotch. Thankfully, our friend does ceramic and rescued the floor. Otherwise, we'd have to pour more cement and our toilet would be teetering on top of extensions on extensions. Second floor went much better.
Boys will be boys...mine decided to suck up CARPET PADDING CHUNKS with the vacuum cleaner. "Don't do that" I said. "You'll burn out the motor" I said. *sigh*
How, exactly, did your ceramic friend rescue the butterscotch problem?
The only reason I’m here taking a refresher course is that I just tore up the floor my husband had installed as a surprise during my brief absence. Not only did he leave conspicuous gaps between the tongue-groove tiles and make cuts that can’t be hidden under conventional baseboards, I could tell by the flex that the floor wasn’t properly levelled. The manufacturer no longer makes the tiles I had painstakingly chosen, which is why I bought extra for replacement. But I hadn’t bought an entire room’s worth of replacement tiles! After I’ve finished moving all the appliances out of the kitchen, removing the baseboards, chipping out the god-awful leveler mess with a demo hammer, replacing the subflooring that was damaged by the previous dishwasher (which he hadn’t), I’m installing porcelain tiles. Alone. When all’s said and done, this will be the most expensive and time-consuming floor in the house.
Pftt. Men. ~ karen!
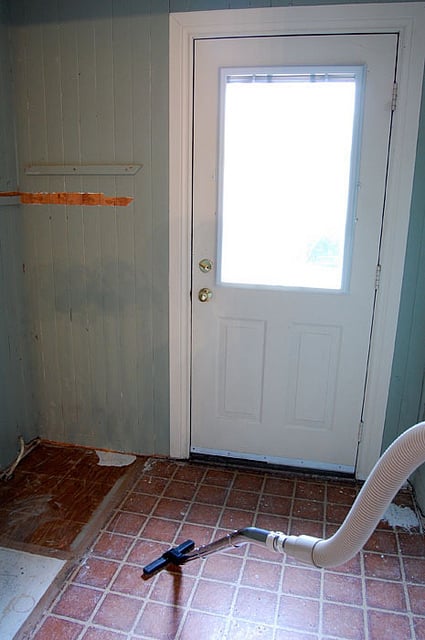
I'm a little creeped out by the photo where the vacuum seems to be moving all by itself but overall, I'm really impressed. Thanks for showing us how to use this stuff! And I totally feel your pain on those chips. I love them, but my mouth always feels like one giant pucker afterwards.
Nice job!! wish I had the gumption to do that ! Please keep up the good work cause you are very inspiring! Maybe I'll get the gumption to do this in the near future.
I'll say it again; you're my hero!
Ditto - HERO
Hard, huh? I mixed, my friend tried smoothing the stuff out all over my bake shop floor. Bags and bags and bags of that runny stuff. We'd come in the next day expecting a smooth surface and find another hollow! And start all over again. I mixed by hand till my shoulders felt like they were going to fall off! But the floor looks like it was worth all the work! Even if it did hold up the opening date by at least 2 weeks! And depleted my pocketbook even more! Yours is looking great! Oh by the way I wouldn't walk in it in my bare feet either. Yuck! And I have chips if you need some more! I'll send them over via Glynnis my chicken!
Glynnis? Is she new? I don't think I've heard of Glynnis! ~ karen
Glynnis is my Ameracuna. She's an old girl but new to me! A "rescue" chicken so to speak. I have got two blue eggs from her. One last Aug. 25th...my oldest daughters birthday and one this last Saturday.. My youngest daughter's birthday! Can't wait to see the finished product! Keep working girl! The heat's acoming!
Hi good job,
i wanted to share my experince if priming or not, yes if you primer the plywood you will get a better bond and also if you going over tile, if you dont use the primer eventually it crack and peels off.
Wow, Karen. I can't believe you could pour cement with your hair looking subpar.
::snicker::
Serious now: I bow to your fearless, inspirational ambition and energy. It appears things came together in a magnificent way. Brava! :)
subpar?
Her hair looks magnificent, you jerk
omg, don't you people know teasing/sarcasm when you see it...
Excellent job Karen.
I do this for a living, nice to see you are not afraid to tackle
something like this. Dirty Jobs, lol....
Thanks for saying that David. Appreciate it. ~ karen!
I install these self leveled floors for a living. She did a great job. If your doing this i don't recommend doing it barefoot. Chemical reaction in the cement can cause burn. But a pair of self level Spikes for 20 bucks on Amazon.
would it be ok to section offf the floor with little batons a bit like shes does at the threshold, and do it in small sections the way they do the road. i am so sur ei wouldnt be able to do it all at once not least becaus ei would have to shove the furniture to one side of the room ... but if sections would work i think i could manage to do it in strips and i also feel its going to be so hard to calculate the three dimensions. i coudl start with the highest side and then it would be easier to have the low end match up i think.