Even for those of us who consider ourselves to be pretty handy within the home improvement world, the thought of pouring self leveling concrete IN OUR HOUSE is moderately terrifying. O.K., completely terrifying. Don't worry. You can do this.
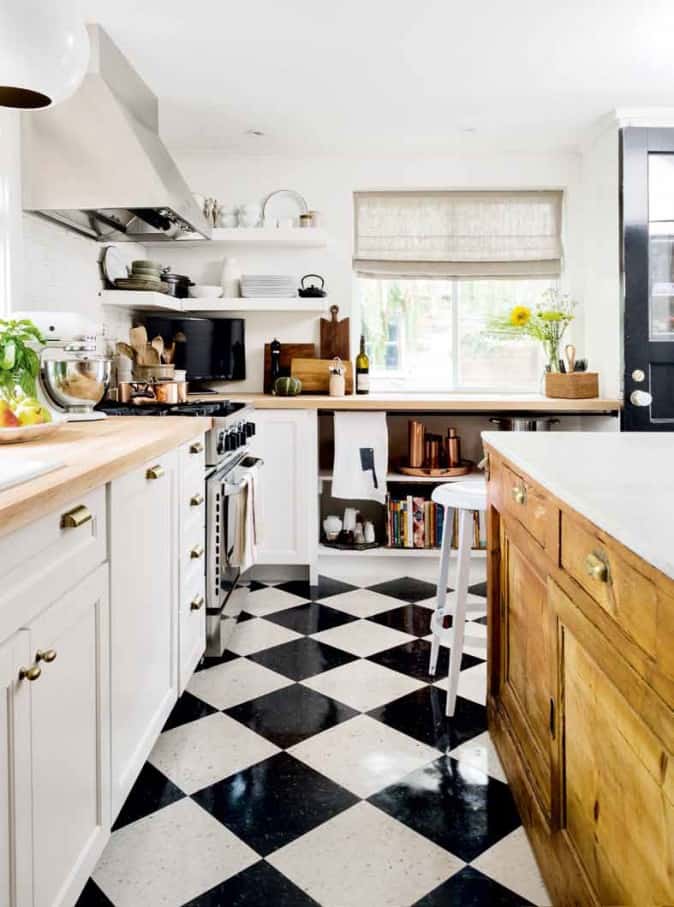
The VCT floor I laid, on top of the cement I poured, over the self installed heated floors.
First things first. I ate a whole can of Pringles today. They were Salt & Vinegar and now my tongue feels like I ate a ball of sandpaper. That might not seem pertinent to the task at hand - and it isn't.
When I redid my kitchen a decade ago I really wanted to address my cold floors. So I ripped out all of my ceramic tile and laid down heated floor mats. That wasn't scary at all. Pouring buckets of self leveling concrete over them WAS.
The cement floor would encase the heating elements, allow them to radiate heat still, plus provide a level smooth surface for tiles. That was my reason for pouring cement all over my floors and working myself into a panic.
Whatever your reason, you don't need to be afraid. I say that because I was afraid. Really afraid. Letter from the tax department afraid. You don't need to be.
Table of Contents
Using Self leveling concrete
Self levelling concrete is cement based like traditional concrete, but it flows much easier and sets up more quickly due to polymers added to it. It's used to create a smooth, level surface for laying carpet, ceramic tiles or other floor coverings on.
For use almost exclusively on interior flooring.
Self leveling cement (concrete) can be poured up to a 1 inch thickness.
Materials
- Self leveling concrete*
- Leveling primer**
- a cement mixing paddle
- a strong drill (rent an industrial one)
- 5 gallon bucket
- trowel
- filler (like Durabond 90)
* It may also be called self leveling concrete, leveling compound, self leveling floor resurfacer or self leveling underlayment. Make sure you get REGULAR instead of QUICK DRYING. Regular will give you more time to work and spread out the material before it starts to set.
** Primer is needed when you're pouring concrete onto a porous surface like an existing concrete floor. It isn't needed when pouring onto old tile.
Method
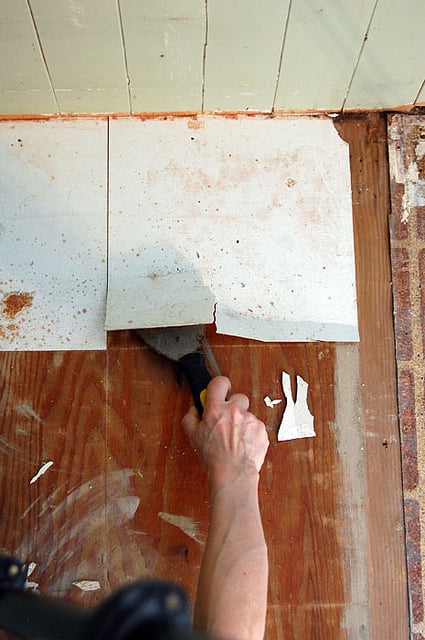
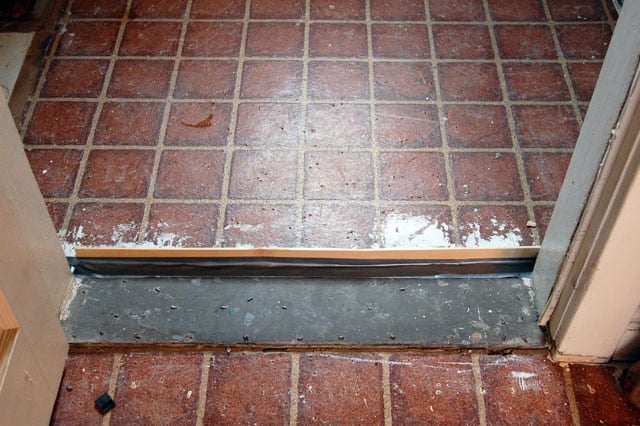
PREP WORK
- Scrape up any loose debris or old tiles from the floor.
- Fill any cracks or holes with Durabond 90 and create a dam to prevent the runny concrete from seeping anywhere you don't want it to go.
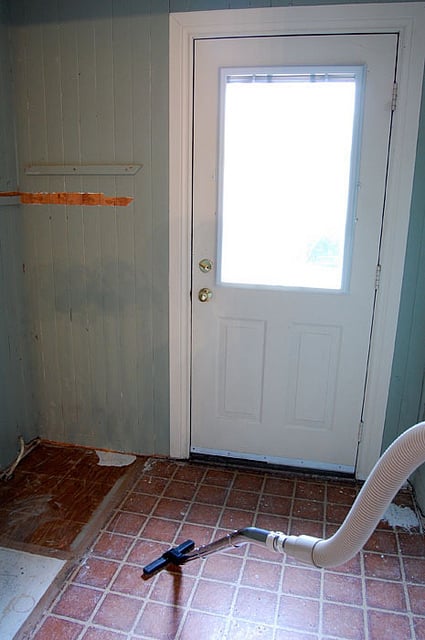
- Vacuum so you have a clean surface.
- Gather your materials.

The brand of resurfacer doesn't matter so much as the type. There are 2 types. Quick drying and regular. You want regular.
POURING
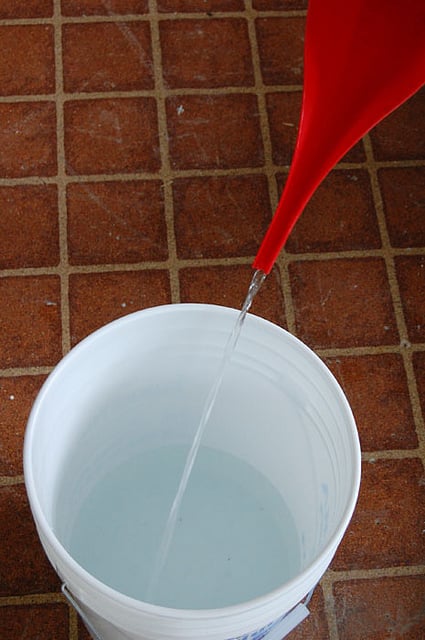
- Add the required amount of water to the bucket FIRST. (the bag will tell you how much water to compound mix to use)
- Add ¼ - ⅓ of the powdered compound. Mix with water using the drill. Continue mixing in the remainder of the bag bit by bit until it's all incorporated. Mix for prescribed amount of time as detailed on the bag.
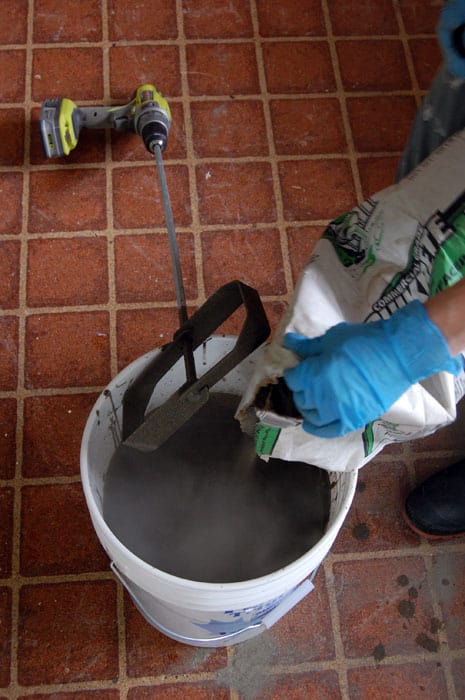
For one bucket of concrete a strong cordless drill will do the job, but if you have any more than 1 bucket to do you're in trouble. The battery will die after 1 or 2 buckets. Then you'll go for your corded drill, which will burn out and will get thrown in the garbage.
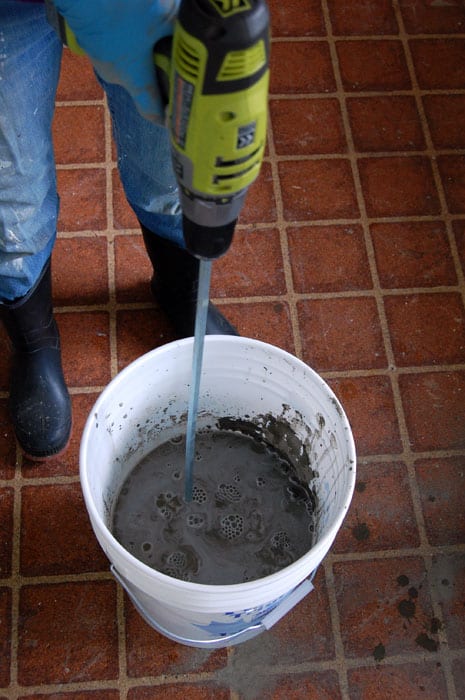
Save your anger, your sanity and your relationship and RENT AN INDUSTRIAL DRILL. After the first day I rented a strong drill for $20 for half a day.
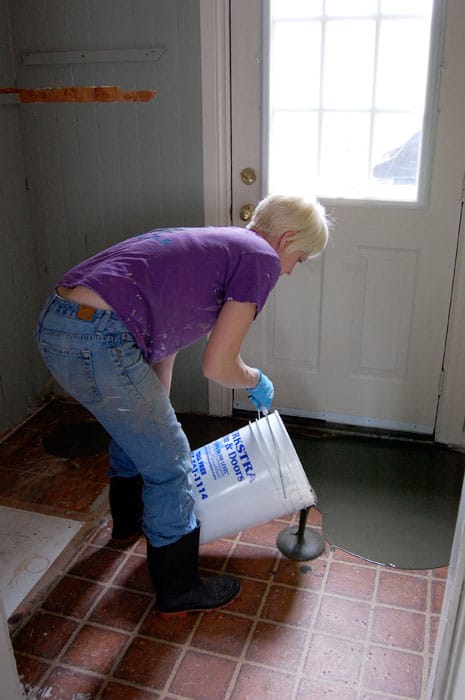
- Pour your leveling compound where you want it.
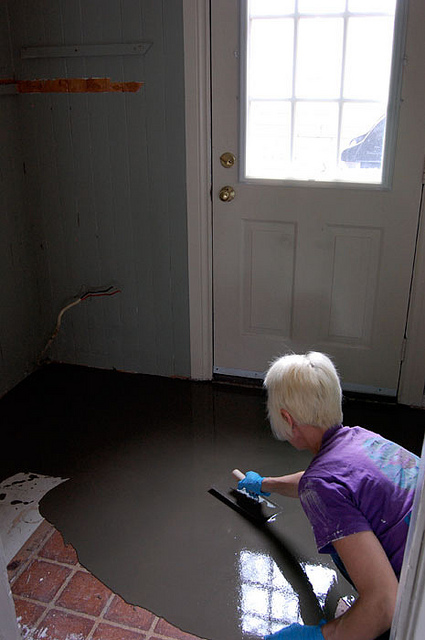
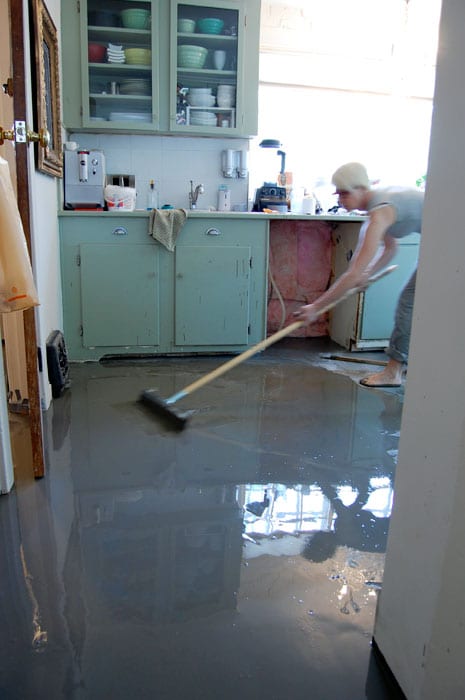
- Trowel it. Using a trowel push and pull the mixture where it needs to go. Push it into corners and pull it towards you. Excuse my hair. It appears I was having a Paul Weller moment.
- Clean up your drips.
- Wait 24 hours to walk on it.
- Wait 3 days to place furniture back.
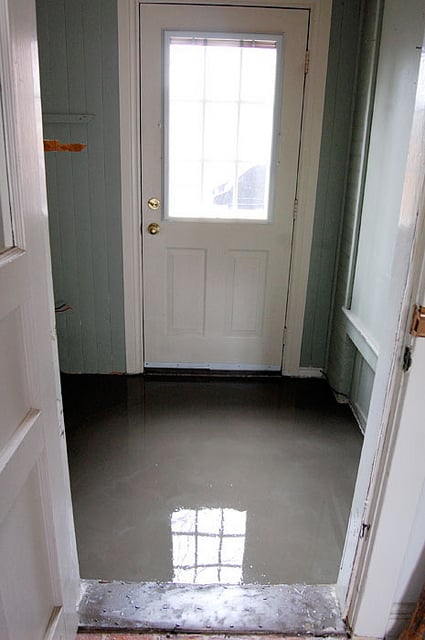
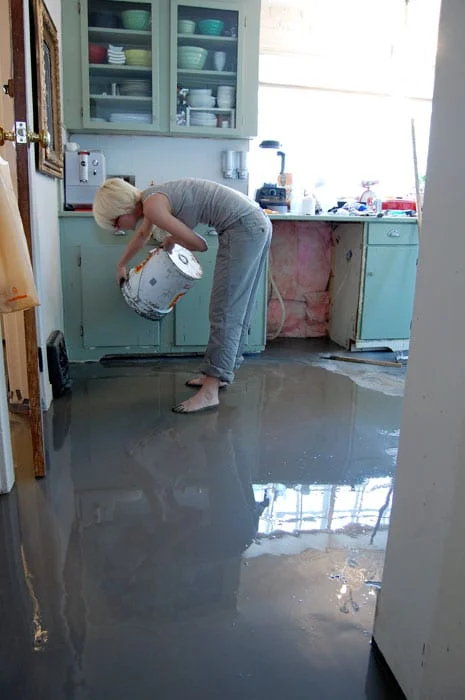
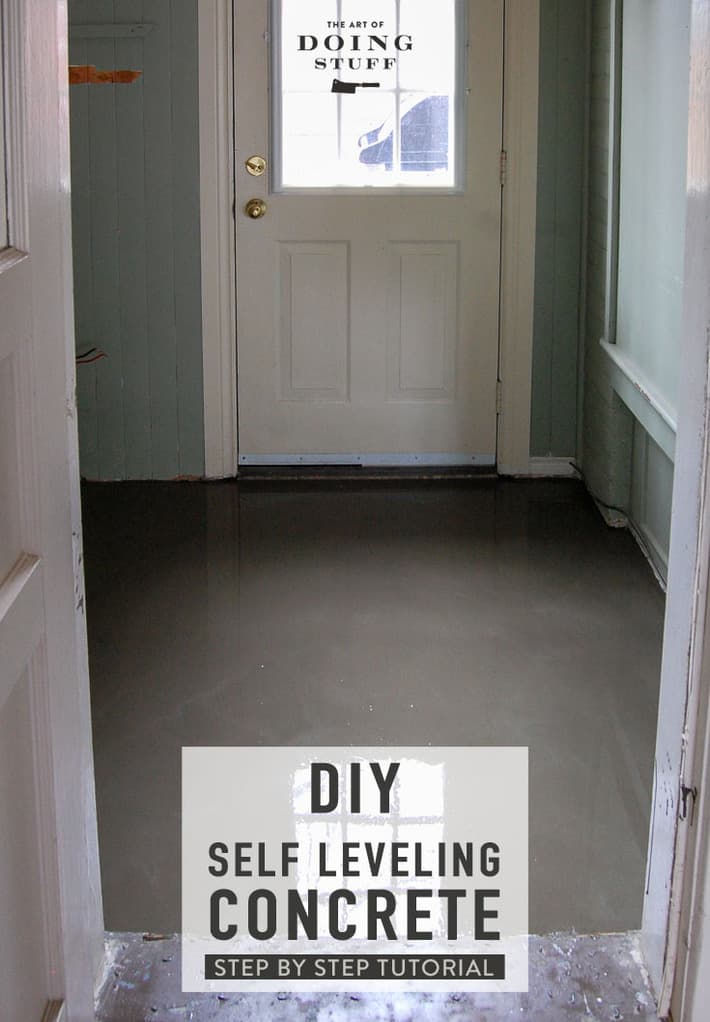
The mudroom went perfectly well. It couldn't have gone better so I continued onto the kitchen where things were a bit tricker.
Tips for Larger Rooms
A bigger room means you have to pour the buckets of concrete, run back to the mixer and mix up another batch (which needs to be mixed a longgg time), run through the house with a 50 pound bucket of cement and pour it where you left off. And repeat.
- Larger rooms are easier to do if there are 2 people working. One mixing the cement and one pouring it.
- Use a stiff squeegee on a long broom handle for pushing and pulling the compound into place.
NOTE: Wet concrete is caustic and can burn.
YOU HAVE TO WASH YOUR FEET IMMEDIATELY AFTER YOU WALK THROUGH IT. Do so after every time you walk through it. Also don't walk through wet cement if you have open cuts.
- If you find bits of unmixed lumps of cement. Just mush them with your fingertips.

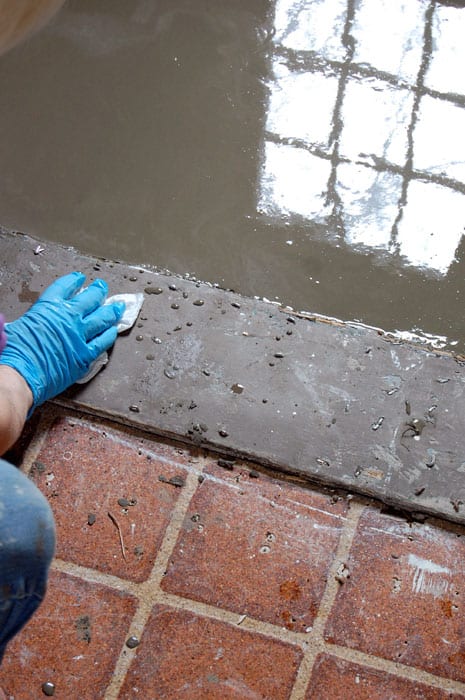
- You may need to do a second coat if the first coat didn't cover. You could still see the heated floor mats I installed after the first coat, so I did a second.
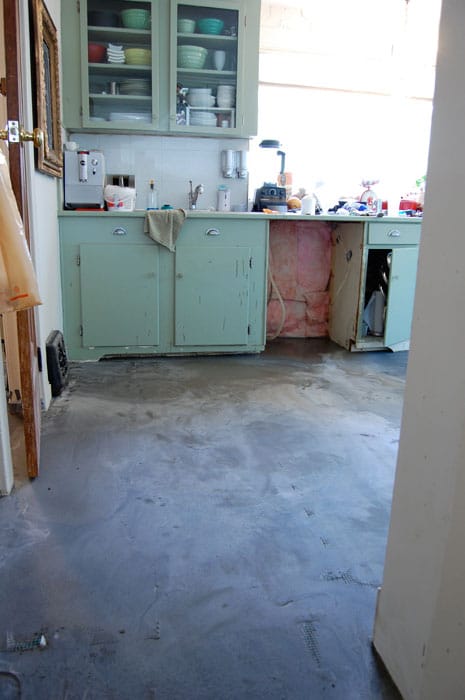
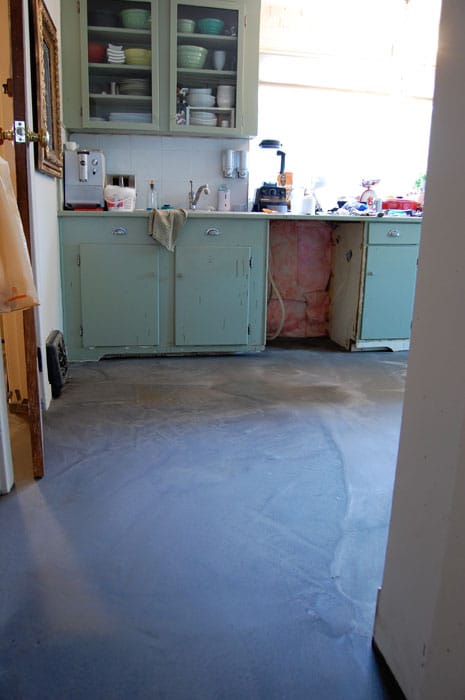
It may look uneven, but it's just an optical illusion. The photo on the right is a levelled floor that is perfectly smooth.
- After leveling if you have any issue with dips and bumps you can correct them with a bit of Durabond 90. (fill, let dry, then sand)

Would you ever want to pour self leveling concrete?
To level an uneven concrete floor.
If you have a wonky basement floor that's uneven you can use self leveling concrete to smooth everything out and get it nice and flat. It's even handy if your concrete floors are just filthy. A thin layer of this will give you nice, clean concrete floors.
To prep a floor for laying down tile or to encase radiant floor heating.
The reason I poured it in my kitchen, bathroom and mudroom was so I could put down radiant floor heating. There's no basement or crawlspace at the back of my house which makes the floors pretty darn cold in the middle of a Canadian winter.
How much does a 50 lb bag of self leveler cover?
How much the cement will cover depends on how thick you will need it to be. This mudroom is around 30 square feet and one 50 pound bag of cement just barely covered it at about ¼" thickness.
Quick drying self leveling cement
Starts to set up in 5 minutes. This is only used when you have a small area to do and are an experienced concrete finisher.
Regular drying self leveling cement
It starts to set up within 15 minutes. This gives the amateur user much more working time. Those extra 10 minutes make a huge difference when you aren't exactly sure of what the hell you're doing.

The Self Leveling Cement *Quick Guide*
A quick guide to pouring self leveling cement. Refer to post for in depth instructions.
Materials
- Regular Self leveling cement*
- Leveling Primer**
- a cement mixing paddle
- a 5 gallon bucket
- a trowel
- filler (Durabond 90).
Tools
- Strong drill (I rented an industrial one)
Instructions
Scrape up any loose debris or tiles from the floor.
Build dams to stop the cement from going anywhere you don't want it to go.*
Fill any holes and/or cracks in the floor that the liquid cement could run down. I use Durabond 90.
Vacuum to get the surface perfectly clean.
Add water to your bucket (amount will be stated on your bag of cement)
Add ⅓ of the bag of cement into the water.
Mix with the drill and cement paddle, continually adding the rest of the bag of cement until everything is incorporated and then mix for the length of time given on the bag.
Here we go. Pour the self leveling cement into the desired area. Push and pull it into place with a trowel. It does self level but needs some help getting around.
And now you wait for it to cure. You can walk on it within 24 hours and place heavy objects back in 3 days.
Notes
*It may also be called self leveling concrete, self leveling floor resurfacer or self leveling underlayment. Either way make sure you get REGULAR self levelling cement. Quick Dry lets you walk on it within 6 hours, but you have a much shorter working time, and for an amateur it's better to have as much working time with the product as possible.
**Primer is needed when you're pouring concrete onto a porous surface like another concrete floor. It isn't needed when pouring onto old tile.
**It's very liquidy so make sure you don't skip this step or you'll have cement running under your dishwasher or down your stairs or into other rooms! I used thin wood, heavy cardboard and duct tape to make dams.
Self levellers can be poured to an inch deep.
If for some reason your cement isn't level, didn't turn out right or wasn't poured quite deep enough, you can re-pour more cement as long as you do it before the initial cement cures. Don't exceed the total recommended depth of 1".
OTHER TUTORIALS REFERENCED IN THIS POST
p.s. I'm out of chips.
→Follow me on Instagram where I often make a fool of myself←


Girl, you kick butt! I have been looking for a great tutorial which I found in yours. My floor has minimal damage but I want to pour the whole floor. You have built my confidence and given me the info I needed. You rock, Thanks!!!!
No problem Neicy! You can do it. :) ~ karen!
Wow! I just stumbled on this post.. it's giving me ideas. We live in an old house that has 3 cellar sections: the house cellar, the man room under the garage and the tunnel that connects the two. All those floors could use a fresh coat of cement. I never even thought I could try it myself! Very cool!
Yup. It's a *fairly* easy DIY for the brave. :) ~ karen!
A "man room" under the garage?
Thank you so much for the very informative post!!! Wow, that really helps! We are thinking of using self-leveling compound AS flooring in our family room space, hoping for the look of concrete without actually being concrete. It is a mail floor area with plywood subfloor. In your opinion, would it work? Is it sturdy enough to stand up as a floor?
Hi Kelly - It's a bit trickier if you want this stuff to work as actual flooring. The problem is, you can have problems with discolouration and tiny bubbles in the surface of the concrete. Pouring self levelling concrete is easy ... pouring a *perfect* looking self levelling concrete is not. :) ~ karen!
After reading and watcing several videos i was still quite nervous. You saved me alot of stress. Thank you very much. If you ever need realtime electrical advice feel free to drop me a line!
Glad to have helped Andy. And I will keep the electrical advice in mind, LOL. I *often* need electrical advice. :) ~ karen!
I came across this post while I was doing research on line about how to use self-leveling cement. So, I am very happy that I came across your page. Anyway, I am here typing at 4:23 in the morning and I think I've been up for about an hour. Okay, the reason is that I am remodeling my bathroom and came across a big problem. I removed some tiles to get to the bottom floor where it was sinking due to water damage. I fixed the damage area but by then I had removed two layers of tiles. But now that the hole is patched up I am left with an uneven floor and yes I did notice other areas that were not even and that is why I need to do the cement trick..So, once again I am glad that I came across this page. I am going to do this tomorrow.
Excellent. Glad to have helped! ~ karen
So I am loving the idea of this I want to do it in my basement where there are obvious pits and left over black adhesive but I defiantly need the basement to still slope in the same way it currently is. It should work in my head so long as I am using the squeegee. Right? I just want to get rid of the current way it looks and create a surface that can be flat for future flooring or possibly sealed, painted, epoxied. You opinion? Does the floor need to be warm for it to dry well?
great job.. very informative - easy to understand. our living room floor is an old old concrete floor - the deed says our house was built in the 1920's and I suspect the living room may have once been the porch!! anyways -- we are doing away with carpet - have a 13 yr old dog- so lots of messes. he just can't help it at times.. and this is one of the options we are researching.. your tip about damming off the area was great.. we had not even thought about that... thanks.. you saved us a future headache.. today we patched the cracks with a flexible concrete patch mix.. and we thought the next step would be the primer.. but after reading your post and online research we decided to skip it.. so again thanks.. thanks for the great tips..
You're very welcome and good luck with your work! ~ karen!
What brand of self leveler did you use and from what contractor store did you buy it?
Hi Vida - I'm afraid I can't remember the brand. If look at my post you might be able to make it out from the bag. ~ karen!
Where did you rent your industrial drill? I've called a few big box stores and they said they don't rent out.
I got mine from a tool rental supply place near my house. That's all they do ... rent tools! This particular place is called "Stephenson's Rental Service", but there may be another business in your area that does the same thing. ~ karen!
Hi Karen, There once was a time when I thought Paul Weller was the coolest thing on the planet, now I know it's you!! I have been planning on doing this for months in an 8m x 6m shed in the back yard. Question to you........how deep can you apply this stuff and is there an optimum ambient temp for application.
Regards,
A Setting Son.
Hi Freezerbear - Each product will very slightly in terms of how deep you can pour them etc. Just read the bag once you buy it. It can often be poured up to 1". Anything where the outdoor temperature is below 50 (10 celsius ) will slow the curing process significantly. Aim for a nice warm day with low humidity. ~ karen!
Wow. Smashing job and so well written too. You've given me the confidence to take on this job myself! Thank you. I apologize in advance as I will probably curse you a few times for making it look so easy before the job is done but all will be forgiven in the end. :-)
No problem. I'd expect as much. I often curse myself for doing the things I do. ~ karen!
Hi Karen,
Great site. Which I had stumbled on it BEFORE I attempted to pour my self leveling stuff. Because it was my first attempt at this, I decided to do only half a bag at a time. The first half seemed ok to me but as it started to set water rose to the surface - I obviously used too much water. What should I do about this? Will it just take longer to dry? Second half seemed to work better. Your advice would be greatly appreciated.
Hi Lynda - I seem to remember something similar happening to me. It's has to do with the mixing, I think. If I remember correctly, I dried the wet spots by putting a cloth or paper towel on top for a second to let the water soak in. Then I let it dry normally. I did another thin layer of cement over top to smooth it out. (you have to do the second coat while the first coat is still a bit wet otherwise it won't adhere properly). Good luck! ~ karen
Hi Karen I am just about to do the same thing but on a mutch larger scale I have a car garage that I want to get the floor really smooth so that when I paint the floor pure white and then coat it whit a acrylic clear coat it will be easy to keep it clean and be able to mop it I am doing nearly 200m2 so I am going to build quite a few little dams to do this but your vidio defo gave me the insight into what can be done thanks so much
Ken - and others..
With such a smooth garage floor be careful if water spills on it or it's wet from washing the floor........ (and a painted surface can take a while to dry)......ref one broken hip (my aunt) when she slipped on the floor she'd just washed.....
Thanks very much Karen. A Google search for self-leveling cement brought me here. Great site BTW. After reading your post, I got 25% off an open bag AND when I pressed the guy at Home Depot a bit, he told me I didn't need the primer. So thanks for saving me a few bucks. I'll use it to pick up a couple extra sleeves of Pringles and email them to you!
It actually took me a moment to realize you could not email Pringles. :( Glad you saved a few bucks! ~ karen
This article is fantastic! Bought a house that is 30 years old and the floor had low points and high points. I ended up destroying a sander (and my shoulders) taking down 2 high points but was researching on how to lay self leveling cement as a contractor gave a quote with him doing it or me. Guess which one was cheaper :)
After examining your article, better by far than even the silly product web pages, I and a friend decided to do it ourselves. It was really easy, hard work but worth it.WARNING! Read the mixing instructions! You will find some manufacturers are more expensive as their bags cover less flooring, or square footage per bag! Or their instructions are based on Quarts of water and weight of the mortar.... right ...... not buying the product then. either way all done and looking good!
Thanks again!
Hi Carpe Mark - I"m glad my post was able to help you. That's the point of all this. To prove to every that it ain't that hard. Except math as I'm mentioned numerous times. Math is really, really hard. :) ~ karen
Hi Karen, do you have a video link to the self leveling cement project?
Guess not............
Fabulous tutorial and worth a ton of money! Oh how I wish we would have seen this before we used that self leveling cement. I won't go into our nightmare but let's just say it wasn't as neat and pretty as yours. We were in too big of a rush and a lot of other problems happened one being the cat got out of the house and she isn't an outside cat! I want a do over, how do you get it up? Oh shoot I just remembered that I forgot to tell my husband that the there is water leakage under the new tile on top of the stupid self leveling cement!
Oh dear god. Yikes! ~ karen
Karen! Where have I been? This is amazing! I admit, I love reading about your adventures in things I will likely never try to accomplish myself. You're amazing!
Also, last week I got a letter from the IRS. As scary as it is, I'm pretty sure I'd be more scared to pour my own cement floor.
wow, self-leveling cement. who knew? good for you!
Nice job but I must say, as a former commercial carpenter, NEVER go barefoot in any type of cement product. In fact, you should limit your skin's exposure to it at any chance. If you have a small cut or scratch and it absorbs the cement you can be looking at some serious blood poisoning. I worked with a fellow carpenter many years ago that had to undergo several skin grafting surgeries to repair his hands after mixing grout with his bare hands. Really not a good idea to do this. Some people are also allergic to the portland and exposure can result in extreme dermatitis and infection.
Hi Annie - Thanks! I actually looked up the MSDS for self levelling cement and the worst the MSDS states it can cause is skin irritation. I agree infections and blood poisoning can occur with a small cut or scratch. My sister was in the hospital for a week recently after washing her car with a small scratch on her finger. ~ karen
Nice job, I am very impressed. I cant wait to see the finished product.